
Fix Cakey Concealer in 5 Steps: The Pro Blending Hack
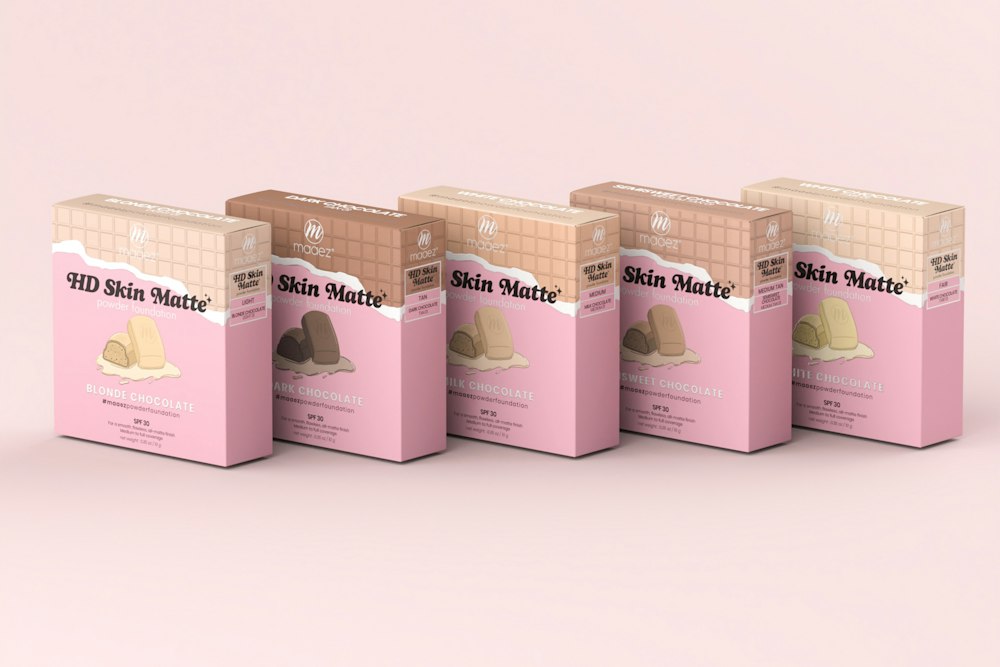
Photo by Firdaus Roslan on Unsplash
Key Takeaways
Cakey concealer happens when you over-blend or skip hydration—fix it by melting the product into skin with a damp sponge or brush. The #1 mistake? Using a dry brush or powdering too soon.
- Hydrate first: Apply a serum to under-eyes before concealer—skip this step and the formula will settle into dry patches.
- Press, don’t rub: Blend with light downward pressure (like pressing a stamp), never circular motions that drag the product.
- Wait 30 seconds: Let concealer sink in before setting with powder or spray—rushing this step traps formula in creases.
- Damp sponge reset: If it’s already cakey, use a clean damp beauty sponge to gently press (not wipe) the product into skin until it disappears.
Part of our complete guide: for the full picture, see 25+ Free Procreate Makeup Brushes for Flawless Digital.
Why Your Concealer Looks Cakey (And How to Stop It)
Concealer cake isn’t about the formula—it’s about how you apply it. Cake happens when concealer sits on top of dry skin instead of blending into it. Most tutorials blame the wrong product, but the real culprits are three hidden triggers: applying to unprimed skin, over-blending with a dry brush, and setting with powder too soon. Fix these, and your concealer will melt into your skin instead of clinging to it.
The Three Hidden Causes of Cakey Concealer
-
Unprimed Skin Dry skin is like a desert—it doesn’t absorb anything. If you slap concealer on without hydration, it has nowhere to go but on top of your skin, where it oxidizes and hardens. Crepey under-eyes? Your concealer is fighting dehydration first. Hydrate with a water-based serum (like hyaluronic acid) before applying, then pat concealer over it. Let it sink in for 30 seconds before blending.
-
Over-Blending with a Dry Brush A dry brush helps blend concealer into dry skin, creating a smoother finish. Instead, press (don’t drag) with a damp sponge or fluffy brush. The moisture helps the product melt into your skin instead of settling on top. Pro tip: If your brush leaves streaks, it’s too dry—dab it in water and squeeze out excess.
-
Setting with Powder Too Soon Powder is the #1 enemy of crease-free concealer. It locks in cake before the product has a chance to blend. Wait 2–3 minutes before setting, or use a hydrating mist (not alcohol-based) to refresh instead. For oily skin? Use a long-wear formula and press it in with a damp sponge—oxidation is the real villain here.
Skin Type Fixes
- Oily Skin? Cake happens when concealer oxidizes. Use a long-wear formula and press (don’t drag) with a damp sponge. Avoid setting sprays with alcohol—they dry out the product faster.
- Sensitive Skin? Alcohol-based setting sprays accelerate cake. Swap for a hydrating mist and let concealer set naturally before touching it up.
The Bottom Line: Cakey concealer is a blending problem, not a product problem. Hydrate first, press (don’t drag), and wait before setting. Skip the powder unless you’re sure your skin is fully dry—and even then, use a light dusting.
The 5-Step Pro Technique to Blend Concealer Without Creasing
The secret to crease-free concealer isn’t blending harder—it’s blending smarter. Cake happens when you press concealer onto dry skin instead of melting it in. Here’s the exact technique pros use to get flawless, long-lasting coverage without a single trace of powdery texture.
Step 1: Prep Skin Like a Pro
Skip the moisturizer if your skin feels oily. A hydrating serum (look for hyaluronic acid or glycerin) works best on dry or combination skin. Pat it under the eyes with your clean fingers—no brushes, no sponges yet. Wait 60 seconds for full absorption. This step isn’t optional: dry skin repels concealer, and that’s when cake starts.
Pro tip: If your under-eyes feel tight or crepey, layer a second coat of serum and wait another 30 seconds. The goal is skin that feels slightly dewy, not slick.
Step 2: Dot, Don’t Swipe
Forget the heavy-handed swipe. Use a clean finger, a damp beauty sponge, or a small dotter brush to apply concealer in tiny dots—think half the size of a pea—right where you need coverage. Press lightly, then let it sit for 10 seconds. This gives the formula time to sink in before you blend.
Why this works: Swiping spreads concealer too thin and forces it to sit on top of skin. Dotting keeps it concentrated where you need it, and the 10-second pause lets it bond with your skin’s natural oils.
Step 3: The ‘Press-and-Glide’ Trick
This is where most people mess up. Grab a damp beauty sponge (like a BBA Make Up Sponge or a wet cotton pad) and press (not rub) the concealer into your skin in small circular motions. Start light—you can always build coverage—and work outward from the center of the face.
Key difference: Pressing melts the concealer into the skin, while rubbing drags it across the surface, which is how cake starts. Think of it like melting butter into a cake batter: you fold it in gently, not stir it aggressively.
Visual cue: If you’re using a sponge, it should glide smoothly without pulling at your skin. If it sticks, your sponge is too dry—dampen it again.
Step 4: Wait Before Setting
Here’s the part competitors skip: do not powder for at least 30 seconds. Let the concealer sink into your skin’s natural oils. If you’re oily, reach for a blurring powder (like a finely milled translucent powder) instead of a matte finish. Press it lightly with a fluffy brush—just enough to set, not cake.
Why the wait? Powder locks concealer on top of skin, which is exactly how it becomes visible as the day goes on. The 30-second pause lets it integrate before you set it.
Exception: If you’re sweating or your makeup is already melting, a light dusting of powder is fine—but skip the heavy hand.
Step 5: Seal with a Hydrating Spray
This is the final lock-in step. Mist your face with a hydrating setting spray (look for glycerin or aloe in the ingredients). This doesn’t just set your makeup—it blurs the edges of the concealer so it looks seamless.
Pro move: If you’re prone to creasing, spray the under-eye area last and hold the spray can 6 inches away to avoid over-saturating the product.
The Damp Sponge Reset (For Already-Cakey Concealer)
If your concealer is already cakey, don’t reapply—reset it. Dampen a beauty sponge with water, press it onto the cakey area, and let it sit for 5 seconds. Water softens the top layer of concealer, making it easier to blend in with clean fingers.
A dry brush or a stiff sponge is your enemy here. The best tools for this technique:
- Damp beauty sponge (for blending)
- Clean fingers (for dotting)
- Fluffy powder brush (for setting, if needed)
- Hydrating setting spray (for sealing)
Avoid: Dry brushes, heavy-handed blending, and powdering too soon. Those are the surefire ways to turn concealer into a mask.
Final Checklist
- Hydrate first (serum, not moisturizer).
- Dot, don’t swipe (tiny dots, 10-second pause).
- Press-and-glide (damp sponge, circular motions).
- Wait 30 seconds before setting.
- Seal with a hydrating spray (no cakey powder).
This isn’t just a technique—it’s a hydration-first framework that keeps your concealer looking fresh all day. Skip any step, and you’re back to square one. But do it right, and you’ll never see cake again.
3 Hidden Fixes for Already-Cakey Concealer (No Reapplying Needed)
Cakey concealer is a disaster waiting to happen—but you don’t have to reapply to fix it. The key isn’t slapping on more product; it’s melting what’s already there into your skin. Here are three pro tricks to dissolve cake without adding layers.
Fix #1: The Damp Sponge Reset
The fastest fix? A damp sponge. Dip a clean beauty sponge in water, wring it almost dry (it should feel damp, not dripping), then press—not wipe—over cakey areas. The moisture melts the concealer into your skin instead of spreading it further. Pro tip: Use a new sponge for this—old ones trap bacteria.
Why it works: Cake forms when concealer sits on top of dry skin. The damp sponge hydrates the area first, letting the product sink in. Skip this step, and you’re just pushing cake around.
Fix #2: Oil Blend (No Shine Guaranteed)
A tiny drop of fragrance-free facial oil (like squalane or jojoba) can break up cake without adding shine. Apply a pea-sized amount over the cakey spots, then press with a clean sponge or your fingers. The oil dissolves the concealer’s texture, blending it into your skin.
The catch: Use only fragrance-free oils—scented ones can irritate or trigger breakouts. And no, baby oil or coconut oil won’t work—they’re too heavy and can clog pores.
Fix #3: The ‘Second Skin’ Trick
If your concealer is already set (like with powder or setting spray), layer a thin coat of hydrating primer over the cakey areas first. Let it dry for 30 seconds, then blend your concealer on top. The primer acts as a buffer, preventing the new product from clumping.
Why this beats reapplying: Most people think they need more concealer, but adding to a dry layer just makes it worse. The primer “resets” the surface so your concealer blends cleanly.
The Pro Warning: Never Reapply Directly
This is the #1 mistake. Slapping concealer over cakey concealer layers the product, making it thicker and more likely to crease. Always fix underneath the existing layer—whether with moisture, oil, or primer.
Image:  Photo by Mariia Berezovsky on Unsplash
The Blending Tools That Cause Cake (And Which Ones Fix It)
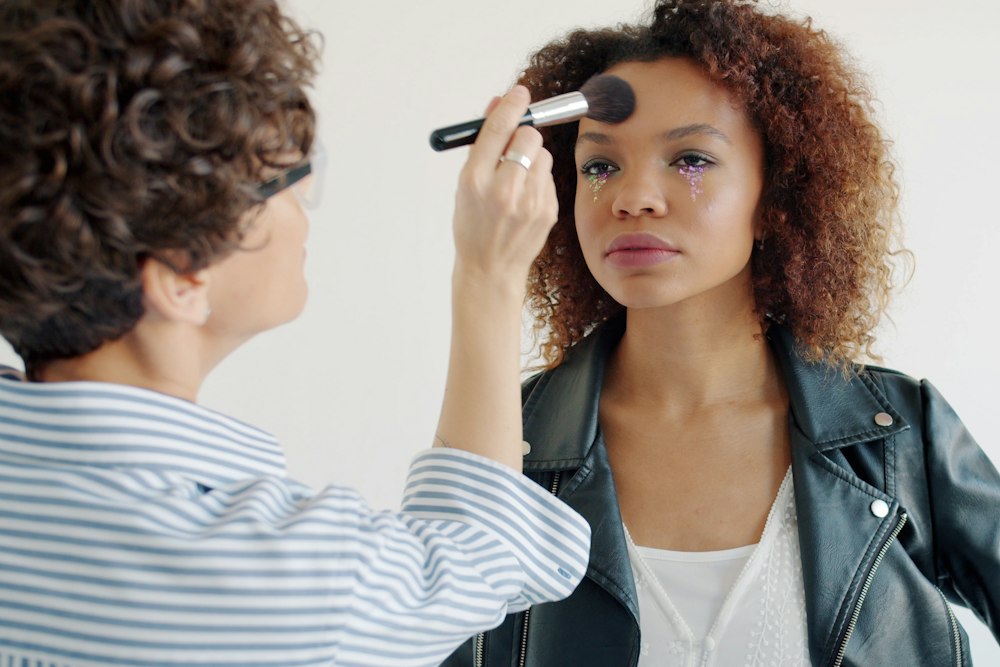 Photo by Vitaly Gariev on Unsplash
Cakey concealer isn’t about the tool itself—it’s about how you use it. The wrong technique with the right brush can still leave you with a chalky mess, but the wrong tool makes it nearly impossible to fix. Here’s what to avoid, what to use instead, and the one rule that trumps all others: hydration first, blending second.
The Tools That Make Cake Worse
Dry synthetic brushes are the #1 culprit. They drag product to the surface instead of melting it into skin, leaving you with a matte finish that’s actually just a thin layer of concealer sitting on top. Stiff contour brushes can drag concealer into creases instead of blending it smoothly.
Even worse? Using a brush that’s been sitting in your vanity for months. Old brushes hold onto product, clumping it together and spreading it unevenly. (For how to keep yours fresh, see our guide on brush care.)
The Tools That Actually Work
For most skin types, a damp beauty sponge (like the one pros swear by for under-eyes) is your best bet. The moisture helps the concealer stick to skin instead of sitting on top, and the texture diffuses it evenly. Press it into the skin—don’t rub—and let the formula melt in.
If you prefer a brush, go for a soft, fluffy one (think under-eye blending brushes, not dense contour tools). The key is pressure: press lightly, then feather outward. For oily skin, a textured brush (like the ones designed to diffuse product without over-blending) helps prevent shine while keeping it from looking flat.
And for sensitive skin? Your clean fingertip is often gentler than any tool—just press, don’t rub, and let the concealer sink in.
The One Rule That Beats the Tool
No matter what you use, skip the dry brush if your skin isn’t hydrated first. Cake happens when concealer meets dry skin—it doesn’t blend in, it just sits there. The fix? A hydrating primer or even a few drops of facial oil pressed into the skin before applying concealer. Then, and only then, blend with your tool of choice.
(Need to fix already-cakey concealer? We’ve got three no-reapply hacks in this section.)
When to Powder (And When to Skip It)
Powder is the #1 cause of cakey concealer—unless you’re dealing with truly oily skin or high humidity. For everyone else, it’s the fast track to a matte disaster. Here’s the rule: only dust translucent powder on your T-zone if you’re sweating through makeup or your skin is actively greasy. For the rest of your face? Skip it entirely.
The mistake most tutorials make is treating powder like a universal fix. It’s not. Powder seals in moisture—it doesn’t blend it. That’s why your concealer turns to chalk after you pat it on. Instead, let your concealer set for 30 seconds after application. Then, if you’re in a humid climate or your T-zone is slick, use a light, blurring powder—just a whisper on the forehead, nose, and chin. Avoid the cheeks and jawline unless you’re actively melting into your phone.
For dry skin? Skip powder completely. The second you add it, you’re turning hydration into texture. Swap it for a hydrating setting spray—one with glycerin or hyaluronic acid—to lock in moisture without the cake.
The exception? If you’re working in 90°F heat or your skin is actively shiny (not just dewy), a minimalist translucent powder can help—but only if you’re using it to diffuse shine, not to set. Think of it as a last-resort matte finish, not a daily habit. Most skin types don’t need it. The real fix? Melting the concealer into skin first—this helps it blend more naturally. (See The 5-Step Pro Technique to Blend Concealer Without Creasing for how.)
Why This Works
Powder isn’t the enemy—how you use it is. The key is timing and placement. Apply it after your concealer has had a chance to sink in, and only where you need it. For the rest of your face, let your skin’s natural moisture do the work. The result? A flawless finish that doesn’t scream “I just put makeup on.”
FAQ: Fixing Cakey Concealer for Specific Skin Types
Why does my concealer look cakey after 2 hours?
Your skin’s natural oils are breaking down the product—but only if you’re not reapplying correctly. The fix isn’t slapping on more concealer; it’s reactivating what’s already there. Dip a damp sponge (not a dry one) into a tiny bit of concealer, then press it over the cakey areas. The moisture melts the product back into your skin instead of adding another layer on top. This works because the concealer relies on a water-based layer—run a fingertip across the sponge: if it feels slick instead of dry, the formula is breaking down and absorbing into the damp surface.
If you’re using a long-wear formula, the issue might be that your skin’s oil production isn’t keeping up. Try a hydrating primer (avoid alcohol-based ones—they dry out concealer faster). For oily skin, this seems counterintuitive, but even oily skin needs a light hydrating base to help the concealer adhere without flaking.
Can I use primer to fix cakey concealer?
Primer helps—but only if it’s the right kind. Skip alcohol-based primers (they evaporate too fast and leave your skin dry). Instead, look for:
- Hydrating primers (with glycerin, hyaluronic acid, or squalane)
- Blurring primers (they diffuse light, making concealer look seamless)
The wrong primer is the real culprit: if it’s matte or “setting,” it’ll dry out your skin and make concealer cling like chalk. Pro tip: If your primer has a “dewy” finish, it’s usually the safer bet for blending.
What’s the best setting spray for long-wear concealer?
Avoid sprays labeled “matte” or “setting”—they’re designed to lock everything in place, including cake. Instead, hunt for formulas with:
- “Hydrating” in the name (they add moisture, not dryness)
- “Blurring” or “soft-focus” (they diffuse light without matte powder)
The real test? Spray a small amount on your wrist. If it feels dry or tight, it’ll cake your concealer. If it leaves a dewy, weightless finish, it’s the right choice. (And yes, this applies to oily skin too—even oily skin needs a spray that supports the product, not fights it.)
How do I blend concealer on dry, flaky skin?
Dry skin is the worst enemy of smooth concealer because it creates a rough texture for the product to cling to. Fix it in two steps:
- Exfoliate gently the night before (a chemical exfoliant with lactic acid works better than scrubs—less risk of micro-tears).
- Apply a hydrating primer (skip the alcohol-based ones). Then, when blending, use a damp sponge—not a brush—to press the concealer into your skin. The moisture helps it sink in instead of sitting on top.
If your skin is extremely dry, try a lightweight moisturizer as your base layer. It’ll give the concealer something to grip without adding bulk.
Is cakey concealer a sign of bad product?
Almost never. Cake is almost always a technique issue, not a formula flaw. Even high-end, long-wear concealers will look cakey if:
- You apply them to dry skin
- You blend with a dry brush (moisture is key)
- You powder too soon (or at all—see [When to Powder (And When to Skip It)])
The only exception? If your concealer instantly looks cakey the second it hits your skin, it might be too thick for your skin type. But before blaming the product, ask: Did I prep my skin properly? If the answer’s no, that’s your culprit.
Your Cake-Free Concealer Routine (Step-by-Step Recap)
Here’s the exact sequence to apply concealer without cake—no guesswork, no reapplying. The secret? Hydration first, pressure last. Skip the powder unless your skin is actually oily, and never rub the sponge—press, then melt.
1. Hydrate (60 seconds before concealer)
Your skin’s natural oil is the only thing that keeps concealer from drying out. Skip the alcohol-based primer—it sucks moisture—and apply a hydrating serum (look for hyaluronic acid or glycerin) 60 seconds before concealer. Let it sink in completely. Pro move: If your under-eyes are crepey, add a drop of clean oil (jojoba or squalane) to the serum—this is the only time oil helps with cake.
2. Dot, Don’t Swipe (10-second set)
Use your ring finger (gentlest pressure) to press small dots of concealer onto damp skin—never drag. Start with the innermost corners of your eyes and work outward. Let it sit for 10 seconds before blending. Why? Pressing forces product into skin layers where oil can reach it; swiping pushes it into dry surface layers where it cakes.
3. Blend with a Damp Sponge (Press, Don’t Rub)
Soak a beauty sponge (like a Beautyblender) in water, wring it out until it’s damp but not dripping, then press it onto your concealer. Press in small circles—never drag—starting from the center of your face and working outward. The sponge’s dampness melts the concealer into skin instead of spreading it thin. If it cakes: Don’t reapply—reset it by dabbing a tiny drop of clean oil (or your serum) over the cakey spot, then press with the damp sponge again.
4. Set (30 seconds, Optional Powder)
Wait 30 seconds for the concealer to absorb. Then—only if your T-zone is shiny—lightly dust a fine, translucent powder (like a loose mineral powder) only on the T-zone with a fluffy brush. Never pat it on—dust means a whisper of product. Skip powder entirely if your skin is dry, mature, or you’re wearing long-wear concealer (it’ll just dry out faster).
5. Seal the Deal (Hydrating Spray)
Finish with a hydrating setting spray (no alcohol) to lock everything in. This keeps your skin’s moisture barrier intact—the single biggest reason concealer cakes is dehydration from sprays and powders. Pro tip: If it starts caking later, don’t fix it with more powder—dab a drop of oil under the cake and press with a damp sponge.
The Cake-Reset Rule: If your concealer looks chalky after blending, you didn’t press enough. The fix isn’t more product—it’s melting what’s there with damp tools or oil. Reapplying just layers cake on cake.
Keep reading
Keep exploring the topic with these related guides: