
How to Apply Concealer with a Brush
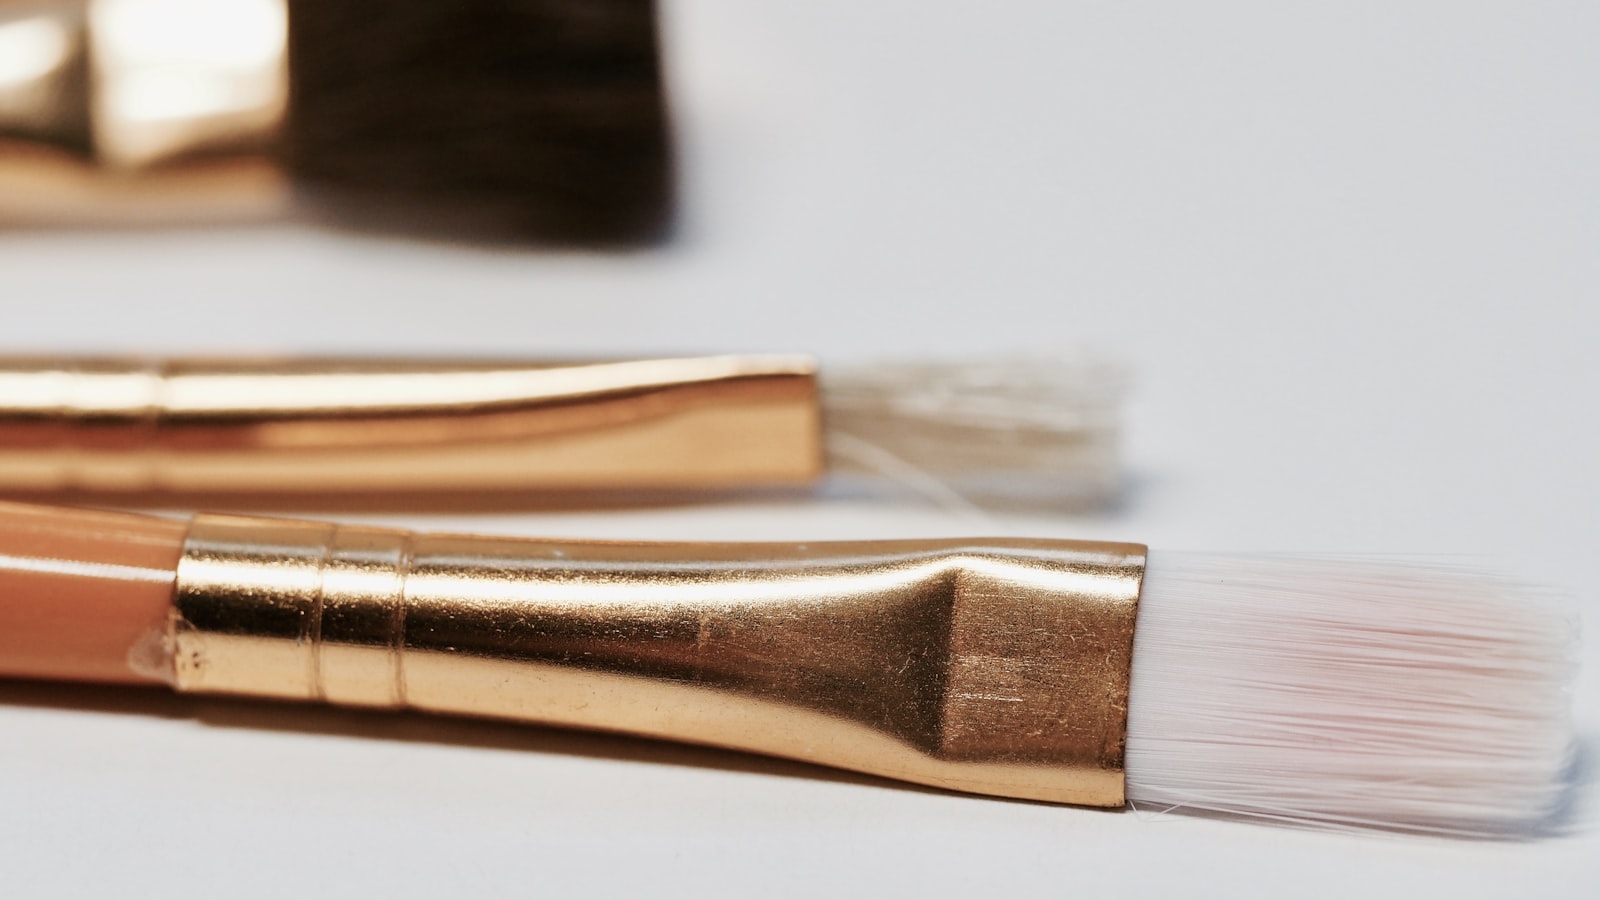
Photo by Jess Bailey on Unsplash
Key Takeaways
Applying concealer with a brush is about precision, not coverage. Use a dense, angled brush (like a stippling or flat) and work in three zones: under eyes, around the nose, and along the jawline. Blend outward with light, feathery strokes—never circular—to avoid creasing.
- Press the brush into skin to “lock in” pigment before blending, preventing settling into wrinkles.
- Cool oily skin with a spray and hydrate dry skin with a mist to avoid creasing.
- Always blend outward—toward the outer corners of your eyes and along the jawline—to diffuse edges naturally.
- Avoid swiping concealer onto skin, as it drags pigment into fine lines; press and blend instead.
The Right Brush for Concealer: What to Avoid (And Why)
Applying concealer with a brush is all about precision—not pressure. The wrong brush turns a flawless base into a creased mess, but the right one locks in pigment without dragging into fine lines. Here’s what to avoid, and why.
Skip the fluffy blending brushes. They’re designed to melt foundation, not conceal. Their soft, wide bristles pick up too much product, which means streaks, settling, and—worst of all—concealer pooling into the delicate under-eye area. A fluffy brush is like using a sledgehammer for a nail: it moves product where you don’t want it.
Density matters more than shape. Flat brushes (like stippling brushes) and angled brushes are your best friends. Their dense, tightly packed bristles hold just enough concealer for control, without shedding or dragging. Angled brushes, in particular, let you apply under eyes without tugging the skin downward—a common mistake that accelerates creasing.
Size dictates the job. A small brush (under 1 inch) is your under-eye precision tool. It lets you dot and blend concealer exactly where you need it, without smudging into the lash line. For larger areas like the T-zone or redness, a medium brush spreads product evenly without overloading the bristles.
Pro tip: Tap, don’t swipe. After dipping your brush into concealer, tap off the excess on your wrist—not by swiping, which flattens the bristles and reduces control, but by lightly tapping to remove only the surface product. A loaded brush is a creasing waiting to happen.
Why this matters: The physics of blending are simple—skin is oil, concealer is pigment, and pressure is the enemy. A dense brush holds pigment where you place it, while a fluffy one distributes it where gravity and oil take it. Avoid the wrong brush, and you’ll skip the creasing that ruins even the best concealer. Creasing is a question of skin prep and pressure, and the steps below cover both. The right brush is your first line of defense.
Step-by-Step: How to Apply Concealer with a Brush (No Creasing!)
The secret to crease-free concealer isn’t pressure—it’s precision. A brush lets you place pigment exactly where it belongs, but only if you work with the skin’s natural contours, not against them. Here’s how to do it right, step by step.
Step 1: Prep Your Skin (The Foundation Rule)
Concealer sticks best to a clean, even canvas. Skip the step, and you’ll either waste product or end up with patchy, uneven coverage.
- Oily skin? Blot with a mattifying primer (look for “oil-free” or “blurring” on the label) or press a clean tissue over your T-zone to lift excess shine.
- Dry skin? Mist with a hydrating facial spray (water-based, not alcohol-heavy) to prevent flaking. Let it dry for 30 seconds—no rushing.
- Sensitive areas (under eyes, around nose)? Pat, don’t rub. Over-exfoliating here thins the skin’s barrier, and concealer will sink in unevenly.
Why it matters: Concealer clings to oil like glue to a sticky note. Too much oil? It slides. Too little? It clumps. The goal is a surface that’s dry enough to hold pigment but not so tight it cracks under coverage.
Step 2: Dot, Don’t Swipe (The Pressure Trap)
This is where most people mess up. Pressing concealer into the skin locks it into the first layer. Dragging it pushes pigment into creases, where it settles like sediment in a riverbed.
- Load your brush lightly—tap off excess on the edge of the concealer jar or palette. A stippling brush (dense bristles, angled handle) holds the most pigment without shedding.
- Press, don’t drag. Place the brush flat against the skin and press the concealer into:
- The inner corners of your eyes (the first place creases form).
- The teardrop under your lower lash line (where dark circles start).
- The sides of your nose (where shadows pool).
- The jawline (if you have hollows or redness).
- Work in triangles. Start at the center of the face (nose, chin) and press outward. This mimics the natural fall of concealer and keeps it from pooling in creases.
Troubleshooting: If your concealer looks patchy after pressing, you’re overloading the brush. Dot smaller amounts and blend immediately.
Step 3: Blend Outward (The Direction Matters)
Circular motions are the enemy. They push concealer into fine lines and creases, where it settles like mud in a crack. Instead, blend in straight lines, radiating outward from the center of your face.
- Start at the nose. Use the flat side of your brush to press a thin line of concealer from the center of your nose upward toward your hairline.
- Work in sections. Move to the cheeks, blending from the nose outward toward the temples. Then the forehead, blending from the center toward the sides.
- Under the eyes: Blend in a V-shape—from the inner corner outward along the lash line, then upward toward the brow bone. Never circle.
Why this works: Your skin’s natural tension pulls pigment outward when you blend in one direction. Circles fight that tension, forcing concealer into the very lines you’re trying to hide.
Step 4: Layer Strategically (Thin > Thick)
Most people load up on concealer and wonder why it creases by lunchtime. Less is more—layer thinly, then build only where needed.
- First layer: Apply a sheer coat over your entire face (even where you don’t “need” it). This evens out your base tone and prevents visible lines where you skip areas.
- Second layer (if needed): Press a tiny amount only on problem spots—dark circles, redness, or uneven texture. Let it dry for 30 seconds before blending.
- Third layer? Only if you’re dealing with deep discoloration. But here’s the rule: If you need a third layer, you’re probably over-applying. Instead, try a denser formula or a primer next time.
Pro tip: If your concealer looks dull after blending, you’ve overworked it. Let it set for 60 seconds before touching up.
Step 5: Set (Optional, But Smart)
Powder isn’t the enemy—misapplying it is. Only powder the areas that actually need it.
- Skip powder on dry skin. Areas like the under-eyes or cheekbones? Leave them alone. Powder here will emphasize texture and make concealer look cakey.
- Use translucent powder only on oily zones. Press a tiny amount onto:
- The T-zone (forehead, nose, chin).
- Any area where your concealer starts to melt after 2 hours.
- Brush it on, don’t pat. Use a fluffy brush (like a powder brush) and press lightly. Patting compacts powder and can drag concealer into creases.
Alternative for dry skin: A blurring primer (like one with silica or dimethicone) can replace powder entirely. It blurs imperfections without emphasizing texture.
The One Mistake That Ruins Everything
Over-blending. The more you work the concealer, the more it drags into fine lines. Stop when it looks “good enough.” Perfection is the enemy of longevity—concealer that’s been blended to oblivion creases by 10 a.m.
Your Quick Fixes for Common Problems
| Problem | Cause | Fix |
|---|---|---|
| Creasing by noon | Too much product or dragging | Press, don’t drag. Use a stippling brush. Layer thinly. |
| Patchy coverage | Over-blending or dry skin | Let first layer dry completely. Use a hydrating primer. |
| Melting in heat/humidity | No setting or oily skin | Powder only the T-zone. Use a mattifying primer. |
| Visible brush strokes | Heavy hand or wrong brush | Tap off excess pigment. Use a dense, angled brush. |
Final Rule: Concealer with a brush is about control, not coverage. The less you mess with it after pressing it down, the longer it stays put. Now go press, don’t drag—and watch the creasing disappear.
The Science of Blending: Why Most People Crease (And How to Fix It)
 Photo by
Flawless Blending in 5 Minutes: The Pro Makeup Artist’s Brush System for Busy Creators — If blending concealer feels like a daily battle against creasing or uneven coverage, a structured brush system can transform your routine—especially when you’re short on time. Includes 1 free bonus resources. 5-minute pro makeup blending system for busy creators
Creasing isn’t a flaw in your technique—it’s physics. When concealer sits on top of skin instead of blending into the first layer, it creates a barrier that traps oil and sweat, making it slide away. The fix? Press the brush into skin to displace oil before applying product. This lets concealer adhere to the epidermis where it belongs, not float on top like a slick film. Think of it like pressing a sponge into a damp surface—it locks in moisture instead of letting it bead up.
Temperature plays a hidden role here. Warm skin (like after a shower) causes concealer to melt faster, increasing the risk of creasing. The solution? Chill your brush for 10 seconds in the fridge before application. The cooler brush temp slows product breakdown, giving you a longer window to blend without it sliding. Pro tip: skip the freezer—just a few seconds in the fridge is enough to make a difference.
Brush angle is the third variable most people overlook. A 45-degree angle deposits more product, while a 90-degree angle (flat) blends. Here’s how to use it right: apply at 45° for coverage, then switch to 90° for blending. The mistake? Many people blend at 45°, which drags concealer into fine lines instead of smoothing it out. Think of it like painting a wall—you don’t swipe the brush horizontally after loading it vertically.
Skin type dictates the rest. Oily skin needs setting powder to lock in concealer, while dry skin requires hydration first to prevent flaking. Here’s the test: apply concealer to your jawline (a warm, oily zone) and wait 2 hours. If it creases, you’re over-applying—lighten the hand or switch to a lighter formula. For dry skin, add a hydrating serum before concealer to create a smoother base.
Finally, the “dot-and-blend” myth is the real culprit. Swiping concealer with a brush drags it into fine lines, especially under the eyes. The fix? Use a damp sponge (like a Beauty Blender) for under-eyes if precision is an issue. Brushes are better for flat surfaces like cheeks or foreheads, where you can control pressure. The key is working with the skin’s natural contours—not against them.
Why This Works (And How to Verify It)
Creasing happens when concealer doesn’t bond with the skin’s first layer. The fixes above address the root causes: oil displacement, temperature control, angle precision, and skin prep. To test it yourself:
- Press the brush into skin before applying—feel the slight resistance as oil moves aside.
- Chill your brush and notice the longer blend time without sliding.
- Apply at 45°, then blend at 90°—watch how the product settles differently.
- Test on your jawline—if it creases, adjust your technique or formula.
No guesswork, just physics. And if you’re still struggling, revisit brush choice—some shapes (like fluffy blending brushes) are worse for creasing than others. (See The Right Brush for Concealer for details.)
Brush vs. Beauty Blender: When to Use Each (And Why)
Concealer application isn’t one-size-fits-all—your tool matters as much as your technique. Use a brush for precision, especially under the eyes and around the nose where fine lines demand control. Brushes deposit less product than sponges, making them ideal for matte finishes and areas where you need to avoid dragging into delicate skin. Use a Beauty Blender (or similar damp sponge) for heavy coverage, like acne scars or when you want a dewy finish. Sponges blend concealer deeper into the skin, reducing creasing risk by preventing that top-layer barrier that traps oil and sweat (the physics behind creasing, explained here).
But here’s the pro move: combine both. Apply concealer with a brush for sharp definition, then lightly dab with a damp sponge to soften edges. This hybrid technique gives you the best of both worlds—precision where you need it, and a seamless blend where it counts. The key? Stick to one tool per zone. Switching between brush and sponge mid-face creates uneven texture, so assign your tools by area: brush for under eyes, sponge for cheeks.
Pro hack: If your brush leaves streaks, dip it in water and press out excess. This softens the bristles for a smoother blend without over-saturating the skin. The goal is control—not pressure—so let the brush do the work, not your wrist.
Why the Choice Matters
The difference comes down to how concealer interacts with skin. Brushes sit on top, creating a matte, opaque layer—great for under-eyes where you want to block darkness. Sponges, when damp, help the product sink in, which is why they’re better for hydrated skin or areas needing extra coverage. Never mix tools mid-application—uneven texture is the result of switching between them without a clear plan.
Troubleshooting: If your concealer looks patchy, you’re likely over-blending. Brushes are for precision; sponges are for diffusion. Use them where they excel, and your base will stay flawless.
Common Mistakes (And How to Spot Them Before They Happen)
 Photo by Kelly Sikkema on Unsplash
Applying concealer with a brush is a precision technique, not a brute-force one. Even small errors can turn a flawless base into a creased mess—or worse, make the concealer look worse than the skin underneath. Here’s how to spot the most common mistakes before they ruin your finish.
Mistake 1: Over-blending → Muddy, washed-out concealer
The fix: Short, light strokes—not rubs. Most people over-blend because they panic about creasing. But dragging the brush in circular motions or pressing too hard pushes concealer deeper into fine lines, thins it out, and leaves a grayish haze. Instead, work in short, outward strokes (like patting, not dragging) with barely any pressure. If your concealer starts looking patchy or streaky, you’re blending too much—stop and let it set for 30 seconds before touching it again.
Mistake 2: Applying to dry skin → Clumpy, uneven texture
The fix: Hydrate first. Dry skin is like a desert—concealer sits on top instead of melting in. If your concealer looks flaky or clumps up when you blend, your skin needs moisture. Mist with hydrating setting spray or apply a lightweight hydrating primer (like one with glycerin or hyaluronic acid) before touching concealer to your face. Pro tip: If your skin feels tight or your foundation always looks cakey, this is your clue.
Mistake 3: Wrong brush size → Smudged under-eyes
The fix: Smaller is sharper. A brush wider than your under-eye area (think: anything over 1 inch) will smudge pigment instead of placing it. For precision under the eyes, switch to a tiny stippling or flat brush—the kind used for eyeliner or blush. If your under-eyes look like a watercolor smudge after application, your brush is too big. Test it: Hold the brush at arm’s length and see if it covers only the area you’re treating. If it doesn’t, downsize.
Mistake 4: Skipping the ‘press’ step → Concealer slides off
The fix: Press, don’t dab. Most people dab concealer onto skin, which leaves it sitting on top like a film. The real trick? Press the brush firmly into the skin for 1–2 seconds before blending. This lets the concealer sink into the first layer of skin instead of floating on top—where oil and sweat will later push it away. If your concealer starts creasing within an hour, you skipped this step.
Mistake 5: Blending upward → Concealer pools under eyes
The fix: Follow skin tension—outward and downward. Blending upward (toward your brow bone) creates a valley where concealer collects, making under-eyes look even more hollow. Instead, blend in the direction your skin naturally pulls: outward (toward your temples) and slightly downward (toward your jawline). Think of it like smoothing a wrinkle—you’re not lifting, you’re guiding pigment along the skin’s natural flow. If your under-eyes look like they’ve sunk further after blending, you’re going the wrong way.
The quick check: If your concealer looks patchy, you’re over-blending. If it clumps, your skin was dry. If it smudges, your brush is too big. If it creases, you didn’t press. And if it pools? You blended upward. Fix one of these, and your brush application will look effortless.
Frequently Asked Questions
Can I use a foundation brush for concealer?
No—and here’s why it fails. Foundation brushes are designed to load and distribute product across large areas, but concealer demands precision under the eyes and around the nose. A foundation brush’s stiff bristles will drag into fine lines, while its dense shape can’t contour to the under-eye’s natural shadow. The result? Creasing, patchiness, and a heavy, cakey look that no amount of blending fixes.
The fix: Swap for a smaller, softer brush with tapered bristles—think a stippling brush or a fluffy blending tool. If you’re set on reusing a brush, clean it thoroughly, trim the bristles to a point, and use it only for concealer (never foundation).
How do I apply concealer without making my under-eyes look worse?
The problem isn’t the concealer—it’s the layering order. Most people apply it after foundation, which traps oil and sweat under a heavy product, causing creasing. Do this instead:
- Skip foundation under the eyes—apply concealer first to a bare, moisturized base.
- Press, don’t pat. Use a stippling brush to press the product into the skin (like a doting grandma), not dab or drag.
- Blend outward in a triangle. Start at the inner corner and feather upward toward the brow bone, then outward toward the temples. Avoid circular motions—they push product into creases.
- Set with powder last. Use a fluffy brush to tap translucent powder only over the concealer, not the entire face. This locks it in without adding bulk.
Pro tip: If you’re prone to creasing, try a cream-to-powder concealer (like a stick or a liquid with a powdery finish). These blend into the skin instead of sitting on top.
What’s the best way to blend concealer on sensitive skin?
Sensitive skin hates friction, and most blending techniques involve too much of it. Here’s the gentle method:
- Use a fluffy, synthetic brush (like a kabuki or a soft stippling brush). Natural bristles can irritate, and stiff bristles will tug at delicate skin.
- Wet your finger slightly and press the concealer into place before blending. This creates a smooth base that won’t flake when you touch it.
- Blend with a damp sponge (not a brush). Soak a beauty sponge in water, wring it out, then press it over the concealer to diffuse edges. The water acts as a lubricant, reducing irritation.
- Avoid heat. If your skin reacts to warmth (redness, puffiness), skip heavy setting sprays or warm toners before applying concealer. Cold tones (like green-tinted primers) can help neutralize redness without aggravation.
Watch out for: Over-blending. Sensitive skin can’t handle the back-and-forth of a brush—stop when the edges look soft, not when they disappear.
Why does my concealer crease after a few hours?
Creasing isn’t a makeup failure—it’s physics. When concealer sits on top of skin instead of blending into the first layer, it creates a barrier that traps oil, sweat, and dead skin cells. Over time, this barrier breaks down, and the product slides away. Here’s how to stop it:
- Layer correctly. Apply concealer before foundation (see above). This lets it sink into the skin instead of getting buried under a heavy base.
- Use the right formula. Cream concealers (like sticks or liquid-to-cream formulas) blend better than powder-based ones under the eyes. Look for terms like “hydrating,” “skin tint,” or “long-wear without creasing.”
- Set it right. Skip heavy powder under the eyes—it cakes and worsens creasing. Instead, use a light dusting of translucent powder after concealer, or try a concealer with a powdery finish (like NARS Radiant Creamy Concealer).
- Prep your skin. Exfoliate gently the night before, and apply a hydrating eye cream or primer. Oil-free, silicone-based primers (like Smashbox Photo Finish) create a smooth surface for concealer to adhere to.
If you’re a sweater: Creasing is worse in humid weather. Switch to a matte, long-wear concealer (like Estée Lauder Double Wear) and set it with a cooling setting spray (like Urban Decay All Nighter) to lock it in.
Should I apply concealer before or after foundation?
Before. Here’s the science: Foundation creates a barrier that prevents concealer from blending into the skin. When you apply concealer after, it sits on top of the foundation, which traps oil and sweat—leading to creasing. The correct order:
- Concealer (under eyes, around blemishes, redness).
- Foundation (blended over the concealer, but not under it).
- Powder (only where needed—under eyes, T-zone—to set, not all over).
Exception: If you’re using a full-coverage foundation (like a liquid or cream-to-powder formula), you can apply it first only if you:
- Use a damp sponge to blend it into the skin (this creates a smoother base for concealer).
- Apply concealer immediately after foundation while it’s still wet.
- Set with a light dusting of powder (not a full face of it).
Why this works: Wet foundation blends into the skin like concealer, so the two can marry without creating a barrier. But if you’re using a traditional powder or matte foundation, skip this shortcut—stick to concealer first.
Final Thoughts: Your Concealer Brush Mastery Checklist
Mastering concealer with a brush isn’t about memorizing steps—it’s about understanding the physics of how skin and product interact. Here’s your recap, distilled into the non-negotiables:
1. Prep like a scientist, not a beauty influencer. Blot oil with a matte primer or pressed powder (no creams—they’re the creasing culprits). Hydrate dry patches with a light mist of hydrating serum, then let it absorb. Concealer won’t stick to wet skin any more than oil repels water. Skip the heavy moisturizer under your eyes—it’s the #1 reason concealer slides off by noon.
2. Dot, don’t swipe. Press the brush perpendicular to the skin (like a dot matrix printer) to deposit concealer into the first layer—not on top. Swiping smears it into a barrier that traps oil. Start with a thin layer, especially under the eyes. If you need coverage, layer after blending, not before.
3. Blend outward, not in circles. Light, feathering strokes radiating from the nose (not the eye socket) prevent creasing. The goal isn’t to erase the under-eye—it’s to diffuse the concealer into the skin’s natural texture. Stop when it’s almost gone; over-blending turns it patchy.
4. Layer strategically. Thin first layer → blend → add a second layer only where you need it (e.g., dark circles, not the entire under-eye). Thick concealer in one spot = creasing in that spot. Set with powder only on oily zones (like the T-zone)—powder dries out the delicate under-eye skin.
5. Test your technique on your jawline. Apply concealer there and wait 4 hours. If it holds without creasing, your method’s sound. If it slides or cakes, revisit your prep or brush choice. A jawline test beats hours of trial and error under your eyes.
Pro tip: The brush matters, but the technique matters more. If you’re creasing, it’s not the brush—it’s the physics. Concealer sits on top of skin until you blend it into the first layer. That’s the difference between a flawless finish and a 2 PM meltdown.
Now go practice. And remember: the best concealer application isn’t about the product—it’s about treating your skin like a canvas, not a blank slate.
Next step: Ready to master concealer (and the rest of your makeup) in half the time? A brush system designed for precision and speed can be your secret weapon—no artist skills required. effortless flawless blending for any skill level
Keep reading
Keep exploring the topic with these related guides: