
Contour Brush Mastery: 5 Types That Sculpt Your Face
Photo by Annie Spratt on Unsplash
Contour brushes aren’t interchangeable—each shape and bristle type solves a specific sculpting problem, from sharp angles to soft blending. The ferrule (where bristles meet the handle) controls product pickup: thicker ferrule = more powder, thinner = less precision.
- Your brush isn’t just for contour: Pros use them for highlighting, blending creams, and even tightening eyeliner—think of them as all-purpose sculpting tools.
- Face shape dictates brush shape: Angular faces need dense, short bristles; round faces benefit from softer, tapered edges. The wrong brush for your shape creates harsh lines or muddy blending.
- The ferrule is the secret weapon: A thicker ferrule picks up more powder, ideal for bold definition; a thin one delivers precision for subtle shading. Check the ferrule thickness before buying—it’s the real spec that matters.
- Misapplied brushes = streaky contour: If your contour looks patchy or streaky, you’re likely using a blending brush to apply it. Contour brushes need a dusting motion (light, directional strokes) and a pat-down finish (press-and-blend) to avoid fallout.
Key Takeaways
Contour brushes aren’t just different shapes—they’re tools with distinct jobs. Use the wrong one, and your sculpted cheekbones turn into cakey messes or streaky shadows. Here’s how to match the brush to the task and spot when you’re misusing it.
Part of our complete guide: for the full picture, see 25+ Free Procreate Makeup Brushes for Flawless Digital.
What Decides Your Contour Success
| Criterion | Why it decides the outcome | How to check it yourself | Red flag |
|---|---|---|---|
| Ferrule thickness | Controls product pickup—thick = bold definition, thin = precision. | Hold the brush at eye level: if daylight shows between bristles, it’s too sparse (will streak). A dense ferrule (no gaps) ensures even application for both powder and cream. | Brush leaves patchy or uneven contour, even with light strokes. |
| Bristle stiffness | Determines edge sharpness—stiff = crisp lines, soft = blending. | Bend bristles downward with your thumb: if they spring back slowly (like a sponge), they’re too soft for contour. The right brush should snap back almost immediately for clean definition. | Contour looks dragged or muddy, even with powder. |
| Brush shape vs. task | Wrong shape = wrong result (e.g., blending brush for contour = streaks). | Match the brush to the job: dense angle for hard edges, tapered flat for soft transitions, round for precision dots. Observe how the bristles angle—sharp angles for sculpting, tapered edges for feathering. | Contour appears patchy, cakey, or overly harsh despite correct technique. |
| Application technique | How you use the brush matters more than the brush itself. | For powder: dust (light taps) not press. For cream: dust after loading. Watch for fallout—if product flakes or drags, you’re overloading or misapplying. | Streaks, creasing, or uneven texture after blending. |
| Handle ergonomics | Poor grip = fatigue = uneven application. | Hold the brush in your dominant hand: does it feel stable? Slippery or awkward handles cause wrist strain, leading to inconsistent strokes. Check if the angle aligns with your natural hand position for contouring. | Hand cramps mid-application, or strokes become uneven. |
| Product type match | Brushes designed for powder won’t work for cream (and vice versa). | Test the brush with your actual product: press a small amount into the bristles. If powder clumps or cream doesn’t adhere, the ferrule/bristle combo is mismatched. | Product clumps in the brush or slides off easily, ruining precision. |
| Bristle density | Too sparse = streaks; too dense = cakey application. | Look at the base of the bristles: if they’re widely spaced, they’ll leave gaps in coverage. If packed tightly, they may over-apply. The ideal density lets you see slight gaps but still delivers even product distribution. | Contour looks streaky (sparse) or overly heavy (dense), regardless of technique. |
The 5 Contour Brush Types—and Which One You’re Probably Using Wrong
Contour brushes aren’t just different shapes—they’re tools with distinct jobs. Use the wrong one, and your sculpted cheekbones turn into cakey messes or streaky shadows. Here’s how to match the brush to the task and spot when you’re misusing it.
1. Dense Angle Brush: The Sharp-Line Sculptor
For: Hard angles—cheekbones, jawlines, the hollow under your brow. Why? Short, stiff bristles pack product tightly for crisp definition. Think of it as a sculptor’s chisel: it carves, not blends.
The Mistake You’re Making: Using it to blend contour. That’s like trying to sandpaper a wall smooth—it’ll leave streaks. Angle brushes are for applying product, not diffusing it. If your contour looks patchy or overly defined, you’re either:
- Loading it too heavily (tap off excess first).
- Or dragging it in the wrong direction (work from darkest to lightest).
Pro Tip: Hold it at a 45-degree angle to your face, and use small, controlled strokes—like you’re drawing a line, not smearing.
2. Tapered Flat Brush: The Swiss Army Knife of Contour
For: Soft transitions—contouring the sides of your nose, blending under the eyes, or a subtle jawline. Why? Medium-density bristles and a tapered edge let you feather edges without losing definition. It’s the bridge between sharp and smooth.
The Mistake You’re Making: Drowning it in powder. Flat brushes are for cream or loose powder—not compact. If you’re pressing a powder compact into the bristles, you’re fighting the brush’s purpose. Instead:
- Use a loose powder or cream formula.
- Load lightly, then blend with a fan brush (see below).
Pro Tip: The taper is your friend—rest the flat edge against your skin and glide outward for seamless transitions.
3. Small Round Brush: The Precision Tool
For: Tiny details—under the eyes, the sides of the nose, or the chin. Why? A round brush lets you dot product where you need it, like a makeup pencil with more control.
The Mistake You’re Making: Skipping the “dusting” technique. If you’re pressing the brush straight into the product and then onto your face, you’re over-applying. Instead:
- Tap the brush lightly against your palm to remove excess.
- Gently press the tip into the product (cream or powder), then tap again to dust it onto your skin.
Pro Tip: For under-eye contour, use a light hand—this area is delicate, and too much product will crease.
4. Fan Brush: The Blender (Not the Applicator)
For: Softening contour edges after application. Why? Fluffy, soft bristles diffuse product without adding more—like a makeup airbrush.
The Mistake You’re Making: Using it to apply contour. Fan brushes are for after—they’re not meant to pick up and place product. If you’re loading one up and patting it onto your face, you’re either:
- Wasting product (fan brushes hold almost none).
- Or creating a muddy, uneven base.
Pro Tip: Work in small sections, patting the brush parallel to your skin to blend without dragging.
5. Angled Blending Brush: The Hybrid
For: Hard-to-reach spots (temples, sides of the nose) and blending. Why? The angled ferrule lets you contour in tight areas, while the slightly tapered bristles handle light blending.
The Mistake You’re Making: Assuming all angled brushes work the same. Some are stiff (good for contour), others are soft (better for blending). If your angled brush leaves streaks when contouring or doesn’t blend smoothly, check the bristle density:
- Stiff bristles? Use it like a mini angle brush (for definition).
- Soft bristles? Use it like a fan brush (for blending).
Pro Tip: The angle is your secret weapon—rest the brush at a 60-degree angle to contour tight areas without over-applying.
The Diagnostic: Which Brush Are You Misusing?
Ask yourself:
- Does your contour look streaky or patchy? → You’re using a blending brush (fan or soft angled) to apply product.
- Is your contour too heavy or cakey? → You’re overloading a dense angle or small round brush.
- Are your edges too sharp or too soft? → You’re not using the taper of a flat brush or the angle of a hybrid correctly.
- Is your contour creasing under the eyes? → You used a round brush without the dusting technique.
Fix It:
- For streaks: Swap to a dense angle brush for application, then blend with a fan.
- For heaviness: Lighten your hand and use a fan brush to diffuse edges.
- For sharpness: Use a tapered flat brush with soft strokes.
- For creasing: Stick to cream formulas and the dusting method with round brushes.
How to Pick a Contour Brush Without Guessing: The 3-Step Check
Contour brushes aren’t just different shapes—they’re tools with distinct jobs, and the wrong one turns your sculpted cheekbones into streaky shadows or cakey messes. You don’t need to guess which one fits your technique: verify three mechanics before buying, and you’ll avoid the brush that looks right but never delivers.
Step 1: Ferrule Thickness
The ferrule—where the bristles meet the handle—controls how much product the brush picks up. Thicker ferrules hold more powder, making them ideal for matte contour sticks or pressed powders. Thinner ferrules let you apply cream or liquid products with precision.
Check: Hold the brush at eye level. Can you see daylight between the bristles? If yes, it’s too sparse—it’ll leave streaks. A dense ferrule (no gaps) means even product distribution, whether you’re using powder or cream.
Step 2: Bristle Stiffness
Stiff bristles create sharp lines; soft bristles blend. If you contour with powder, you need bristles that spring back quickly—otherwise, you’ll get a muddy, dragged-out effect. For cream products, slightly softer bristles help you smooth without over-applying.
Check: Bend the bristles downward with your thumb. If they spring back slowly (like a sponge), they’re too soft for contour. The right brush should snap back almost immediately—this ensures crisp edges.
Step 3: Handle Ergonomics
A contour brush that slips in your hand won’t last. Grip is everything—especially when you’re applying product with precision.
Check: Does the handle fit your palm? If it’s slippery, look for textured grips or angled handles. A brush that feels awkward in your hand will fatigue your wrist, leading to uneven application.
The Trap: Misapplying the Brush
You’ve picked the right tool, but your contour still looks wrong? That’s a technique problem, not a brush problem. The most common mistake: using a blending brush to apply contour. Blending brushes are for softening edges after the fact—they’re not for initial application. If your contour looks streaky, you’re using the wrong brush or applying it incorrectly.
Fix: Start with a dedicated contour brush, apply product in small dots, and blend only after the base is down.
The Decision Rule
No guesswork: pick the brush that matches your product and technique.
- Powder? Thick ferrule, stiff bristles.
- Cream? Thin ferrule, slightly softer bristles.
- Slippery handle? Skip it—comfort is non-negotiable.
The one thing to verify before buying: Hold it, bend it, and grip it. If it doesn’t pass all three checks, it’s not the right tool.
Contour Brushes vs. Blending Brushes: Why You Need Both (And When to Skip the Brush)
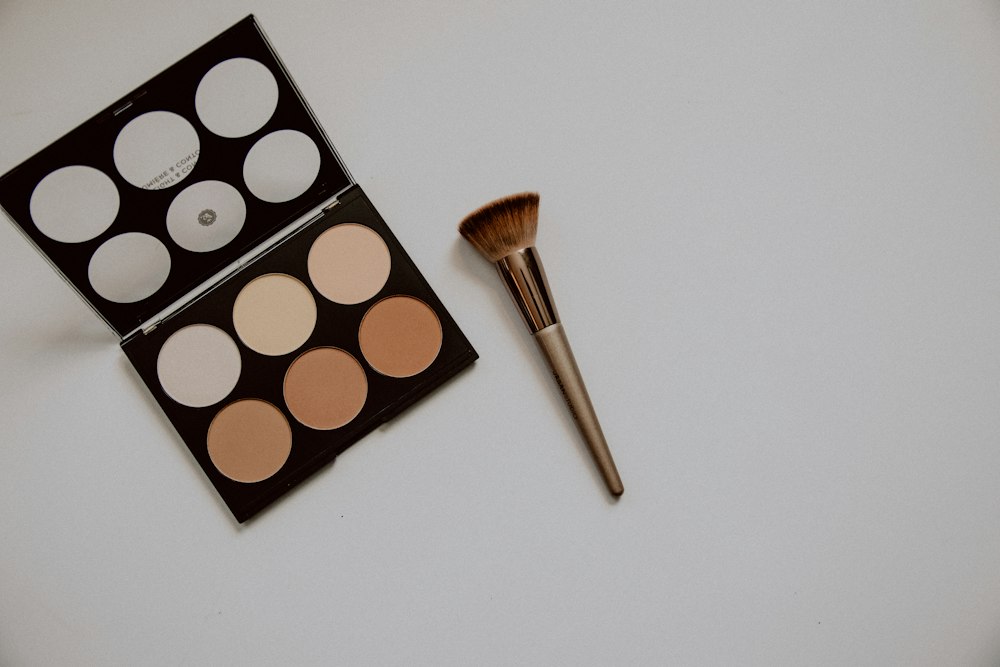 Photo by Kelly Sikkema on Unsplash
Here’s the hard truth: A contour brush and a blending brush are not the same tool, and treating them as interchangeable is how you end up with streaky, cakey makeup that looks like it was applied with a spatula. One applies product with precision; the other softens it into place. Use them wrong, and your sculpted cheekbones turn into a shadowy smudge—or worse, a visible line where the contour ends. The fix? Know when to use each, and when to ditch the brush entirely.
The Two Jobs (And Why You Can’t Skip Either)
A contour brush’s job is precision application. Its dense, angled bristles pack product into sharp edges—think cheekbones, jawlines, or the hollows under your eyes. A blending brush, on the other hand, is for diffusion: its fluffy, tapered bristles feather product into skin to avoid harsh lines. Swap them, and you’re asking for trouble.
Example: Apply powder contour with a dense angle brush, then blend with a fan brush. For cream products? Skip the brush entirely—fingers or a damp sponge work better to avoid drag. (Yes, really. More on this in a minute.)
The One Exception (And Why It’s a Loophole, Not a Rule)
There’s one brush that can double as both: a small round brush with soft, tapered bristles. It’s your go-to for tight areas like under the nose or the sides of your chin, where you need to apply and blend in one motion. But here’s the catch: it’s not a replacement for a dedicated contour brush on larger areas. Try using a round brush to sculpt your cheekbones, and you’ll end up with a shadowy, uneven mess.
The Pro Tip That Fixes 90% of Contour Mistakes
If your contour looks cakey or streaky, you’re using the wrong brush. Here’s the diagnostic:
- Cakey? You’re using a blending brush to apply product. Switch to a softer, tapered contour brush (like a fluffy angle brush) and apply in short, patting motions—never swiping.
- Streaky? You’re using a contour brush to blend. Switch to a fan brush and feather the edges with light, upward strokes.
When to Skip the Brush Altogether
Cream products (like cream contour sticks or liquid highlighters) are the brush’s kryptonite. The drag from bristles pulls at the formula, leaving you with a patchy finish. Instead:
- Fingers for cream sticks: warm the product between your palms, then pat it into place.
- Damp sponge for liquid products: dab (don’t swipe) to avoid streaks.
The Brush You’re Probably Using Wrong (And How to Fix It)
Most people reach for the same brush for both jobs—and that’s how you end up with makeup that looks like it was applied with a credit card. A contour brush is for sharp lines; a blending brush is for softening. If you’re struggling with either, ask yourself:
- Am I applying product with a blending brush? → Switch to a contour brush.
- Am I blending with a contour brush? → Switch to a fan or fluffy round brush.
- Is my contour looking patchy? → You’re using the wrong tool for the job.
Bottom line: Treat these brushes like they’re not interchangeable—because they’re not. Use the right one for the job, and your contour will look like it was sculpted by a pro. (And if it doesn’t, revisit your technique—not the brush.)
The Contour Brush Technique Cheat Sheet: 3 Moves That Fix 90% of Mistakes
You’re holding the right brush, but your contour still looks streaky, cakey, or like it was applied with a butter knife. The problem isn’t the brush—it’s the way you’re using it. Here’s the fix: Three moves that eliminate 90% of contour mistakes, no matter your face shape or brush type.
Move 1: The ‘Dusting’ Tap
After loading powder, tap the brush once on your wrist—not your palm—to remove excess. Why it matters: Too much product = visible streaks. Too little = no definition. The tap isn’t about precision; it’s about control. Watch your wrist: if powder flakes off in chunks, you’ve overloaded. If it barely clings, tap again.
Pro tip: Angle the brush slightly upward when tapping. This prevents bristles from splaying, which happens when you tap flat. A splayed brush drags product, turning your contour into a shadowy smear.
Move 2: The ‘V’ Technique
Hold the brush at a 45° angle and apply in a ‘V’ shape under your cheekbones, starting from the outer corner and working inward. Why this works: A flat swipe (the most common mistake) pushes product into creases, creating a “mask” effect. The ‘V’ mimics the natural hollow beneath the cheekbone, so the shadow follows the bone’s angle—not your brush strokes.
Visual cue: Imagine your cheekbone as a shelf. The ‘V’ is the shadow cast beneath it. If your brush is too vertical, you’ll get a harsh line. Too horizontal, and the product pools. The 45° angle is the Goldilocks zone.
Common misapplication: Using a blending brush for this step. Blending brushes are for softening edges after contour is applied—not for laying it down. If your contour looks streaky, you’re probably using the wrong brush entirely.
Move 3: The ‘Pat-Down’ Blend
Here’s where most people mess up. Never swipe the contour into skin—pat it down with a fan brush. Hold the fan brush flat against your cheek and press in small, circular motions. Why this works: Swiping drags product, creating drag marks. Patting diffuses it, letting the skin absorb the formula naturally.
How to spot the mistake: If your contour looks like it’s melting off your face, you’re swiping. If it’s still sharp but uneven, you’re not patting enough. The goal is to warm the product into the skin, not spread it like frosting.
Brush swap alert: A dense blending brush (like the one you’d use for foundation) won’t work here. You need a soft, fluffy fan—the kind that looks like it could catch dust. If you’re using a blending brush with firm bristles, you’re fighting the tool.
The 90% Rule
These three moves solve:
- Streaky contour → Dusting tap + correct brush choice.
- Cakey makeup → Pat-down blend, not swiping.
- Harsh lines → The ‘V’ technique, not flat swipes.
What’s left? Face shape. A brush that works for a square jaw might over-sculpt a round face. But technique fixes 90% of the rest. Start here, then adjust for your shape—not the other way around.
Image:  Photo by Zahrin Lukman on Unsplash
Contour Brushes for Every Face Shape: What to Buy (Without the Guesswork)
You don’t need a makeup artist’s intuition to match a contour brush to your face shape—just a few mechanical clues. The right brush for your shape isn’t about brand names or price tags; it’s about how the bristles actually work with your bone structure. Here’s how to pick without overthinking it.
Square Faces: Sharpen the Jawline with a Dense Angle Brush
Square faces need a brush that can carve precision into the jawline without overpowering the cheekbones. Look for a dense angle brush—the one with stiff bristles (3–4 rows) and a sharp tip. Why? The angle lets you cut into the hollow under the jaw, while the stiffness keeps the product from smudging when you press.
How to check if it’s right: Hold the brush at a 45-degree angle to your jaw. If the bristles fan out too much, they’re too soft—you’ll end up with a muddy line instead of a defined edge. The ferrule (where the bristles meet the handle) should be small enough to let you work close to your skin without losing control.
Round Faces: Soft Blending with a Tapered Flat Brush
Round faces need a brush that diffuses rather than sharpens. A tapered flat brush (medium-density bristles, 2–3 rows) is your best bet. The tapered edge lets you feather the product outward, while the flat shape prevents over-sharpening the cheekbones.
How to check if it’s right: Run the brush along your cheekbone from the temple toward the jaw. If the bristles spread too wide at the base, they’ll drag product into places you don’t want it. The taper should let you blend gradually—no sudden lines, just a natural fade.
Oval Faces: Precision with a Small Round Brush
Oval faces have the most symmetry, but that doesn’t mean you can skip contour entirely. A small round brush (short handle, fine tip) gives you the control to sculpt cheekbones and jawline without overdoing it. The round shape lets you dot product precisely, while the short handle keeps your wrist steady.
How to check if it’s right: Try tracing a line from your ear to your cheekbone. If the brush feels too bulky, it’ll make your contour look heavy-handed. The ideal one lets you work in tiny, controlled strokes—like drawing with a pencil, not a crayon.
Heart-Shaped Faces: Widen the Forehead with a Fan Brush
Heart-shaped faces need to balance a wider forehead with a narrower chin. A fan brush (fluffy bristles) is the only tool that can diffuse product upward to visually soften the forehead while still giving you enough stiffness to contour the chin.
How to check if it’s right: Hold the brush vertically and sweep it upward along your hairline. If the bristles collapse too easily, they won’t lift enough product to create the illusion of width. The fluff should hold its shape when you press, so you can build coverage without streaks.
Diamond Faces: Blend with an Angled Blending Brush
Diamond faces (wider at the cheekbones, narrower at the forehead and chin) need a brush that can both contour and blend smoothly. An angled blending brush (mix of stiffness and softness) lets you define the cheekbones while feathering the product into the jawline and forehead.
How to check if it’s right: Test how the brush behaves at two angles: sharp for contouring, then soft for blending. If it’s too stiff, you’ll get harsh lines; if it’s too soft, your contour will disappear into your skin. The ideal one lets you switch between the two in one motion.
The One Rule That Covers 90% of Mistakes
No matter your face shape, if your contour looks streaky or cakey, you’re either:
- Using a blending brush to apply product (soft bristles = no grip = drag marks).
- Pressing too hard with a contour brush (stiff bristles need light pressure, or they’ll pack instead of sculpt).
Fix it: Dust the product onto your skin with the brush perpendicular to the area you’re contouring (like dotting), then pat it down with the brush at a 45-degree angle. That two-step method keeps product where you want it—no smudging, no over-blending.
What to Do Next
Now that you know the brush type for your face shape, the next step is how to use it. (Spoiler: It’s not what you’ve been doing.) The Contour Brush Technique Cheat Sheet covers the three moves that fix 90% of contour mistakes—no guesswork, just mechanics.
And if you’re still unsure which brush to buy? Skip the guesswork entirely. The right brush isn’t about the shape on the box—it’s about how the bristles feel when you test them. Hold a few in your hand, press them against your cheek, and see which one gives you control without smudging. That’s the one.
Frequently Asked Questions
Can I use a contour brush for eyeshadow?
No, and here’s why: contour brushes are designed to pack product into crevices—think sharp cheekbones, jawlines, or hollows—while eyeshadow brushes are built to diffuse and build color in layers. Swap them, and you’ll either end up with a streaky eyeshadow (if you try to apply it with a contour brush) or a cakey, uneven contour (if you try to sculpt with an eyeshadow brush). The giveaway? A contour brush’s dense, angled bristles will leave harsh lines in eyeshadow, while an eyeshadow brush’s softer, tapered bristles will smudge your contour into a shadowy blur.
Exception: If you’re working with a very fine contour brush (like a small, densely packed blending brush), you could use it for light eyeshadow application—say, a subtle shimmer on the lid—but it’s not its purpose. Stick to the tool for the job, and your makeup will thank you.
How do I clean a contour brush?
Contour brushes are the dirtiest in your stash because they pack product deep into the ferrule. Here’s how to clean them properly—no streaky bristles or product buildup:
- Rinse immediately after use. Tap off excess product into the trash, then rinse the bristles under lukewarm water (hot water melts cream products and warps handles). Use a gentle shampoo or brush cleaner—never soap or dish detergent, which strips the bristles’ natural oils and leaves residue.
- Reshape the bristles. Lay the brush flat on a towel, bristles down, and gently comb them back into place with your fingers. This prevents them from drying in a permanent curve.
- Dry flat. Place the brush on a clean towel or a brush stand, bristles flat (never upright—this causes the bristles to bend permanently). Let it air-dry completely before using again. Pro tip: If your brushes are in a hurry, swap the towel daily to avoid mildew.
Red flag: If your contour brush develops a permanent bend or the bristles fan out unevenly, it’s time to retire it—no amount of cleaning will fix it.
What’s the difference between a contour brush and a blending brush?
They’re not just different shapes—they’re opposite tools for the same job. Here’s the hard truth:
- Contour brushes are dense, angled, and stiff—designed to pack product into sharp lines (cheekbones, jawlines) and cut light where you need it. Their bristles are usually tapered or chisel-shaped to create definition.
- Blending brushes are soft, fluffy, and diffuse—built to soften edges and melt product into skin. Their bristles are rounded or domed to feather and blend.
Misuse them, and you’ll pay for it:
- Use a blending brush to apply contour? You’ll get a shadowy, diffused look—no definition, just a faded smudge.
- Use a contour brush to blend? You’ll end up with streaks and harsh lines where you wanted a seamless transition.
When to skip the brush entirely: If you’re working with a powder contour, a fluffy blending brush or even your fingers can work—but for cream or liquid products, the contour brush is non-negotiable for precision.
The One Contour Brush Hack That Saves Your Makeup All Day
Here’s the fix for contour that lasts: prime your brush before you apply it.
For powder contour, spray a tiny mist of setting spray onto the bristles before dipping into the product. The spray acts like a glue—it makes the powder cling to the brush longer, so you get a more precise application and less creasing. For cream contour, mix a single drop of blotting paper serum into the product before applying. This thins the formula just enough to reduce drag, so your brush glides instead of grabbing at your skin.
If your contour fades by noon, you’re either using the wrong brush or not applying enough product. Fix it with density: switch to a brush with firmer, shorter bristles (like a dense angled brush) or apply a second layer—just dab it on top of the first instead of blending it in. The key is packing the product into the hollows, not just dusting it on.
This isn’t about technique—it’s about mechanics. The right brush and the right prep make the difference between contour that holds all day and makeup that looks like it was applied with a butter knife. No guesswork. Just results.
Next step: Ready to master contour like a pro? Skip the trial-and-error with a foolproof method. Effortless makeup blending for any face shape
Keep reading
Want to go deeper? Read our guide on 5 Steps to Master Blending Brush for Eyeshadow.