Best Concealer Brush for Mature Skin: Key Checks
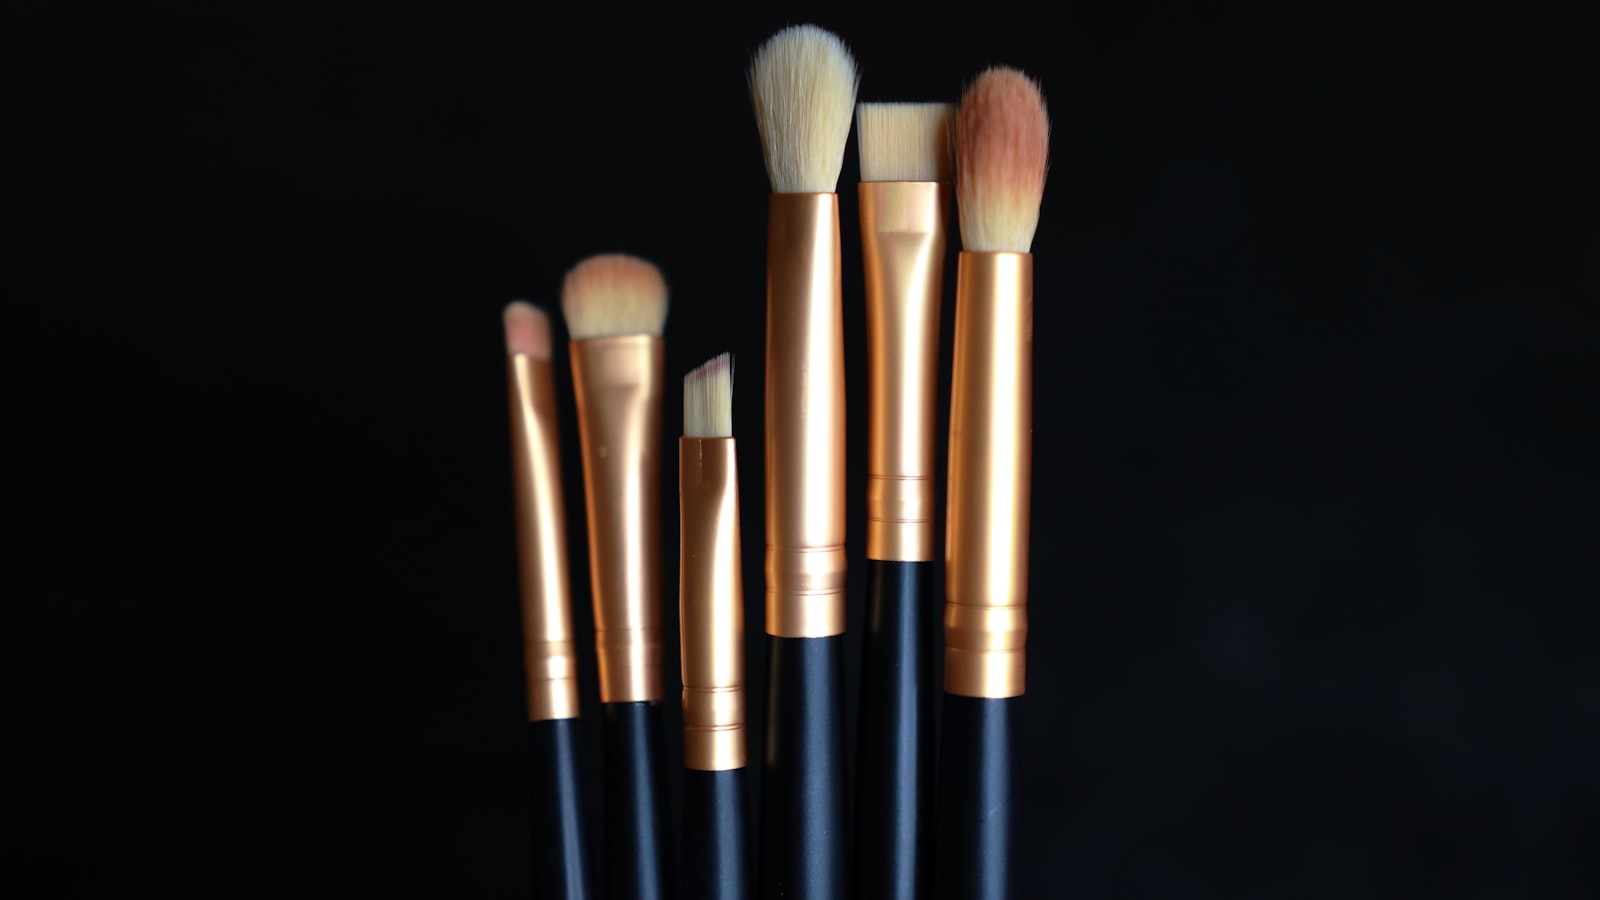
Photo by Chris Quintana on Unsplash
Best Concealer Brush for Mature Skin: Key Checks (2026)
Part of our complete guide: for the full picture, see 25+ Free Procreate Makeup Brushes for Flawless Digital.
Key Takeaways
The right concealer brush for mature skin prioritizes gentle precision over heavy coverage. Look for synthetic, tapered or angled bristles that glide without tugging, paired with a dense yet flexible head to prevent product from settling into fine lines. Before purchasing, run these 30-second checks:
- Finger Roll Test: Roll bristles between fingers—snags mean poor quality.
- Mirror Test: Tap the brush on glass; shedding bristles are a dealbreaker.
- Shape Check: Angled/tapered tips prevent creasing; flat/fluffy heads emphasize texture.
- Ferrule Tug Test: Gently pull bristles—loose fibers signal poor construction.
- Palm Press: Press the tip to your palm—too stiff? It’ll drag. Too floppy? It’ll smear.
Mature skin’s thinner texture and reduced elasticity demand tools that adapt, not fight. The sweet spot? A brush that bends just enough to blend smoothly while maintaining its shape for targeted application.
Why Mature Skin Needs a Different Concealer Brush
Mature skin isn’t just older—it’s thinner, drier, and more reactive than younger skin. A generic concealer brush might cover imperfections, but it can also tug, crease, and emphasize texture in ways that highlight aging rather than conceal it. Here’s why your brush choice matters more than you think.
The Problem with Generic Brushes
Most concealer brushes are designed for smooth, resilient skin—a far cry from the needs of mature complexions. Here’s what goes wrong:
- Thinner skin = less cushion between brush and bone. Rough fibers can scratch or irritate, especially around the delicate under-eye area.
- Drier skin clings to product unevenly. Stiff bristles drag instead of gliding, pulling at fine lines and making them more noticeable.
- Lost elasticity means skin doesn’t bounce back. Every tug stretches it further, worsening sagging or redness over time.
The result? A brush that works for a 20-year-old can make a 50-year-old’s skin look worse by noon.
The Creasing Trap
Fine lines and wrinkles act like tiny valleys. The wrong brush shape fills them with product instead of smoothing over them. Fluffy, dome-shaped brushes are the worst offenders—they deposit too much concealer at once, pooling in creases and settling into texture.
The solution? A dense, tapered brush presses product into the skin with precision, minimizing migration. The key isn’t coverage; it’s control. Over-application doesn’t hide flaws—it highlights them.
Precision Where It Counts
The under-eye area is the most unforgiving. A brush with a blunt tip or loose bristles can’t navigate the contours of the orbital bone, leading to:
- Product drifting into lines.
- Uneven settling.
- A “caked” look that emphasizes dryness.
Angled or tapered tips are game-changers here. They follow the natural curve of the eye socket, depositing concealer exactly where you want it without dragging. For full-face touch-ups, a compact, dense head ensures you’re not overloading the skin, which can emphasize dry patches or enlarged pores.
The Synthetic Advantage
Natural hair brushes might feel luxurious, but they’re often too stiff for mature skin. Here’s why synthetic fibers win:
- Softer and more flexible, reducing tugging.
- Non-absorbent, so they don’t waste product.
- Hypoallergenic, ideal for sensitive or reactive skin.
Look for bristles that mimic the give of a sponge: firm enough to blend, but gentle enough to avoid pulling. The wrong brush doesn’t just apply makeup poorly—it can make your skin look worse by the end of the day.
The Bottom Line
A concealer brush for mature skin should feel like an extension of your fingers—light, precise, and adaptable. If it tugs, creases, or sheds, it’s failing the test. Prioritize synthetic, angled/tapered bristles with a secure ferrule and dense yet flexible head. Your skin’s texture changes with time—your brush should adapt, not fight it.
The 5 Brush Features That Actually Matter (And How to Verify Them)
Most concealer brushes are designed for skin that hasn’t yet earned its fine lines. For mature skin, the wrong brush doesn’t just apply product—it announces every crease, tugs at delicate areas, and leaves streaks. The good news? Five verifiable features separate the brushes that work from the ones that don’t. None require guesswork, and all can be checked in 30 seconds—whether you’re in-store or shopping online.
1. Bristle Material: Synthetic vs. Natural (And Why It’s Non-Negotiable)
Mature skin is thinner, drier, and more reactive than younger skin. Natural hair bristles—often marketed as “luxurious”—are porous, so they absorb product instead of depositing it. Worse, they can harbor bacteria and irritate sensitive skin.
Synthetic bristles (nylon or polyester) are:
- Non-absorbent, so they don’t waste product.
- Hypoallergenic, reducing irritation.
- Softer and more flexible, preventing tugging.
How to verify:
- Look for the words “synthetic,” “vegan,” or “taklon” in the product name or description.
- If the label doesn’t specify, test the bristles: natural hair brushes feel softer and more flexible, while synthetic bristles hold their shape.
2. Brush Shape: The Difference Between Smooth Coverage and Settling into Lines
Flat or fluffy brushes might work for younger skin, but on mature skin, they push product into fine lines, creating a cracked-paint effect.
The best shapes for mature skin:
- Angled brushes (slanted edge): Ideal for under-eyes, following the natural curve of the eye socket.
- Tapered brushes (pointed tip): Offer precision for blemishes or redness.
How to verify:
- The product name or description should include “angled” or “tapered.”
- If it says “flat” or “fluffy,” it’s not the right tool for delicate areas.
3. Bristle Density: The Finger Roll Test
Sparse bristles create patchy coverage because they don’t hold enough product. Dense bristles distribute concealer evenly and prevent streaking.
How to verify:
- Roll the brush between your fingers.
- If you can see the metal ferrule (the band holding the bristles), the brush is too sparse.
- The bristles should feel compact, almost like a soft pencil eraser.
Pro tip: This test works in-store or on product photos—just zoom in to see bristle spacing.
4. Ferrule Security: The Tug Test
A loose ferrule (the metal band) isn’t just annoying—it can snag skin, especially around delicate areas like the under-eyes.
How to verify:
- Gently tug the bristles.
- If any come loose, the brush is poorly constructed.
- A secure ferrule should feel solid, with no give.
Why it matters: Loose bristles can shed mid-application, leaving fibers in your concealer.
5. Handle Length: Precision vs. Control
Long handles (5+ inches) may suit some users for foundation but check if the length works for your concealer application. They force you to apply product from a distance, reducing precision—especially under the eyes, where control matters most.
Short handles (3–4 inches) offer better maneuverability.
How to verify:
- Measure the brush against your hand.
- If the handle extends past your palm, it’s too long for detailed work.
- If it fits comfortably in your grip, it’s the right size for precision.
The One Thing to Remember: These five features aren’t just details—they’re the difference between a brush that works with your skin and one that fights it. Before you buy, run the:
- Finger Roll Test (for density).
- Tug Test (for ferrule security).
- Label Check (for “synthetic” and “angled/tapered”).
If the brush passes all three, it’s worth investigating. If it fails even one, keep looking. Your skin will thank you.
How to Test a Concealer Brush Before You Buy (30-Second Checklist)
Flawless Blending in 5 Minutes: The Pro Makeup Artist’s Brush System for Busy Creators If you’ve ever struggled with blending concealer seamlessly—especially around fine lines or textured areas—you’ll appreciate a system designed to cut down blending time without sacrificing precision. A brush that adapts includes 1 free bonus resource. Blend concealer like a pro in under 5 minutes
You don’t need reviews or a magnifying glass—just your hands and a mirror. Here’s how to test any concealer brush in 30 seconds, whether you’re in-store or scrolling online.
1. The Finger Roll Test
- What to do: Roll the bristles between your thumb and forefinger.
- What to look for: Soft, synthetic fibers should glide like silk, not catch like sandpaper.
- Red flag: Bristles that splay apart or feel scratchy will tug at mature skin.
2. The Tug Test
- What to do: Gently pull a few bristles.
- What to look for: No bristles should come loose.
- Red flag: Shedding bristles mean the brush will leave fibers in your concealer mid-application.
3. The Mirror Test
- What to do: Swipe the brush across the back of your hand.
- What to look for: A smooth, even stroke.
- Red flag: If it drags or skips, it’ll do the same on delicate under-eyes, emphasizing fine lines.
4. The Shape Test
- What to do: Hold the brush at a 45-degree angle to your face.
- What to look for: The tip should align with the direction of your fine lines.
- Red flag: If it doesn’t, product will pool unevenly. Tapered or angled heads work best for precision.
5. The Weight Test
- What to do: Balance the brush on your finger.
- What to look for: A well-balanced brush feels effortless, not top-heavy.
- Red flag: If the ferrule (the metal part) is too heavy, the brush will tip forward, making control difficult.
Final verdict: If a brush fails even one of these tests, keep looking. The right brush should pass all five with flying colors.
Which Brush Type Fits Your Routine?
Photo by Kier in Sight Archives on Unsplash
The right concealer brush isn’t one-size-fits-all—it’s the one that matches how you apply makeup, not just where. Mature skin demands precision without tugging, so the brush’s shape should align with your routine’s rhythm. Here’s how to map your needs to the right category, plus the quick checks that separate contenders from duds.
Under-Eye Precision
Best for: Dark circles, fine lines, or delicate areas. Ideal brush type: Angled brush (slanted tip). Why it works: The slanted edge follows the natural curve of the eye socket, letting you deposit product exactly where you need it—no dragging, no creasing.
How to verify:
- The bristles should taper to a fine point, sharp enough to trace the lash line without smudging.
- If the tip looks blunt or frayed, it’ll skip over texture instead of filling it.
Pro tip: Pair with a lightweight, hydrating concealer to avoid settling into lines.
Full-Face Blending
Best for: Seamless coverage that melts into foundation. Ideal brush type: Tapered brush (rounded, densely packed bristles). Why it works: Diffuses product without streaks, ideal for larger areas like the forehead or cheeks.
How to verify:
- Press the bristles lightly into your palm.
- If they spring back too quickly, they’re too stiff for mature skin.
- The right density should compress slightly, then rebound just enough to blend, not buff.
Pro tip: Use a damp brush for cream concealers to prevent dragging.
Minimalist Routines
Best for: Short on time or space. Ideal brush type: Dual-ended brush (precision + blending in one tool). Why it works: One end handles targeted application (under-eyes or blemishes), while the other diffuses edges.
How to verify:
- Both ends should pass the Finger Roll Test—gently roll the bristles between your fingers.
- If they splay or resist, the brush will tug.
- If they glide smoothly, it’ll apply without pulling.
Pro tip: Look for a short handle (3–4 inches) for better control.
Cream vs. Liquid Concealer
The formula dictates the tool.
For cream concealers:
- Best brush: Dense, flat-top brush (presses product into skin for fuller coverage).
- How to verify: Press the bristles into your palm—if they don’t bounce back, they’re soft enough to avoid dragging.
For liquid concealers:
- Best brush: Fluffier brush (feathers product without overloading).
- How to verify: The bristles should fan out slightly when pressed, creating a soft, even finish.
Pro tip: Always blend in downward motions to avoid pushing product into pores.
The Final Check
Before you buy, ask: Does this brush solve my biggest struggle?
- Creasing under eyes? Prioritize an angled tip.
- Streaky blending? Go tapered.
- Juggling multiple steps? A dual-ended brush might be the only one you need.
The best brush isn’t the one with the most hype—it’s the one that disappears into your routine.
What to Check Before You Buy: The Concealer Brush Decision Table (2026)
Here’s the only table you need—no brands, no prices, just the six criteria that decide whether a brush will work for mature skin. Each row tells you what to look for, why it matters, and how to test it in 30 seconds or less.
| Criterion | Why It Matters | How to Check It | Red Flag |
|---|---|---|---|
| Bristle Material | Prevents irritation and product absorption | Look for “synthetic,” “vegan,” or “taklon” on the product page or packaging. | “Natural hair” (can be rough) or no material listed. |
| Brush Shape | Determines precision and crease resistance | Angled/tapered tips = under-eyes; flat/fluffy = full-face. | “Flat” or “fluffy” for under-eyes (will crease). |
| Bristle Density | Controls product application | Roll bristles between fingers—ferrule should be barely visible. | Sparse bristles (ferrule visible) = patchy coverage. |
| Ferrule Security | Prevents shedding and skin snags | Tug bristles—no shedding. | Loose bristles or visible glue. |
| Handle Length | Affects control and precision | Measure against your hand (3–4 inches = ideal). | Long handles (5+ inches) = harder to control. |
| Flexibility | Balances control and gentleness | Swipe on hand—should glide, not drag. | Too stiff (drags) or too floppy (no control). |
How to Use This Table
- Start with your routine.
- Under-eyes? Go for angled or tapered.
- Full-face blending? Flat or fluffy works—but avoid these shapes for delicate areas.
- Test before you buy.
- The “How to Check It” column is your 30-second checklist. No reviews, no guesswork.
- Watch for red flags.
- If a brush fails even one of these, it’s not the right tool for mature skin.
This table isn’t about brands—it’s about your skin and your hands. The right brush should feel like an extension of your fingers, not a battle.
Frequently Asked Questions (2026)
Can I use a sponge instead of a brush for mature skin?
You can, but it’s a trade-off. A sponge blends smoothly and hydrates dry patches, which sounds ideal—until you press it into thin, crepey skin. The dampness can make fine lines swell, and the repetitive dabbing motion tugs more than a brush does.
If you’re set on a sponge:
- Pick one with very fine, non-absorbent foam (latex-free, not the classic beauty blender texture).
- Use a patting motion, never dragging.
- Reserve it for full-face foundation and keep a brush for spot concealing—your under-eyes will thank you.
Why does my concealer brush leave streaks on dry skin?
Because the bristles are too stiff or too densely packed. Dry, mature skin doesn’t bounce back like younger skin; it grabs at product instead of letting it glide.
How to fix it:
- Finger Roll Test: Pinch the bristles between your fingers and roll. If they don’t flex at all, they’re too rigid.
- Mirror Test: Hold the brush up to a light. If you can’t see daylight between the bristles, it’s too dense for mature skin.
- Switch to a softer brush: Look for synthetic, tapered bristles with a bit of give.
How do I clean a concealer brush without damaging the bristles?
Skip the harsh detergents and the “swirl in your palm” method—both fray bristles over time. Here’s the gentle, effective way:
- Use a silicone-free cleanser: Baby shampoo or a dedicated brush soap works best.
- Finger-only rinse:
- Hold the brush under lukewarm water, bristles pointing down.
- Gently squeeze the ferrule (the metal part) between your fingers to work the soap through.
- Rinse until the water runs clear.
- Dry properly:
- Press the bristles between a clean towel—never rub.
- Lay the brush flat, ferrule off the edge of the counter so the bristles don’t bend.
Pro tip: Clean your brush weekly to keep it soft and bacteria-free.
What’s the difference between an angled and tapered concealer brush?
The angle is about control; the taper is about precision.
- Angled brush (slanted flat):
- Best for contouring, blemishes, or hard-to-reach spots (e.g., jawline, nose).
- Can tug if you’re not careful with pressure.
- Tapered brush (dome shape):
- Softer and more forgiving, ideal for under-eyes and delicate areas.
- Less precise for spot concealing.
Ask yourself:
- Do I need to cut sharp lines? → Angled brush.
- Do I need to blend without pulling? → Tapered brush.
Are there any brushes specifically designed for mature skin in 2026?
Yes! Brands have caught on to the demand for gentler, more precise tools. Here are a few standout options (updated for 2026):
- Angled concealer brush: Designed for precise under-eye blending, with ultra-soft bristles.
- Real Techniques Brightening Concealer Brush (Kitten Paw): A tapered, fluffy head that diffuses product without tugging.
- Mini angled flat-top kabuki brush: Compact and dense, perfect for targeted application.
- Dual-ended concealer brush: Features one angled tip and one tapered tip for versatility.
How to choose:
- Under-eyes? Go for angled or kitten paw shapes.
- Full-face blending? Look for tapered or flat-top heads.
- Minimalist routine? A dual-ended brush saves space.
Final Thoughts: The One Thing to Remember
The best concealer brush for mature skin isn’t the one with the highest rating or prettiest packaging—it’s the one that passes your 30-second checklist. Mature skin doesn’t forgive tugging, creasing, or harsh bristles, so prioritize what actually matters:
- Synthetic fibers that glide without pulling.
- A secure ferrule that stays put.
- A shape that matches your routine (angled for under-eyes, tapered for blending).
Before you buy, run the Finger Roll and Mirror Tests. If the bristles splay or the brush drags, it’s not the right tool. The difference between a brush that works and one that fights you comes down to these small, verifiable details.
And if you’re still unsure, our guide to clean makeup brushes for sensitive skin has more tips to keep your routine smooth and irritation-free.
The right brush won’t just cover—it’ll blend smoothly, without announcing every fine line.
Keep reading
Keep exploring the topic with these related guides:
- Brush vs Finger for Concealer: 5 Expert Tips (2026)
- Best Brushes for Under-Eye Concealer: 6 Expert Picks (2026)
Next step: Ready to streamline your makeup routine without compromising on quality? This system is built for creators who want flawless results, fast. Master pro-level blending in just 5 minutes