
Makeup Brush Uses: The 12 Essential Brushes & How to Master Each
Key Takeaways
To master makeup brushes, select the right shape, bristle type, and technique for each task—no single brush excels at all functions. Precision and care are critical: wrong tools or motions ruin results, while proper maintenance ensures longevity.
- Brush shape/bristles > price: Flats fail at blending; synthetics can’t hold powder—prioritize bristle type.
- Motion dictates function: Blending needs “windshield wiper” strokes; contouring requires sharp taps.
- Clean weekly: Use mild soap, store upright, and replace frayed bristles for even application.
- Troubleshoot first: Streaky foundation or pooled blush signals a brush mismatch—adjust density or technique.
- No all-in-one fix: Even “universal” brushes have limits—task-specific tools deliver best results.
The 12 Makeup Brush Types You Actually Need (And When to Use Them)
Mastering makeup brushes isn’t about owning every brush in the store—it’s about matching each task to the right tool. The wrong brush ruins results faster than any other mistake. Here’s the definitive list of the 12 essential brushes, their shapes, bristle types, and the exact techniques they demand.
1. Foundation Brush (Flat, Dense Bristles)
For: Seamless base application, whether liquid, serum, or cream foundation. Technique: The windshield wiper—start in the center of your face and sweep outward in long, even strokes. Avoid circular motions; they drag product and create streaks.
Why it works: Dense, flat bristles distribute product evenly without clumping. A brush with a slightly angled handle lets you reach the jawline without lifting your wrist.
Pro tip: Tap off excess product before applying—overloading the brush creates a cakey finish. If your foundation looks patchy, you’re either using the wrong brush or applying too much pressure.
2. Concealer Brush (Small, Angled, Tapered)
For: Precision under-eye correction and blemish coverage. Technique: Dot-and-blend—apply concealer in small dots under the eyes, then feather outward with light, upward strokes. For blemishes, dab first, then blend with the brush held at a 45-degree angle.
Why it works: Tapered bristles allow control over tiny areas, while the angle helps you reach under the eye without smudging. A brush with synthetic bristles (like nylon) blends better than natural hair for creams.
Common mistake: Pressing too hard—this pushes concealer into fine lines. Instead, use the brush to lift product, not push it.
3. Blending Brush (Soft, Fluffy, Dome-Shaped)
For: Powder products—translucent, bronzer, blush, and highlighter. Technique: Feathering—press the brush into the powder, then tap off excess. Use a sweeping motion to blend edges, working from the center outward. For blush, smile and swoop upward toward the temples.
Why it works: Fluffy bristles pick up powder without clumping, while the dome shape covers larger areas evenly. A brush with a split tip (like the Morphe M437) helps with precision.
Brush lifespan check: If the bristles splay outward when you tap them, it’s time to replace it—powder gets trapped in the frayed fibers, making application uneven.
4. Contour Brush (Small, Angled, Stiff Bristles)
For: Sculpting cheekbones, jawlines, and nose definition. Technique: Precision taps—dip the brush lightly into powder or cream, then pat (don’t swipe) onto the hollows. Use short, controlled strokes to avoid dragging product.
Why it works: Stiff bristles hold their shape for sharp lines, while the angle lets you reach tight spots. A brush with a tapered tip (like the Real Techniques Sculpting Brush) gives more control than a flat-edged one.
Pro tip: Less is more—over-applying contour flattens your features. Start with a light layer and build up only where needed.
5. Blush Brush (Angled, Tapered, Medium Density)
For: Natural flush on cheeks, temples, and sometimes the bridge of the nose. Technique: Smile and swoop—apply blush to the apples of your cheeks (where you’d blush naturally), then sweep upward toward the temples. For a lifted effect, angle the brush slightly downward.
Why it works: Medium-density bristles pick up enough product for coverage without looking heavy. The angle helps you reach the temples without smudging.
Brush swap: If you’re minimalizing, a blending brush can double as a blush brush—just use a lighter hand.
6. Eyeshadow Blending Brush (Small, Dense, Tapered)
For: Creating gradient effects between eyeshadow shades. Technique: V motion—press the brush into the darker shade, then drag it upward in a “V” shape to blend into the lighter shade. Work from the crease outward.
Why it works: Dense bristles pack pigment for vibrant color payoff, while the tapered shape lets you reach the inner corners of the eye.
Common mistake: Using a dirty brush—old product buildup muddies colors. Clean your blending brush after every use.
7. Cream Eyeshadow Brush (Flat, Dense, Synthetic Bristles)
For: Applying cream or liquid eyeshadow with precision. Technique: Press and blend—press the brush into the product, then pat it onto the lid. Use the flat edge for even coverage, then blend with the tapered tip.
Why it works: Synthetic bristles (like nylon) glide smoothly over cream formulas without pulling. A flat brush ensures full coverage in one swipe.
Brush lifespan check: If the bristles bend when you press them, the brush is too soft for cream products—opt for a firmer synthetic blend.
8. Eyeliner Brush (Thin, Precise, Angled)
For: Sharp winged liner and tightlining. Technique: Flick and drag—use the tip for fine lines, then drag the angled edge for wings. For tightlining, apply a thin line along the upper waterline before smudging.
Why it works: Thin bristles create crisp lines, while the angle helps you reach the outer corner without lifting your wrist.
Pro tip: If your liner smudges, you’re using the wrong brush—switch to a precision liner brush (like the Sigma F80) for a sharper point.
9. Brows Brush (Small, Angled, Tapered)
For: Filling in sparse brows and defining shape. Technique: Brush upward—use the tapered tip to mimic natural hair strokes. Start at the tail and work inward, brushing upward to avoid a harsh line.
Why it works: Tapered bristles mimic individual hairs, while the angle lets you reach the inner brow without smudging.
Brush swap: A detail brush (like the Morphe M696) can double as a brow brush—just use a lighter touch.
10. Lip Brush (Small, Tapered, Dense)
For: Precision lipstick application, especially for full lips or bold colors. Technique: Dot and blend—apply lipstick in small dots, then blend with the brush for a diffused edge. For lining, use the tip
How to Choose the Right Brush for Every Makeup Task
The right brush isn’t just about the job—it’s about the how. A flat brush won’t cut it for tight-lid eyeshadow, and a tapered brush will smear foundation unless you know the trick. Brush shape dictates technique, while bristle type decides whether your product even moves. Here’s how to match them without overbuying.
The Shape-Tech Connection
Brushes aren’t interchangeable. Their geometry forces your hand:
- Angled brushes (like the one for eyeliner) are the Swiss Army knives of precision—tight corners, sharp lines, and under-eye application demand the right angle to avoid smudging.
- Flat brushes (foundation, eyeshadow) are the workhorses of coverage. Their broad surface distributes product evenly, but only if you use the windshield wiper motion: sweep across the skin in overlapping strokes, not dabbing.
- Tapered brushes (blush, bronzer) let you feather edges smoothly. The narrower tip gives control, but the wider base catches stray product—critical for blending without streaks.
Pro move: Test a brush on your hand first. If it drags, the bristles are too stiff for the product. Cream foundations need softer synthetics; powders play nicer with natural hairs.
The Bristle Code
Not all bristles are created equal:
- Synthetic (nylon, taklon): The go-to for creams, liquids, and gels. Taklon’s split ends grip product better, but synthetics can’t handle heat (like setting sprays).
- Natural (goat, squirrel): For powders only. Goat is budget-friendly but harsh on sensitive skin; squirrel’s dense hairs blend like magic but cost a premium.
- Mixed (synthetic + natural): A hybrid for blending powders without losing texture.
The three-bristle rule: If a brush has three distinct zones (short, medium, long bristles), it can replace two single-purpose brushes. A good blending brush, for example, can handle bronzer, blush, and even contour—if you master the feathering motion (light, sweeping strokes outward).
The Minimalist Swap
Most brush collections are overkill. Here’s how to cut down:
- One blending brush can replace 3–4 powder brushes. Train yourself to feather instead of dabbing.
- A single angled brush handles eyeliner, brow gel, and even precision eyeshadow.
- A tapered brush does blush, bronzer, and highlighter—if you use the right motion (short, staccato taps for contour; long, gliding strokes for blush).
Warning: Don’t sacrifice quality for quantity. A cheap brush with uneven bristles will streak your foundation no matter how you hold it.
When to Replace a Brush
Brushes don’t last forever. Watch for these signs:
- Bristles splaying outward (from heat or aggressive cleaning).
- Product buildup that won’t rinse out (a sign the bristles are frayed).
- Uneven strokes (a symptom of bent or broken hairs).
The test: Hold the brush at a 45-degree angle and run your fingernail down the bristles. If it snags, the brush is past its prime.
Image: 
Final rule: Brushes are tools, not accessories. The right one for the job isn’t about prestige—it’s about control. Start with the three-bristle rule, test every brush on your hand, and never let a brush dictate your technique. If it’s fighting you, you’ve got the wrong tool.
The 5 Most Common Makeup Brush Mistakes (And How to Fix Them)
Flawless Blending in 5 Minutes: The Pro Makeup Artist’s Brush System for Busy Creators — Struggling to blend foundation flawlessly without streaks or patchiness? The right brush and technique make all the difference—especially when time is tight. Includes 1 free bonus resource. 5-minute pro foundation blending system
You’re holding the right brush for the job—but still getting streaks, clumps, or uneven results? The problem isn’t the brush itself. It’s how you’re using it. Here are the five most common mistakes, and the fixes that actually work.
1. Using a Blending Brush for Liquid Foundation
Problem: A fluffy blending brush is for powder or cream—it’ll smear liquid foundation into a patchy mess. The bristles are too soft to control the product, and the strokes drag instead of glide.
Fix: Swap to a flat, dense brush (like a kabuki or stencil brush). Load it with product, then use the “windshield wiper” technique: start at the center of your face and drag outward in smooth, overlapping strokes. Press lightly—liquid foundation needs pressure control, not brute force.
Why it fails: The wrong brush turns foundation application into a guessing game. A blending brush can’t distribute liquid evenly, so you end up touching up instead of blending.
2. Pressing Too Hard with Powder Brushes
Problem: Powder compacts when you press down. A heavy hand turns blush into a cakey slab and bronzer into a muddy smear.
Fix: Use the “press and release” motion. Tap the brush lightly against your hand to remove excess, then press just until the brush makes contact—no digging. Release immediately and glide upward in short, feathered strokes.
Why it fails: Powder needs distribution, not application. Pressing hard forces the product into the skin instead of letting it settle naturally.
3. Overloading Cream Brushes (The “Messy Blot” Mistake)
Problem: Cream products (highlighter, blush, cream contour) clump when you load too much. The result? A blotchy, uneven finish that looks like you finger-painted your face.
Fix: Try the “dot and blend” method:
- Load the brush with a small amount of product (think: the size of a pea for cream blush, a grain of rice for highlighter).
- Pat it onto the skin in tiny dots.
- Blend with a clean brush in circular motions.
Why it fails: Cream products need precision, not volume. Overloading turns them into a paste that doesn’t spread.
4. Using the Wrong Brush for Contour (The “Visible Line” Trap)
Problem: A flat brush or angled brush won’t give you sharp definition. You end up with a soft, blended shadow instead of a crisp contour line.
Fix: Angle the brush downward and use a small, tapered brush (like a contour brush or even a dense eyeliner brush). Load it with product, then:
- Start at the hollow of your cheekbone.
- Drag downward along your cheekbone, keeping the brush flat against your skin.
- Blend upward with a clean brush to soften the edges.
Why it fails: Contour isn’t about blending—it’s about placement. The wrong brush turns it into a wash instead of a shadow.
5. Not Cleaning Brushes Properly (The Silent Product Killer)
Problem: Dirty brushes breed bacteria, trap old product, and turn your makeup into a breeding ground for breakouts. Even worse? They ruin your current product by mixing it with last week’s leftover foundation.
Fix: The “squeeze and swirl” method:
- Fill a bowl with mild shampoo or brush cleaner (no harsh soaps).
- Gently squeeze the brush handle to open the bristles.
- Swirl the bristles in the solution for 10–15 seconds (longer for heavily used brushes).
- Rinse under warm water and reshape the bristles.
- Lay flat to dry (never upright—it warps the handle).
Pro tip: Replace brushes when the bristles **
Brush Care 101: How to Make Your Brushes Last Years
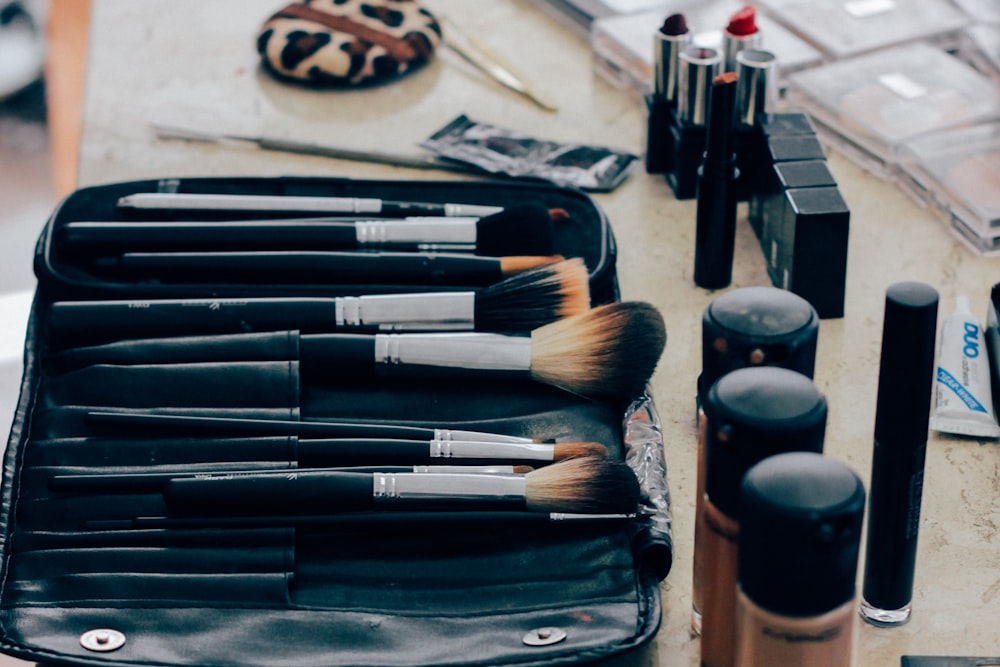
The 30-second rule is your first defense. The moment you finish applying makeup, rinse your brushes in lukewarm water to dissolve product buildup. Let the bristles fan out naturally—never wring them—then tap them gently against the sink or a towel to remove excess water. This prevents makeup from hardening into the fibers, which is the fastest way to ruin a brush. Pro tip: If you’re in a rush, even a quick rinse beats doing nothing. The longer product sits, the harder it is to remove later.
Storage: The Silent Shape Killer
Brushes don’t just need cleaning—they need breathing room. Store them upright in a vented container (think: a brush roll with holes or a stand designed for airflow) to prevent bristles from warping or mold from taking hold. Never toss them into a closed drawer or bag—moisture and heat are a bristle’s worst enemies. And here’s the rule you’ll regret breaking: Keep them away from direct sunlight. UV rays degrade synthetic fibers faster than you’d think, turning them brittle in weeks.
When to Replace: The Three Tells
A brush doesn’t just wear out—it fails visibly. Watch for these three signs:
- Frayed bristles at the base or tips (a sign of over-washing or old age).
- Uneven shape—if the bristles no longer fan out evenly, they’ve lost their structure.
- Product refusal—if it can’t hold powder or cream after a thorough cleaning, the bristles have lost their grip.
The DIY cleaner that works every time: Mix 1 part mild shampoo (no sulfates) with 3 parts warm water. Swirl the brush in the solution for 10–15 seconds, then rinse until the water runs clear. Never use soap or hot water—heat melts synthetic fibers, and harsh detergents strip natural oils from boar bristles. For stubborn buildup, let the brush soak for 5 minutes before rinsing.
The Pro’s Secret: Cool, Dry, and Protected
Brushes are delicate tools, not toys. Store them in a cool, dry place—a bathroom vanity or a drawer with a silica gel packet works well. If you travel with them, use a hard case (like a makeup bag with a zippered compartment) to protect bristles from bending. And here’s the truth most brands won’t tell you: Brushes last longer when you treat them like the precision tools they are. A little care goes a long way—think of it as the difference between a $20 brush and a $200 one.
Key Takeaway: Brushes don’t last years by accident—they last because you clean them immediately, store them right, and replace them before they fail. Skip any of those steps, and you’re paying for a new brush every few months.
Makeup Brush Techniques: Master the 4 Essential Motions
Mastering makeup brush techniques isn’t about the brush itself—it’s about how you move it. The right motion turns a mediocre brush into a precision tool, while the wrong one ruins even the best one. Here are the four foundational techniques every makeup artist uses, broken down with the exact hand movements that make them work.
1. The Windshield Wiper (Foundation & Concealer)
What it does: Creates a seamless base by blending product in one clean direction, just like a wiper clearing rain from a windshield.
How to do it:
- Load your brush with foundation or concealer (use a damp sponge for liquid products to avoid streaks).
- Start at the center of your face and sweep outward in a single, unbroken motion—like you’re wiping away a smudge.
- Key detail: Keep your wrist loose and your elbow steady. The brush should glide, not press. For under-eyes, use a smaller, controlled stroke.
- Common mistake: Overloading the brush or pressing too hard, which causes clumping. Less is more—tap off excess before applying.
Why it works: The flat brush’s dense bristles distribute product evenly when dragged, not dabbed. This is how pros get that “no-makeup makeup” finish.
2. Feathering (Powders & Setting Sprays)
What it does: Softly diffuses powder or spray to blend edges and avoid a cakey look.
How to do it:
- Lightly tap your powder brush on your wrist to remove excess (never shake—it fluffs the bristles).
- Hold the brush at a 45-degree angle and tap the center of your face (cheeks, forehead, chin).
- The motion: Fan outward in short, feathering strokes—like you’re dusting crumbs off a table. Think “light as a whisper.”
- Pro tip: For setting spray, hold the brush 4–6 inches away and mist in the same feathering motion. This prevents patchiness.
Why it works: The tapered or fluffy brush shape disperses product in a way that mimics the natural diffusion of powder or spray particles.
3. Precision Tap (Contour & Eyeliner)
What it does: Delivers exact, controlled product placement—critical for sharp contours and crisp eyeliner.
How to do it:
- For contour: Dip your brush in cream or powder, then tap it sharply against your wrist or palette to remove excess. The bristles should be almost dry.
- The tap: Use your dominant hand’s ring finger to stabilize the brush, then tap the tip onto the skin with your middle finger. One tap = one line of product.
- For eyeliner: Load a small amount of product onto the brush, then tap the tip onto the lash line or contour area. No dragging. One tap = one defined edge.
- Common mistake: Over-tapping, which smudges. Less product = sharper results.
Why it works: The angled or tapered brush shape lets you “draw” with precision. This is how you get that sculpted cheekbone or a winged liner that stays put.
4. Dot and Blend (Cream Products: Highlighter, Blush, Bronzer)
What it does: Applies cream products in a way that mimics the natural flush of skin.
How to do it:
- Dot a small amount of product onto the skin (use your ring finger for precision).
- The blend: With a fluffy or domed brush, press lightly and circle outward in small motions—like you’re stirring a pot of soup. Start from the center and work outward.
- Pro tip for blush: Smile to find your cheekbones, then sweep the brush upward in a “swoop” motion (see bonus technique below). This lifts color into the apples of your cheeks.
Why it works: The circular motion mimics how blush naturally settles in the skin’s creases, while the dot-and-blend method prevents streaking.
Bonus: The Smile and Swoop (Blush Application)
What it does: Places blush in the exact spot where it looks most natural—highlighting the cheekbones without overdoing it.
How to do it:
- Smile to locate your cheekbones (the peaks you feel under your eyes).
- Sweep the brush upward in a curved motion, starting from the apples of your cheeks and moving toward your temples.
- Key detail: The brush should glide, not press. Think “a feather landing on skin.”
Why it works: This mimics the way blush naturally rises when you smile, creating a lifted, youthful effect.
The One Rule That Fixes 90% of Brush Mistakes
Every technique fails when you ignore this: the brush should never press into the skin—it should glide over it. Pressing causes streaks, clumps, and an uneven finish. Instead:
- Use the brush to distribute product, not push it.
- Tap off excess before applying.
- Work in thin layers—build coverage gradually.
Visual cue: If your brush leaves a visible mark when you lift it, you’re pressing too hard. The goal is invisibility—product should disappear into the skin.
Next up: How to Choose the Right Brush for Every Makeup Task — because even the best technique won’t save you if the brush is wrong for the job.
How to Build a Minimalist Makeup Brush Collection
You don’t need a brush for every task—just the right ones. The 5-brush essentials cover 90% of daily makeup: foundation, blending, contour, blush, and brows. That’s it. Everything else is a luxury, not a necessity.
The Core Five (And Why They’re Enough)
- Flat Foundation Brush – The workhorse for seamless base application. Look for a dense, tapered taklon brush that holds product without shedding. Pro tip: The windshield-wiper motion (sweeping in one direction) prevents streaks better than dabbing.
- Blending Brush – A fluffy, dome-shaped brush for powder, bronzer, and eyeshadow. One high-quality taklon brush can replace three synthetics: powder, blush, and contour. Trade-off: Synthetics shed less but blend less smoothly.
- Angled Contour Brush – Precision is key here. A tapered brush with firm bristles lets you define cheekbones without smudging. Multi-use hack: This same brush works for brow definition if you flip it.
- Blush Brush – A smaller, softer brush with a slightly rounded tip for a diffused flush. Budget swap: A single taklon brush can do blush and contour if you adjust pressure.
- Brow Brush – A fine, tapered brush with a pointed tip for shaping. No-compromise rule: Never use a flat brush for brows—it’ll look like you’ve drawn a line, not sculpted.
When to Splurge (And Where to Save)
Invest in one high-quality blending and contour brush—these are the tools that make or break professional results. A $25 taklon brush will outlast three drugstore synthetics. Where to cut costs: Blush and brow brushes can be swapped without sacrificing quality.
Multi-Use Brushes That Actually Work
- Angled Brush: Blush, contour, and brow definition (flip the brush).
- Taklon Blending Brush: Powder, bronzer, and eyeshadow (adjust pressure).
- Flat Brush: Foundation and eyeshadow (if you’re okay with a slightly heavier hand).
The Minimalist Starter Set
Start with a versatile blending brush—it can replace 3-4 single-purpose brushes. Add the flat foundation brush next, then the angled contour. Blush and brows can wait until you’ve mastered the basics.
Final Rule: If you’re not using a brush weekly, it’s not essential. Your collection should fit in a small case, not a vanity drawer. Exception: A high-end blending brush is worth the splurge—it’s the one tool that elevates everything else.
Frequently Asked Questions About Makeup Brush Uses
Can I use the same brush for foundation and concealer?
No—never. Foundation and concealer require different brush shapes and techniques to avoid streaks or cakey buildup. A dense, flat brush (like a kabuki or stippling brush) works for foundation because it distributes product evenly in broad strokes. But concealer needs a smaller, tapered brush (like a dotter or angled brush) to apply precisely under the eyes or on blemishes without feathering.
The mistake? Using a blending brush (meant for eyeshadow) for either—it’ll smear foundation and drag concealer. Pro tip: If you’re minimalist, a small, dense brush (like a mini kabuki) can sometimes work for both, but only if you clean it thoroughly between uses to avoid product cross-contamination.
How do I know if my brush is too old?
A brush doesn’t have an expiration date, but three physical cues mean it’s time to replace it:
- Bristles that won’t spring back – Press the ferrule (the metal band where bristles meet the handle). If they stay bent or splay unevenly, the glue degraded.
- Dry, brittle bristles – Run your fingers along the tips. If they feel rough or flakey, the synthetic fibers (or animal hair) have broken down.
- Product buildup that won’t wash out – Even after deep cleaning, if makeup clumps up like cement, the bristles’ texture is permanently damaged.
Brush lifespan hack: Animal hair brushes (like sable) last 2–3 years with proper care, while synthetic blends (like taklon) may last 1–2 years—but it’s the condition that matters, not the calendar.
What’s the difference between a blending brush and a powder brush?
They’re not interchangeable, and using the wrong one ruins your makeup:
| Blending Brush | Powder Brush |
|---|---|
| Shape: Flat, slightly angled, or tapered | Shape: Rounded, dome-like, or slightly tapered |
| Bristles: Soft, fluffy (synthetic or goat hair) | Bristles: Stiffer, denser (horsehair or taklon) |
| Job: Smooths eyeshadow, bronzer, or blush into skin | Job: Sets powder onto skin (no blending needed) |
| Motion: Feathering (light, windshield-wiper strokes) | Motion: Dabbing (press-and-release, no dragging) |
Common mistake: Using a blending brush for powder leaves a streaky, uneven finish. A powder brush for blending? It’ll drag and smear. Fix: Keep them separate—or invest in a dual-purpose brush with a split ferrule (one side for powder, one for blending).
Can I use my fingers instead of a brush for some makeup?
Yes—but only for specific products and techniques. Fingers work best for:
- Cream blush or bronzer (warm with your hands first to melt the product, then press into skin).
- Lipstick or gloss (for a diffused, natural look).
- Setting powder (press gently with fingertips for a seamless finish).
Where fingers fail:
- Eyeshadow or eyeliner (precision matters—your hands are too broad).
- Foundation or concealer (can drag and streak unless you’re a pro at finger-stippling).
- Waterproof mascara (fingers spread it unevenly).
Pro move: For blush, dot the product on your cheekbone first, then blend with your fingers—this mimics the motion of a brush but avoids drag.
How do I clean brushes with waterproof products?
Waterproof mascara, longwear foundation, and cream products won’t dissolve in water, so you need a three-step method:
- Rinse with warm water – This removes some surface product, preventing clumps.
- Use a gentle shampoo or brush cleaner – Work in tiny circles at the base of the bristles (where dirt hides). Avoid harsh soaps—they strip oils that keep bristles flexible.
- Deep clean monthly – Soak in mild dish soap + warm water (10–15 mins), then rinse. For stubborn buildup, **scrub with a soft
Final Thoughts: Your Makeup Brush Mastery Plan
Here’s your roadmap to brush perfection—no clutter, no guesswork, just results. Start with the five essentials (foundation, blending, contour, blush, brows) and master their techniques before adding anything else. That’s 90% of daily makeup covered with zero fluff. When you’re ready to upgrade, focus on quality blending and contour brushes—they’re the difference between amateur streaks and seamless pro work. And never skip the 30-second rinse after use: lukewarm water, no wringing, and let the bristles dry flat. That simple habit extends their life and keeps your skin safe.
The real mastery comes from experimentation. Swap shapes and bristle types—dense for powder, soft for cream, angled for precision—until you find your perfect match. And listen to your brushes: if they shed, drag, or lose their shape, replace them. No “good enough” here. The right tool makes all the difference—so don’t settle for brushes that don’t fit your technique.
Your next step? Pick one technique to refine this week. Try the windshield-wiper motion for contour or the feathering stroke for blush, and watch how the brush responds. Small tweaks lead to big upgrades. Now go make it count.
Keep reading
Keep exploring the topic with these related guides:
- Spectrum Makeup Brushes 3-Piece Set: 5 Pro Tips
- Makeup Brushes for Sensitive Skin: 6 Criteria to Choose Safely
Next step: Ready to master blending like a pro? Skip the trial-and-error—start with a system designed for speed and precision. effortless flawless makeup in minutes