
How to Store Makeup Brushes So They Last for Years (2026)
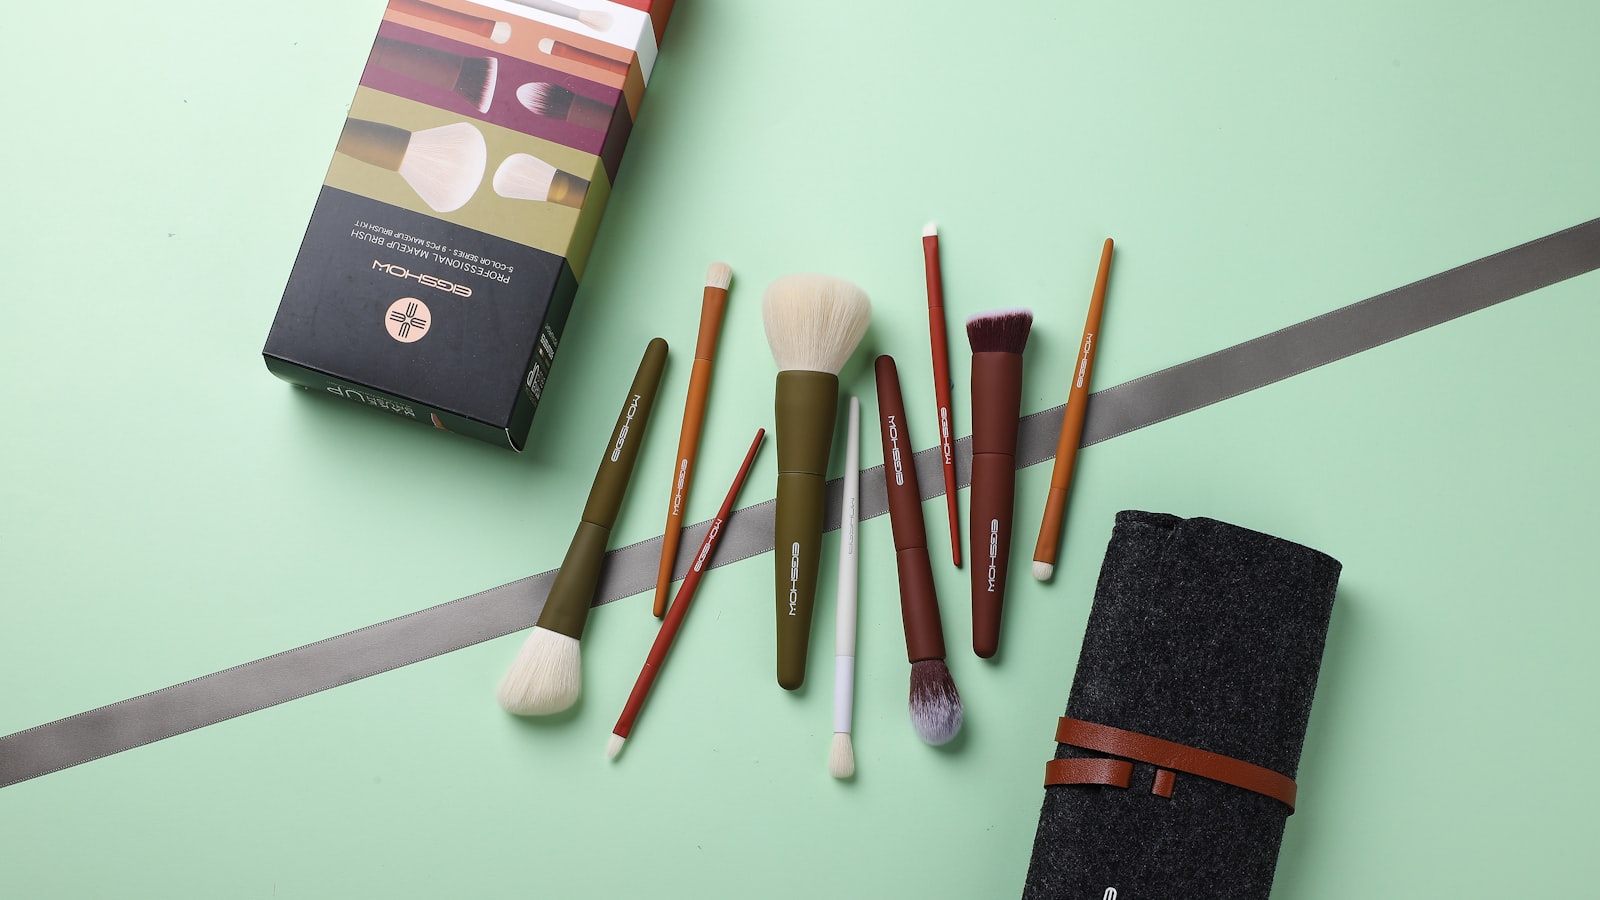
Photo by William Shu on Unsplash
Key Takeaways
Store brushes upright in a dry, ventilated container—bristles up, never down. That single habit prevents splay, preserves shape, and slashes bacteria buildup. Done right, brushes last 3–5 years; left loose in a drawer, they collapse in 6–12 months.
Skip the bells-and-whistles organizers. What matters isn’t the price tag; it’s whether the container meets four core criteria: breathability (mesh or vents), upright stability (no rolling or toppling), bristle protection (no crowding), and easy access (so you actually use it).
Test any storage before you buy. The DIY swap is simple: fill a jar with water, nest your brushes inside, and leave it overnight. When you pull them out, check three things—shape hold, zero moisture at the ferrule, and no bristle twist—those are the real failure points, and they’ll show up before you spend a dime.
Match the setup to your routine. Are you a traveler? Prioritize a hard case that fits in a toiletry bag. Full vanity? Go for a wide base and deep dividers to keep brushes separated. Minimalist? A single slim cup with a removable mesh lid is all you need—one spec decides it all: bristle exposure to air.
Why Your Current Brush Storage is Ruining Your Brushes
Ever pull out a brush that once had a perfect dome—and now looks like it lost a fight with gravity? That’s not just aging; it’s bristle-down storage at work. When bristles spend hours (or days) pointing downward, gravity tugs at the individual hairs, slowly bending them into a permanent splay. Over time, the brush loses its ability to blend smoothly, and you’ll never get that crisp edge back—no matter how much you re-fluff it. The damage isn’t reversible.
But that’s just the start. Closed containers—whether drawers, sealed jars, or zippered pouches—turn into bacteria incubators. Every time you dip a brush back into product, moisture clings to the bristles. Trap that moisture in an unventilated space, and you’ve basically built a petri dish. The result? Breakouts, funky odors, and bristles that start breaking down from the inside out. If your brushes smell off after one use, humidity is the culprit—and your storage method is feeding it.
Then there’s the crush factor. Loose brushes in a drawer act like billiard balls—constantly rolling, bumping into compacts, swatches, or other tools. The bristles take the brunt, fraying at the tips and losing definition faster than if you’d just left them alone. It’s like storing a fine wine on its side: the shape is what gives it value, and you’re grinding it into the table.
Heat and sunlight are the silent glue-killers. The adhesive holding bristles to handles isn’t built to handle UV rays or warmth—both weaken the bond over time. You might not notice it for months, but eventually, you’ll find half your brush is dangling off the handle, or bristles start shedding mid-application. It’s the fastest way to turn a $30 brush into a $30 paperweight.
Here’s the kicker: none of this is irreversible. Store your brushes upright—bristles up— in a spot that’s dry, cool, and exposed to airflow. A simple glass or ceramic cup on your vanity (away from direct sunlight) does more than most $80 organizers advertise. The specs you need to check? Ventilation holes, a stable base to prevent tipping, and a design that keeps brushes separate. Ignore those, and you’re back to square one.
The 5 Non-Negotiable Criteria for Any Brush Storage Solution
Brush storage isn’t about pretty containers—it’s about mechanical survival. Every time you toss your brushes into a drawer or shove them into a closed cup, you’re compressing bristles, trapping moisture, and inviting deformation. The right holder doesn’t just look better; it actively prevents the three silent killers of brush longevity: splay, bacteria, and glue degradation. Here’s what to compare—no brand names, no specs, just the hard rules that decide whether your brushes keep their shape for years or turn into sad, fuzzy clubs.
1. Orientation: Bristles Must Stay Up, or They’ll Splay for Good
Why it matters: Gravity is the enemy. When bristles hang downward or lie flat, their own weight pulls the fibers apart at the ferrule—the metal band where the bristles meet the handle. Over time, this permanent deformation flares the brush into a useless, splayed mess. The only way to stop it is to keep bristles pointing straight up from day one.
How to verify it:
- Hold the holder to a light and look inside. Can you see the ferrule-to-bristle angle clearly? If the bristles are angled more than 10 degrees from vertical, the holder is already encouraging splay.
- Test it with a cheap brush: Insert one and leave it for a week. If the bristles curve at the base when you remove it, the holder failed the first criterion.
Red flag: Any storage that forces bristles to bend, fold, or lie flat—including cup-style holders, drawers with tight dividers, or containers where brushes are stacked horizontally. If you wouldn’t store a paintbrush that way, don’t do it to your makeup brushes.
2. Ventilation: Closed Containers are Bacterial Petri Dishes
Why it matters: Moisture is the second-leading cause of brush decay—not dirty brushes, not old brushes, but wet ones. Closed containers trap evaporated water from your makeup, your hands, even the air itself. That humidity breeds mold, mildew, and bacteria that eat away at glue and bristle fibers from the inside out.
How to verify it:
- Touch test: Press the inside of the container with your fingertip. Does it feel damp, slick, or cool after a few hours? That’s trapped moisture.
- Breath test: Hold the container at arm’s length and exhale sharply. If you hear a hiss or see condensation form, the material isn’t breathable enough.
- Material check: Avoid wood (absorbs water like a sponge), cardboard (harbors mold), and foam (traps condensation). Look for perforated plastic, mesh, or slotted designs where you can see air moving.
Red flag: Any storage that feels sealed—even if it’s “elegant” or “luxury.” If you can’t see through it or poke holes in it with your finger, it’s not ventilated.
3. Stability: A Wobbly Holder Dumps Brushes—and Crushes Bristles
Why it matters: Gravity strikes again. A holder that tips, slides, or collapses under weight means brushes are dropping onto hard surfaces, crushing their delicate bristles on impact. The damage isn’t always visible right away—it’s a slow crunching of fibers that starts at the tips and works inward.
How to verify it:
- Push test: Place the holder on your vanity and press down firmly with one finger on the edge. Does it rock, tilt, or slide? A stable holder should stay put even when you nudge it.
- Drop test (gentle):
How to Test Any Brush Storage Before You Buy (DIY Checklist)
 Photo by Kristina Evstifeeva on Unsplash
You wouldn’t buy a car without test-driving it — so why commit to brush storage without running these five quick checks? Each one tells you whether the organizer will actually preserve your brushes or silently sabotage them. Do these before you drop cash on anything labeled “brush holder” or “brush organizer.”
1. The Perpendicular Test: Does the base hold the brush upright?
Grab a brush and press it straight into the holder. If the handle leans more than a finger’s width from vertical (that’s about 15 degrees), the base isn’t stable enough — gravity will pull the bristles into a permanent splay. A good holder should feel planted, not wobbly. If it tips when you let go, the walls are too flimsy or the base is too narrow. Red flag: your brush will droop within weeks.
2. The Breath Test: Can air flow through the bristles?
Hold the brush by the handle and blow gently through the bristles. You should feel air pass through with almost no resistance. If you feel puffs of air blasting around the sides or back-pressure building up, the holder lacks ventilation — trapped humidity is the fastest way to breed bacteria and degrade the glue holding your bristles in place. Red flag: your brushes will smell before they shed bristles.
3. The Tap Test: Is the material thick enough to last?
Knock the empty holder sharply against a table or countertop. A high-quality organizer will ring with a solid thunk. If it clatters with a hollow echo, the material is too thin — it’ll warp under heat, crack with age, or collapse under a full set of brushes. Red flag: your organizer will start to sag within months, leaving bristles crammed into an uneven shape.
4. The Clearance Check: Do bristles have room to breathe?
Insert a brush fully into the holder. The bristles should stop at least half an inch above the bottom of the container. If they bottom out, the holder is too shallow — bristles will get crushed or bent when you pack tools tightly, and any moisture trapped there accelerates glue breakdown. Red flag: your brushes will come out with permanently flared or matted bristles.
5. The Moisture Test: Is the material non-stick and non-absorbent?
Lightly wet two fingers and press them against the inside walls of the container. If your fingers stick, or the material absorbs water (you’ll see a dark spot where you touched it), it’s absorbing moisture from the air — and your brushes will be next. Red flag: your brushes will expand and contract with humidity, loosening the ferrule and inviting mold.
Bottom line: Run this checklist on any storage solution before you buy. If it fails even one test, put it back on the shelf — your brushes will thank you later.
What to Check Before You Buy Any Brush Organizer
Flawless Blending in 5 Minutes: The Pro Makeup Artist’s Brush System for Busy Creators — If you’re tired of fighting splayed bristles and wasted brushes, the Pro Makeup Artist’s Brush System is designed to keep your tools in peak condition—so you can blend like a pro without the hassle. Includes 1 free bonus resources. upgrade to a brush system that preserves bristle shape
Not all brush organizers are created equal — and some will actively shorten the life of your brushes before you even notice. The difference comes down to mechanics, not marketing. Before you commit to any product, run this checklist against the organizer you’re considering. If it fails any item, skip it; if it passes all five, it’s worth your money.
Orientation: The One Way to Prevent Damage
Brushes are designed to hold their shape when stored bristles up. Anything that flips or flops them horizontally, folds them inside a pouch, or jams them point-down into a tight cylinder forces the bristles to splay under their own weight. That splay isn’t reversible — gravity wins every time.
Grab the organizer and hold one of your brushes perpendicular to the slots or stands. Does it stay upright without leaning or wobbling? If the brush can rock side to side or droop toward the base, the slots are too wide or the stand isn’t rigid. A loose fit is the same as no fit — it lets the bristles deform over time.
Ventilation: The Silent Enemy of Damp Bristles
Moisture is the second-leading cause of brush degradation, right after gravity. If your organizer traps humidity — whether it’s a sealed pouch, a jar with a tight lid, or a fabric-lined cup — expect bacteria and mold to colonize the bristles within weeks. Even if the product claims to be “dry,” check the airflow.
Hold the organizer up to a light and look for gaps or vents between the slots and the base. If you can’t see straight through the openings when you hold it to the light, it’s not ventilated enough. Smaller gaps restrict airflow just as much as no gaps at all.
Base Stability: Don’t Let the Organizer Tip Over
A wobbly base turns a tidy vanity into a tripwire. If your organizer rocks when you nudge it, or tips when you pull a brush from the back row, it’s only a matter of time before it hits the floor — or worse, topples onto your face.
Place the organizer on your countertop and press down lightly on the top edge. Does it tilt or slide? If it moves at all, it’s too unstable for daily use. Look for a wide, flat footprint or weighted bases made of denser materials like ceramic or thick acrylic.
Bristle Clearance: Space to Breathe, Not to Bend
Brushes need room to stay straight — but not all slots are sized for it. Too narrow, and the bristles get compressed; too shallow, and they catch on the rim when you pull them out. Either way, the bristles deform.
Take your largest brush and slide it into the organizer. Does it fit snugly but not tightly? Does the ferrule clear the opening without resistance? If the brush sticks, scrapes, or bends during insertion, the slot is the wrong size. A brush should slide in and out smoothly, with no pressure on the bristles.
Material Inertness: Avoid the Plastic Trap
Plastics aren’t inherently bad, but cheap PVC or dyed acrylics can leach chemicals or leave residue on your brushes over time. Worse, some plastics absorb oils from your makeup and transfer them back onto clean brushes, speeding up degradation.
Look at the base and slots of the organizer. Does it feel greasy to the touch, or does it smell faintly of plastic when you sniff near it? If so, it’s a red flag. Stick to organizers made of glass, stainless steel, untreated wood, or food-grade silicone — materials that don’t react with makeup or oils.
Which Storage Setup Fits Your Routine?
You’ve diagnosed why your current storage fails the bristles—and now you need to match a solution to how you actually use your brushes. Not all storage is created equal, and the wrong type for your routine will frustrate you before it ever saves your brushes. The good news? One spec decides everything for each trip type. Match your brushing behavior to the setup, then verify that single number before you pay.
Travel frequently? Prioritise a leak-proof case with upright slots
If you’re living out of a suitcase or gym bag, stability and protection come first. A compact, rigid case with individual upright slots keeps bristles from touching each other or the case walls, while a silicone or foam gasket seals out spills. The trade-off? You’ll sacrifice capacity—most travel cases hold 5–8 brushes max, and crowding them defeats the purpose. Before you click “buy,” check the base width: a case that’s narrower than your palm will tip when jostled, no matter how snug the slots feel on your desk.
Full vanity with many brushes? Go for a multi-tiered holder with ventilation slits
Stacking saves floor (or counter) space, but only if air can still circulate. A multi-tiered acrylic or silicone holder with open sides or slits lets brushes air-dry between uses, which is non-negotiable for dense bristle packs. The catch? Wide bases wobble if the holder’s footprint is smaller than a sheet of paper. Verify the base width relative to your heaviest brush: if the longest bristle overhangs the base by more than a finger’s width, the whole stack will sway when you grab one brush.
Minimalist setup? A ceramic cup or glass jar works if you clean it weekly
No organiser, no problem—if you’re ruthless about sanitation. A simple cylindrical ceramic cup or straight-sided glass jar keeps bristles upright and out of dust, but offers zero organisation. That means quicker degradation if you skimp on cleaning: trapped moisture and residue accelerate glue breakdown. Check the cup’s diameter against your thickest brush: if the ferrule (the metal band) wedges tightly, the bristles can’t fan out to dry, locking in bacteria.
Sensitive skin? Avoid wood or fabric-lined containers
Wood absorbs moisture and harbours mould; fabric linings trap dust and oils. For reactive skin, opt for acrylic or silicone with open ventilation—think wire racks, mesh-lined cups, or even a perforated plastic organiser. The downside? These materials scream “lab equipment,” not vanity chic. Look for “antibacterial” or “non-porous” labels on the product page; if they’re missing, the plastic itself might leach chemicals over time.
The one spec to rule them all: base width vs. bristle length
No matter which path you pick, one measurement decides if it survives your routine: the base’s footprint relative to the longest bristle in your kit. Measure your bulkiest brush from ferrule to tip, then compare that number to the organiser’s base width. If the bristle overhangs by more than a thumbnail’s width, the brush will flop, splay, or push against its neighbour—undoing every benefit of “upright storage.” Ignore weight limits, slot counts, or “universal fit” claims; they’re marketing fluff. Base width is the silent killer of brush longevity.
Step-by-Step: How to Store Makeup Brushes for Maximum Lifespan
Your brushes won’t last if you treat them like yesterday’s dirty laundry. The way you store them directly determines how long their bristles stay firm, their glue stays intact, and their handles stay free of bacteria. Do it wrong, and you’ll watch them splay outward like a startled octopus—a mechanical failure that starts with moisture trapped in the ferrule and ends with permanent distortion. The good news? This five-step routine reverses the damage before it begins.
Step 1: Clean them right, then let them breathe
Before anything touches your storage setup, your brushes need to be clean. Dirt and oils in the bristles don’t just smell—they glue fibers together and create a damp pocket inside the ferrule, the metal band that holds the bristles. When that happens, the glue softens, the bristles migrate, and suddenly your once-perfect kabuki is a splayed mess.
Use a gentle brush shampoo or dedicated cleaner. Avoid dish soap—it strips protective coatings on synthetic fibers and can leave residues that attract dust. Work the cleanser in with lukewarm water, then rinse until the water runs clear. Squeeze out excess water with a towel, reshape the bristles to their original taper, and lay them flat or hang them upside down to dry. Never store a damp brush. Even residual moisture feeds bacteria colonies that corrode the ferrule glue from the inside out.
Step 2: Stand them upright, one per slot
Now that they’re clean and bone-dry, stand them bristle-up in a holder designed to keep each brush isolated. Crowding is the enemy: when bristles press against each other or against the container walls, they deform. The synthetic fibers in many brushes have memory—they’ll try to return to their original shape if you give them space. But if they’re pinched for hours, that memory weakens, and the brush splay becomes permanent.
Check clearance before you commit. Insert a brush perpendicular to the holder. If the bristles brush against the sides or other bristles, the holder is too tight. Each brush needs its own slot. A divided acrylic cup or a tiered rack with individual sleeves works. Avoid fabric pouches—they trap humidity and turn your brushes into petri dishes.
Step 3: Park them somewhere cool, dry, and not your bathroom
Your bathroom’s humidity is the silent killer. Even if you run the fan, moisture lingers in the air—and in your brush holder. That’s the perfect environment for mold, bacteria, and glue breakdown. Keep your brushes in a well-ventilated area away from direct sunlight. A bedroom vanity, a dedicated makeup desk, or a wall-mounted rack in a low-traffic room works best.
If you must keep them near a sink, place a small dehumidifier nearby or run a small fan on low for a few hours daily. The goal isn’t luxury—it’s eliminating the conditions that cause bristle drift and ferrule corrosion.
Step 4: Rotate them weekly—top to bottom if you use tiers
Even with perfect storage, gravity is still working against your brushes. Over time, the weight of synthetic fibers settles in one direction, especially in multi-tier holders. The brush at the top of a stack bears the most pressure from the bristles below it, while the bottom brush gets compressed by the entire column.
Swap them weekly. Move the top brush to the bottom tier and the bottom to the top. You’re not just evening out the wear—you’re forcing the fibers to remember their original shape. If your holder has only one tier, rotate the brushes 180 degrees so the direction of gravity changes. This simple act prevents the gradual bending that ruins a brush’s blending power.
Step 5: Inspect monthly for moisture buildup—and act fast
Once a month, give your setup a quick audit. Pull out each brush and check the ferrule for condensation or discoloration. If you see even a film of moisture, it’s time to switch to a more ventilated container. A damp ferrule isn’t just a sign of poor storage—it’s a red flag that bacteria are already at work weakening the glue that holds your bristles in place.
If you find any condensation, move your holder to the driest spot in your home and consider adding a silica gel packet nearby. Don’t wait for visible mold—by then, the damage to your brushes is already done.
The One Rule That Outlasts All Others
Every brush, no matter the brand or price, will eventually splay if you ignore these steps. The difference between a brush that lasts years and one you replace every six months comes down to how much moisture you allow to linger and how much pressure you let the bristles bear. Follow this routine faithfully, and your brushes will reward you with crisp edges, smooth strokes, and a ferrule that stays glued together. Ignore it, and no brush—no matter how expensive—will survive the mechanical forces at play.
Frequently Asked Questions
 Photo by Maayan Nemanov on Unsplash
Brush storage seems simple until you realize how much is riding on the details. These questions come up again and again because the wrong move can turn bristles into frayed messes—or worse, breeding grounds for bacteria. Below are the real answers, stripped of fluff.
Can I store brushes in the fridge to prevent bacteria? No. Refrigeration creates condensation when the brushes warm back up, which accelerates bacterial growth and can loosen glue in the ferrule. Keep brushes cool and dry in a ventilated holder instead.
How often should I replace my brush storage holder? Replace it when you notice visible warping, warped bristles, or a smell that won’t go away even after cleaning. Clean the holder with mild soap and water monthly to prevent buildup.
Is it safe to store brushes in a makeup bag? Only if the bag is breathable and you empty it regularly. Makeup bags trap moisture and heat, turning them into petri dishes for bacteria—and the bristles will splay from being bunched up.
What’s the best DIY solution for brush storage? A pencil cup or mason jar works if you follow the 5 criteria: vertical placement, ventilation, bristle-up, no crowding, and no moisture. Leave the jar open to air overnight after cleaning to prevent trapped humidity.
Do wooden brush holders harbor mold? Wood can, especially if it’s unfinished or damp. Look for holders with sealed finishes and avoid storing wet brushes inside. If you love wood, wipe the holder with rubbing alcohol monthly to kill spores.
How to Test Any Brush Storage Before You Buy (DIY Checklist)
You wouldn’t buy a car without test-driving it — so why commit to brush storage without running these five quick checks? Each one tells you whether the organizer will actually preserve your brushes or silently sabotage them. Do these before you drop cash on anything labeled “brush holder” or “brush organizer.”
1. The Perpendicular Test: Does the base hold the brush upright?
Grab a cheap practice brush (or any brush you don’t mind ruining). Press it straight down into the holder so the handle is as close to 90° from the base as possible. Hold it for 10 seconds. If it drifts more than a finger’s width from vertical, the holder will fail the splay test over time. A good holder should feel planted—no wobble, no lean.
2. The Breath Test: Can air flow through the container?
Hold the empty container at arm’s length and exhale sharply into it. If you hear a hiss or see condensation form inside, the material traps moisture. Look for visible gaps, mesh panels, or slotted sides—anything you can stick a pencil through counts. Solid walls, wood, or foam are red flags.
3. The Ferrule Check: Will the bristles stay dry?
Fill the container with water halfway up the ferrule of a test brush (use a spare). Leave it overnight. Pull the brush out. If the ferrule is damp or the bristles feel slick, the holder fails—moisture at the glue line weakens the bond and invites bacteria. A safe holder keeps the ferrule bone-dry.
4. The Crowd Test: Do brushes touch or overlap?
Insert two brushes side by side. If their bristles overlap or press against each other, the holder is too narrow. Bristles need at least the width of one finger of space between them to avoid fraying and shape loss. If you can’t slide a credit card between bristles, the design is too tight.
5. The Tip-Off Test: Does the holder dump brushes?
Set the container on your vanity edge and gently tap the side with your knuckle. If any brush falls out or rolls, the base isn’t stable enough. A stable holder should stay put even when nudged—otherwise, brushes will land bristle-first on hard surfaces and crush over time.
Final Thoughts
Your brushes’ lifespan hinges on three mechanical essentials: upright bristles, dry storage, and airflow. Miss any one of these, and the brush degrades—splayed bristles, bacterial buildup from trapped moisture, or glue breakdown from heat. That’s not speculation; it’s how polymer handles and natural fibers fail when stored wrong.
If you stick to the checklist in this post—upright bristles, consistent cleaning, and a well-ventilated spot—you’ll stretch most brushes from 6–12 months to 3–5 years. The magic isn’t in fancy organizers; it’s in the criteria. A ceramic cup and a weekly rinse beat any $50 gadget if it doesn’t meet the five non-negotiables from earlier.
Stuck on where to start? Grab a basic cup you already own, line up your brushes bristles-up, and add a 60-second cleaning habit before you buy anything new. The rest is just tinkering with placement.
Next step: Ready to say goodbye to brush chaos for good? transform your brush storage with a pro system
Keep reading
Keep exploring the topic with these related guides: