
Beauty Blender Sponge: 7 Insider Tips to Choose & Use
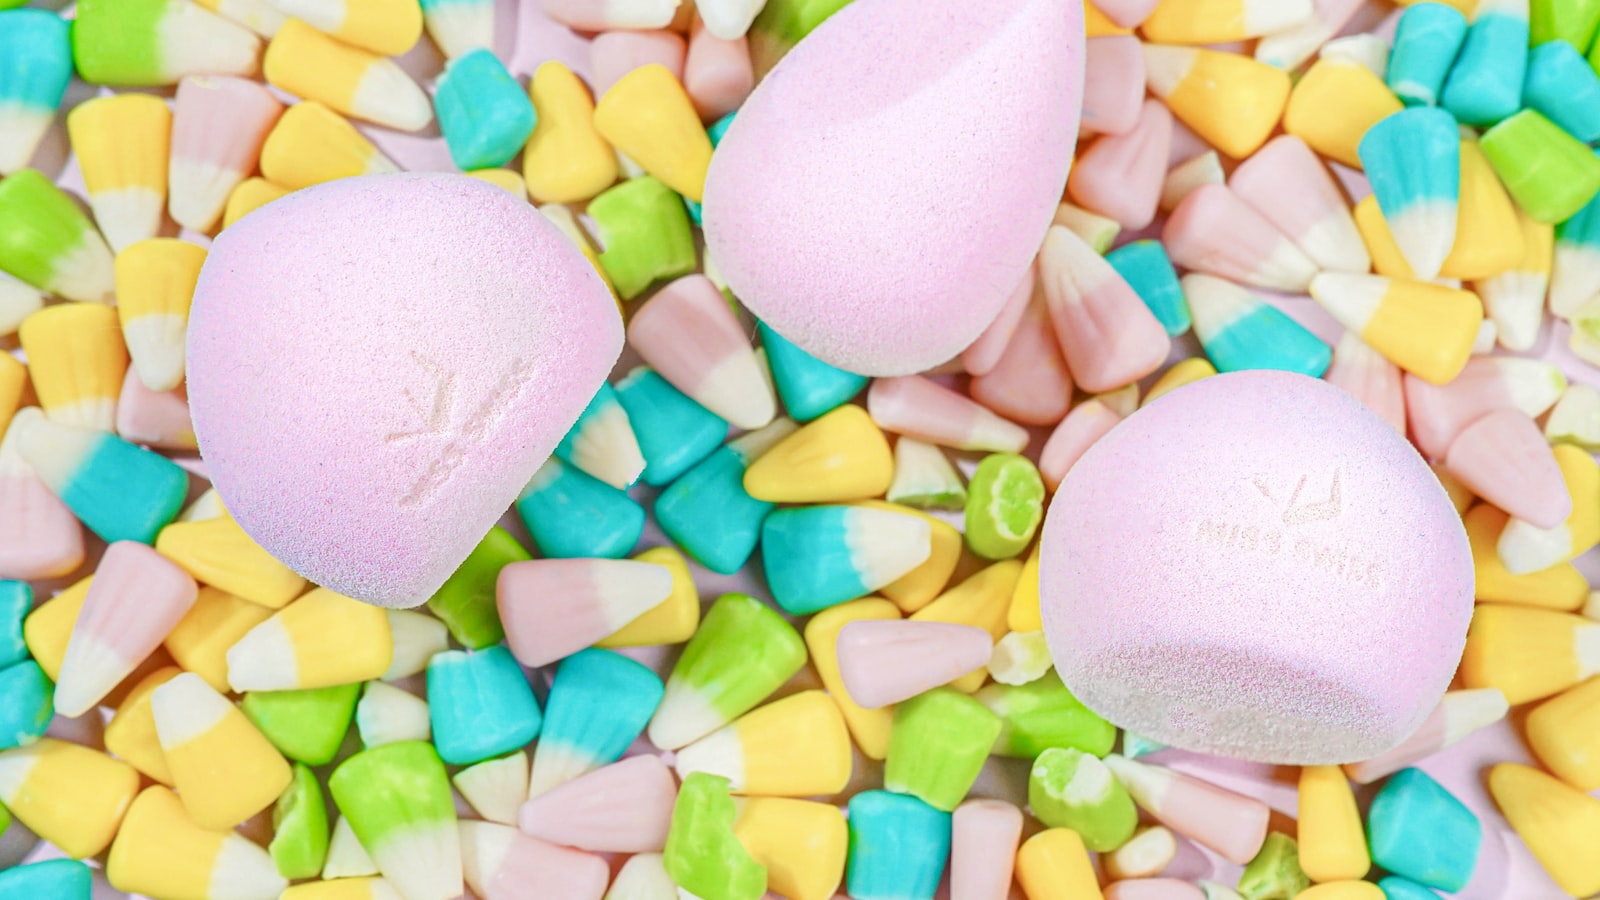
Photo by Ashley Piszek on Unsplash
Key Takeaways
A beauty blender sponge isn’t one-size-fits-all—it’s your secret weapon for flawless blends. Match the sponge’s texture, density, and shape to your makeup routine, not to brand marketing. Focus on four real-world criteria—how it feels against skin, how much it compresses, how versatile its design is, and how easy it is to clean—before you buy.
Skip the hype. Use a simple 4-step self-check on any product page: press the sponge to gauge texture, compress it to test resilience, imagine how you’d use its shape, and read the care instructions to confirm cleaning won’t turn into a chore. Your biggest blending challenge—whether it’s under-eye concealer or full-face foundation—dictates the right shape. Classic, curved, or mini? Pick the one that solves your problem.
Don’t skip clean-up. A sponge that stays fresh and dry between uses lasts longer and protects your skin. Store it upright or on a drying rack, and sanitize it weekly to avoid bacteria buildup.
Choose by feel, not by name. The best sponge for you is the one that matches your skin’s needs and your routine’s demands—not the one with the loudest ads.
Part of our complete guide: for the full picture, see 25+ Free Procreate Makeup Brushes for Flawless Digital.
The 4 Core Criteria That Actually Decide a Beauty Blender Sponge
A beauty blender sponge isn’t just a tool—it’s the difference between foundation that looks painted on and makeup that melts into your skin. But not all sponges are created equal. The right one for you depends on four non-negotiable criteria: how it feels, how it bounces back, what shape it is, and how easily it stays clean. Skip any of these, and you’re gambling with streaks, patchy coverage, or a sponge that falls apart after a month.
Material Feel: Why Softness Isn’t Just Comfort
The texture of your sponge dictates everything from coverage to finish. A softer sponge absorbs more product, which means sheerer application—ideal for lightweight foundations or touch-ups. But if you crave full coverage, a firmer sponge presses product into the skin with less absorption, giving you that airbrushed effect without caking. The catch? If it’s too firm, it can drag on dry patches or emphasize texture. Test the feel by pressing it between your fingers: if it compresses easily, it’s soft; if it resists, it’s firm. Your foundation formula should guide you here—liquid foundations pair well with softer sponges, while creams and sticks thrive with firmer ones.
Compression Resilience: The Secret to Streak-Free Blending
Ever notice how some sponges leave behind visible strokes, while others blend smoothly? That’s compression resilience at work. A sponge that snaps back quickly maintains its shape as you dab, distributing product evenly without dragging. A slow-rebound sponge, on the other hand, collapses under pressure, leaving streaks or uneven patches. To test it, press the sponge firmly—if it springs back in under a second, it’s resilient. If it stays squashed, it’ll fight you every time you blend. This is especially critical for liquid foundations, where even a millisecond of lag can show up as a visible line.
Shape Versatility: One Sponge Doesn’t Fit All Zones
The shape of your sponge determines where it excels—and where it fails. A classic teardrop is the workhorse for large areas like cheeks and forehead, but its pointed tip can be clumsy around the eyes or nose. A curved sponge hugs the contours of your face, making it perfect for under-eyes and around the nostrils, but it’s less efficient for broad strokes. Mini sponges? They’re not just for travel—they’re precision tools for highlighting, concealing, or blending small areas like the inner corners of the eyes. The key is matching the shape to your routine: if you’re heavy on contour, a curved sponge will save you time; if you’re all about full-face foundation, a classic shape is non-negotiable.
Cleaning Ease: The Hidden Factor That Ruins Sponges
A sponge that’s a nightmare to clean is a sponge you’ll replace too soon. Pore size and surface texture decide how well it rinses out—and how quickly bacteria builds up. Fine-pored sponges trap product deep inside, making them harder to sanitize, while larger pores release makeup more easily. Surface texture matters too: a smooth sponge rinses cleaner than a textured one, which can cling to product in its crevices. To test it, wet the sponge and squeeze—if water runs clear quickly, it’s easy to clean; if it stays murky, you’ll be scrubbing for ages. And if you’re not deep-cleaning your sponge weekly
How to Evaluate a Sponge Without Trusting Brand Hype
Don’t trust the hype—the claims on a product page are designed to sell, not to inform. Your job is to strip away the marketing and verify the sponge against the four core criteria: material feel, compression resilience, shape versatility, and cleaning ease. These aren’t just buzzwords; they’re the axes that decide whether a sponge will blend smoothly or fall apart after two uses. Skip the pretty pictures and focus on what the listing actually tells you.
Check the material description against your needs
Every sponge’s listing includes a material description—usually phrased as “latex-free foam,” “silicone blend,” or “viscoelastic polymer.” That’s not just filler text. Latex-based sponges resist compression over time, while latex-free options stay flexible but can degrade faster with heavy use. If your routine involves layering thick foundation or cream products, prioritize resilience. If you’re blending liquid or cream formulas daily, versatility and ease of cleaning will matter more. Match the material to your routine, not to the brand’s latest campaign.
Spot red flags in user photos
Independent user photos are your best defense against marketing gloss. Look for shots that show the sponge under pressure—compressed in someone’s hand or pressed into the skin. The texture should look uniform, with no uneven pitting or visible seams that could snag makeup. If the pores appear stretched or flattened in user pictures, that’s a sign the sponge will lose its blending power quickly. Brands curate their hero images; customers rarely do. Use those real-world shots to check the compression and texture claims.
Decode the return policy and warranty
A generous return policy and clear warranty terms are proxies for durability. Policies vary by retailer—always check the fine print before you buy. Warranty wording is even more telling—if it excludes “excessive wear from improper cleaning,” for example, the sponge is likely made from a weaker material that can’t handle heat or harsh cleansers. Scan the fine print before you buy. If the retailer won’t stand behind it, why should you?
Compare cleaning instructions to pore structure
Cleaning instructions reveal more than they intend. Sponges with dense, fine pores require gentle, oil-free cleansers to avoid breaking down the foam. Larger, more open pores can handle stronger soaps but may trap product buildup. If the listed cleaning method calls for a specific cleanser that isn’t widely available or requires soaking overnight, the sponge is likely finicky to maintain. Opt for sponges with straightforward cleaning instructions—your future self will thank you when it’s time to wash.
Bottom line: Skip the marketing, verify the material, inspect user photos, read the return policy, and cross-check the cleaning instructions. If any of these steps feel vague or incomplete, the sponge likely isn’t worth the investment.
Which Sponge Shape Fits Your Makeup Routine?
 Photo by Aalo Lens on Unsplash
The right beauty blender sponge shape isn’t about trends—it’s about solving the specific blending challenges you face every morning. A teardrop won’t help with under-eye precision, and a mini won’t cover full-face foundation efficiently. Match the shape to your routine, not the other way around.
Classic Teardrop: The Full-Face Workhorse
Best for: Foundation, concealer, and all-over blending. Look for a smoothly tapered tip in product images. The curve should feel organic, not forced, so you can smoothly blend large areas without streaks. If the tip looks pinched or flat, it’ll drag product instead of diffusing it.
Curved/Angled: The Contour Specialist
Best for: Under-eye concealer, hollows, and sharp contour lines. Look for a distinct curve or angle in close-up shots—one side of the sponge should visibly shorter than the other, almost like a wedge. This asymmetry lets you press product into tight areas without disturbing adjacent makeup. If the curve looks subtle or symmetrical, it’s not built for precision.
Mini/Compact: The Spot-Concealing MVP
Best for: Blemishes, travel touch-ups, and hard-to-reach spots. Check the product listing for size details—usually under 2 inches in length. Avoid vague terms like “travel size” unless the brand clarifies it’s a scaled-down version of their classic sponge. A true mini should feel like a smaller replica, not a shrunken, denser ball.
Hybrid (Dual-Shape): The Versatility Play
Best for: Multi-step routines where you want one sponge to do it all. Look for descriptions that mention both shapes—for example, “teardrop + angled” or “rounded + flat edge.” If it only highlights one shape, it’s not a hybrid. The best hybrids have a defined seam where the two shapes meet, so you can switch between them mid-application.
The Shape-to-Routine Checklist
Still unsure? Ask yourself:
- Do you apply foundation all over? → Classic teardrop.
- Do you struggle with under-eye blending? → Curved/angled.
- Do you travel often or need spot concealing? → Mini/compact.
- Do you want one sponge for everything? → Hybrid.
The shape that solves your biggest blending frustration is the one to reach for—no brand hype required.
Decision Checklist: Verify a Beauty Blender Sponge in 5 Minutes
Want to skip the guesswork when shopping for a beauty blender sponge? Use this table as your quick-reference guide—just copy and paste it into any product page or shopping cart. Treat it like a questionnaire: answer each row to rule out options fast.
| Criterion | Why it decides the outcome | How to check it yourself | Red flag |
|---|---|---|---|
| Material feel | A sponge’s texture dictates how it grips foundation or cream—too soft and it slides; too firm and it tugs. | Pinch the sponge between your fingers. If it collapses instantly with light pressure, it’ll soak up too much product. If it barely compresses, it won’t blend smoothly. | Corners that round too soon or edges that pinch fabric—both signs of cheap foam that breaks down fast. |
| Compression resilience | A sponge that compresses fully but springs back ensures even pressure—no streaks, no drag. | Press down on the sponge and release. If it stays flat or splits at the sides, it’s already fatigued. If it bounces back quickly, it’ll last you months. | Crumbling edges or a visible split during the first press—walk away. |
| Shape versatility | A teardrop won’t fit under your eyes, and a mini won’t buff high-coverage areas. Match the shape to where you’re blending. | Hold the sponge against your face where you apply makeup. If it doesn’t reach the corners of your under-eyes or the bridge of your nose, it’s the wrong shape. | Too large for precision zones or too small to cover full face—both waste time and product. |
| Cleaning ease | A sponge that traps makeup deep inside stains permanently; one that’s too porous dries cracked and useless. | Squeeze it under running water. If suds disappear instantly, the pores are too open. If water beads up, it’s sealed with silicone and won’t stain—but it might not hold product either. | Stains remain after a thorough wash or foam flakes off in the palm—both signal a one-time-use sponge. |
| Durability cues | A sponge that wears down unevenly leaves streaks; one that lasts keeps blending power intact. | Run your thumbnail lightly across the surface. If it snags or the texture changes mid-swipe, it’s already breaking down. | Grainy patches or a rough edge that catches skin—classic signs of a sponge past its prime. |
Run through this checklist in the order above. If any row fails, drop that sponge and move to the next option. No brand loyalty survives a failing compression test.
Common Mistakes & How to Spot Low-Quality Sponges
 Photo by Alan Emery on Unsplash
The right beauty blender sponge should feel like an extension of your hand—not a flimsy accessory that collapses under pressure or tugs at your skin. Low-quality sponges often fail in predictable ways, and the symptoms show up within the first few uses. Here’s how to spot them before they sabotage your blend.
Over-Soft Sponges That Flatten Too Fast
A sponge that feels plush in the package but dents after a few presses is a red flag. Visible compression marks—flat spots where the material refuses to bounce back—mean the foam lacks resilience. Test this by pressing the sponge between your fingers: if it stays squashed instead of springing back, it’ll struggle to build coverage evenly. High-quality sponges maintain their structure through dozens of uses, so if yours looks deflated after a single application, it’s not built for longevity.
Excessively Dense Sponges That Drag on Skin
At the other extreme, sponges that feel rock-hard or leave streaks are just as problematic. Tugging and pulling happen when the material is too dense to glide smoothly, especially on sensitive areas like under the eyes. A good sponge should compress just enough to diffuse product without resisting your hand. If you’re fighting the sponge to blend, it’s either too stiff or poorly shaped for the task. Check user reviews for mentions of “drag” or “streaking”—these are dead giveaways.
Unclear Shape Claims
Product photos that don’t match the description are a classic bait-and-switch. Mismatched silhouettes—like a teardrop labeled as a precision tip—mean the sponge won’t perform as advertised. Always compare the product image to the shape name in the title or specs. If the photo shows a rounded edge but the description promises a sharp point, assume the worst. The shape should solve a specific problem (e.g., a flat edge for contour, a pointed tip for under-eyes), so if the visuals don’t align, neither will the results.
Missing Cleaning Instructions
A sponge that doesn’t come with care guidelines is a hygiene disaster waiting to happen. Buildup warnings in reviews—mold, lingering product, or a sour smell—are signs the material isn’t designed for easy maintenance. High-quality sponges include instructions for washing (e.g., mild soap, air-drying) and often specify how often to replace them. If the packaging skips this entirely, the sponge is likely made from cheap foam that traps bacteria. Always check reviews for complaints about odor or staining—these are dealbreakers.
The key to avoiding these pitfalls? Trust the symptoms, not the marketing. A sponge that dents, tugs, or misleads on shape is a waste of money, no matter how trendy the brand. Focus on how it performs in your hand, not how it looks in an ad.
Frequently Asked Questions
Can I use a beauty blender sponge for powder products?
Absolutely—but it depends what you’re blending. A dry sponge is perfect for light layers of translucent powder, setting spray, or bronzer because it adds minimal product while evening out texture. The catch? If you dip it straight into the jar, it’ll soak up powder like a sponge soaks up water—meaning you’ll be reloading constantly. The work-around: tap off excess powder, press lightly onto the back of your hand, then dab onto your skin. If you’re layering heavy powder (like HD powders for extreme matte), switch to a denser brush—your sponge will clog and lose its precision.
What’s the difference between a beauty blender and a regular makeup sponge?
The difference isn’t beauty versus plain—it’s geometry and material. A beauty blender has a rounded, teardrop or egg shape designed to contour into cheeks, under-eyes, and around the nose. Regular makeup sponges (like triangle or flat wedges) are built for speed and broad strokes—they’re great for blending bronzer on the jawline, but they’ll drag foundation under your eyes instead of pressing it in. The real test? Try blending foundation on your hand: the shape that hugs the curves without stretching or poking is the beauty blender. Everything else is a utility sponge.
Is it safe to wash a beauty blender sponge in the dishwasher?
Dishwashers are too aggressive for sponge fibers—they’ll melt the latex or melamine, turning your sponge into a gummy blob that shreds makeup instead of blending it. Stick to the sink: run it under warm water, lather with a gentle, unscented soap (baby shampoo works), and squeeze in a circular motion until the water runs clear. For stubborn buildup, let it soak in a bowl of soapy water for 10 minutes first. The key sign it’s truly clean? No lingering odor after drying—if it still smells like yesterday’s foundation, toss it and start fresh.
Why does my sponge get a weird smell after a few weeks?
That funk isn’t just “old sponge”—it’s bacterial growth. Foundation, concealer, and even powder trap moisture against your skin, creating a breeding ground for microbes. The fix? Wash it daily (or after every use if you’re using liquids), and dry it completely—hang it in direct sunlight or use a fan. Storing it damp in a drawer? That’s an invitation for the smell to return. If the odor persists after washing, consult a dermatologist for skin concerns—those bacteria can irritate sensitive skin.
Final Thoughts
Choosing the right beauty blender sponge isn’t about chasing trends or brand names—it’s about solving the blending challenges you actually face. Material, resilience, shape, and cleanability aren’t just details; they’re the four axes that decide whether a sponge will work for your routine or become another drawer casualty. A sponge that collapses under pressure or tugs at your skin isn’t just frustrating—it’s a red flag for poor quality.
The 5-minute checklist you’ve seen here isn’t just a shopping aid; it’s your shield against marketing hype. Apply it to every product page, and you’ll spot the trade-offs that matter—like how a denser sponge might last longer but require more effort to clean, or how a pointed tip can’t replace a flat edge for large-area blending. The right sponge should feel like an extension of your hand, not a compromise you tolerate.
Proper care isn’t optional. A sponge that stays damp or harbors bacteria isn’t just gross—it’s a fast track to breakouts. Wash it after every use, let it dry completely, and replace it when the texture changes (usually every 3-4 months, depending on how often you use it). Your skin will thank you.
Ready to put this into practice? Use the checklist to evaluate your options—compare beauty blender sponges here and find the one that matches your routine. The right tool won’t just blend better; it’ll make your makeup process faster, cleaner, and more intuitive.
Keep reading
Keep exploring the topic with these related guides: