Beauty Blender vs Cushion Puff: Which is Better?
Photo by Marek Studzinski on Unsplash
Key Takeaways
Go straight to the sponge that matches your makeup and skin: Liquids and coverage? Grab the beauty blender. Powders and a barely-there finish? The cushion puff is your pick. Five things decide the outcome—texture, density, shape, finish, and how your skin reacts—and they’re all easy to test before you open the package.
Before you buy, run the press test: push the sponge against your clean hand to feel how much it drinks up. Then check the shape: a teardrop fits curves; a flat edge smooths edges and under-eyes. Your skin will tell you what to favor—oily skin may prefer the puff’s lighter grip, while dry skin soaks up the blender’s cushioned hydration.
Part of our complete guide: for the full picture, see 25+ Free Procreate Makeup Brushes for Flawless Digital.
The 5 Differences That Decide Your Makeup Finish
Here’s the truth: the right sponge doesn’t just apply makeup—it finishes it. And the five things that decide that finish? Texture, density, shape, the coverage it delivers, and how it plays with your skin. Skip any of them, and you’ll be blending forever, chasing a seamless look that keeps slipping away.
Texture: The silent director of product deposit
A sponge’s surface isn’t just about feel—it’s about control. Smooth surfaces glide, laying product down in a thin, even layer. That’s the move for liquids and creams: foundation, concealer, even tinted moisturizer. Introduce texture—even faint micro-dimples—and the sponge grips and pushes product deeper. That’s ideal for powders like setting powder, blush, or bronzer. Test it yourself: drag a finger across the sponge. If it catches, it’s built for powder. If it doesn’t, it’s your liquid’s best friend.
Density: The pressure gauge
Density decides how much product the sponge holds and how much force you need to release it. A softer sponge absorbs more, which can dilute coverage. Liquid sponges tend to be denser—they hold the product on the surface, not in it, so every press deposits instead of drinking. Powder sponges? Softer, because you want them to collapse under light pressure, releasing the product in a fine mist. Press test: squeeze the sponge between your fingers. If it gives easily, it’s for powders. If it resists, it’s built for liquids.
Shape: Precision vs. reach
Teardrop sponges are the sharpshooters—pointed tip for under-eyes, around the nose, along the jawline. That shape is why they’re the go-to for full-face liquid routines. Flat or rounded sponges cover more ground: cheeks, forehead, anywhere you want a soft, diffused finish. The shape isn’t just about where you can use it—it’s about where you have to. If your routine leans on powders and a barely-there finish, a flat sponge will cover more ground with less effort. If you’re layering liquids and need to carve out cheekbones or hide dark circles, the teardrop is non-negotiable.
Finish: Sheer, buildable, or full—pick your fighter
Liquid sponges are the chameleons. They start sheer and let you build to full coverage without looking like you’re wearing a mask. That’s the magic of a denser, smoother surface—it deposits in layers, so you control opacity. Powder sponges? They’re the opposite. Their texture and softness mean they diffuse, delivering a soft-focus, skin-like finish. You can layer powder, but you’ll never get full coverage—just a more polished version of the same barely-there look. If your goal is “I woke up like this,” the powder sponge is your tool. If it’s “I need this redness gone,” reach for the liquid sponge.
How to Test a Makeup Sponge Before You Buy (Without Opening the Package)
The best sponge for your skin and routine isn’t the one with the highest rating—it’s the one you can verify for yourself before you buy. Here’s how to run the same tests in-store or online, using only what’s on the packaging or the brand’s website.
The Press Test: Density Decides Deposit
Gently press the sponge against the back of your hand. A softer sponge will compress easily, absorbing more product and leaving a sheer, buildable finish—ideal for liquids and creams. A firmer sponge resists compression, depositing product more evenly for medium-to-full coverage. If the packaging doesn’t describe density, look for terms like “ultra-plush” (softer) or “precision-dense” (firmer).
The Shape Check: Does It Reach Where You Need It?
Hold the sponge against your face, not just your cheek. The right shape should contour to your under-eyes, nose, and jawline without stretching your skin. A teardrop or hourglass design typically covers more surface area, while a flat or rounded puff excels in targeted areas like the sides of the nose. If the packaging shows a size reference (e.g., “fits in palm”), compare it to a sponge you already own.
The Material Feel: Will It Tug or Glide?
Lightly rub the sponge against your inner arm. Synthetic materials (like polyurethane or latex-free foam) should glide without catching on dry patches. If the packaging lists “textured” or “micro-exfoliating,” expect a slight grip—great for powders but potentially irritating for sensitive skin. Natural materials (like konjac) may feel softer but can absorb too much product if not pre-dampened.
The Absorption Test: Does It Waste Product?
If the store offers foundation samples, apply a small amount to the back of your hand and dab the sponge over it. A sponge that absorbs too much will leave streaks; one that releases too little will require extra product. Check the packaging for “non-absorbent” or “high-release” claims—these are red flags for sponges that either soak up foundation or skimp on coverage.
Where to Find the Answers
- Density and material: Look for these details on the product page or packaging. Brands often highlight them in bullet points or under “key features.”
- Shape and size: Use the product images to compare proportions. If the sponge is shown next to a coin or a hand, use that as a reference.
- Absorption: Search for “foundation pairing” or “best for” sections on the brand’s website—these often hint at how the sponge performs with liquids vs. powders.
The goal isn’t to memorize specs but to know what to look for. A sponge that passes these checks in-store will work the same way at home.
Which Sponge Fits Your Makeup Routine?
 Photo by Jamie Street on Unsplash
If your makeup bag runs on liquids—foundation, concealer, cream blush—reach for the beauty blender. Its teardrop shape and medium density are built for layering product without streaks, so you can dial up coverage without looking cakey. The denser surface grips wet formulas better than a puff ever could, letting you press and bounce the product into your skin instead of dragging it around.
Powders demand a different tool—the cushion puff. Its flat, rounded design is ideal for pressing compact foundations, bronzer compacts, or powder blush into the skin with minimal product loss. The softer density means it won’t scratch or pull at dry patches, and the minimal absorption keeps powders from disappearing mid-application. It’s the secret weapon for that airbrushed, barely-there look without the sponge’s bulk.
For sensitive or dry skin, shape and feel matter more than the brand name. Skip anything with a coarse, open-cell texture—they’ll tug at fine lines and irritate reactive skin. Instead, look for packaging that highlights non-irritating materials or dermatologist-tested claims. A smoother surface and hypoallergenic foam (often labeled “silky” or “gentle”) will glide over dryness without stripping your skin.
Oily skin thrives with firmer tools—the cushion puff’s tighter weave helps control shine by depositing less product with each press. The trade-off? Less buildable coverage, but that’s exactly what you want when your skin’s already making its own glow. A denser sponge also means fewer trips to the powder compact, which keeps your routine lean and your pores happier.
Before you click checkout, verify this one thing on every product page:
- Liquids? Confirm the sponge’s density is labeled “medium” or “firm” and the shape is teardrop or oval.
- Powders? Check for a flat or rounded surface with “soft” or “lightweight” density.
- Sensitive skin? Hunt for the words dermatologist-tested or hypoallergenic in the product description.
- Oily skin? Prioritize “firm” density and avoid anything marketed as “extra soft.”
If you’re still unsure, do this: press the sponge against your palm with foundation. The right tool will release product evenly; the wrong one will either soak it up like a sponge or leave streaks. That single test tells you everything you need to know.
What to Check Before You Buy: The Makeup Sponge Decision Table
Here’s the only checklist you need—no brand names, no guesswork. Each row is a dealbreaker you can verify in-store or online before you hand over cash.
How to use this table
Every criterion below decides how your makeup sits, blends, and lasts. Run the check in column three; if the red flag in column four lights up, walk away.
| Criterion | Why it decides the outcome | How to check it yourself | Red flag |
|---|---|---|---|
| Texture | Determines how product is deposited on the skin | Press the sponge against your hand—feel the surface | Rough or overly smooth textures may not blend evenly |
| Density | Affects product absorption and blending pressure | Squeeze the sponge gently—softer sponges absorb more | Too soft = product waste; too firm = uneven application |
| Shape | Decides precision for hard-to-reach areas | Hold the sponge against your face to test reach | Shapes that don’t fit your face may leave gaps in coverage |
| Finish | Determines the type of coverage (sheer, buildable, full) | Check the product description for “finish” or “coverage” claims | Vague descriptions like “flawless finish” without details |
| Skin compatibility | Affects irritation and product adhesion | Look for “hypoallergenic” or “dermatologist-tested” on the packaging | No material info = potential irritation risk |
What the checks actually tell you
- Texture: A slightly textured surface (not rough, not glass-smooth) grabs product and rolls it onto the skin instead of smearing it. Press the sponge against your palm—if it drags or feels slick, it’ll streak.
- Density: The squeeze test is non-negotiable. A sponge that collapses under light pressure will soak up half your foundation before it touches your face; one that resists feels like a brick when you try to blend.
- Shape: The teardrop reaches the inner corner of your eye; the flat puff skips it. Hold the sponge where you’d use it—if your fingers can’t reach the tip without stretching, neither can the product.
- Finish: “Buildable” means you can layer; “sheer” means one pass and you’re done. If the description doesn’t say, assume it’s a gamble—brands that know their finish will name it.
- Skin compatibility: “Latex-free” and “hypoallergenic” are the only labels that matter. No label? Assume it’s made of whatever was cheapest that week.
The one trap nobody warns you about
Most sponges are sold in opaque packaging, so you can’t see the texture or feel the density until you open them. That’s why the hand-press and squeeze tests are crucial to avoid a costly mistake. If the store won’t let you touch it, order online from a retailer with free returns—then run the tests at home. If it fails, send it back. Your skin (and your wallet) will thank you.
How to Use Each Sponge for Flawless Results
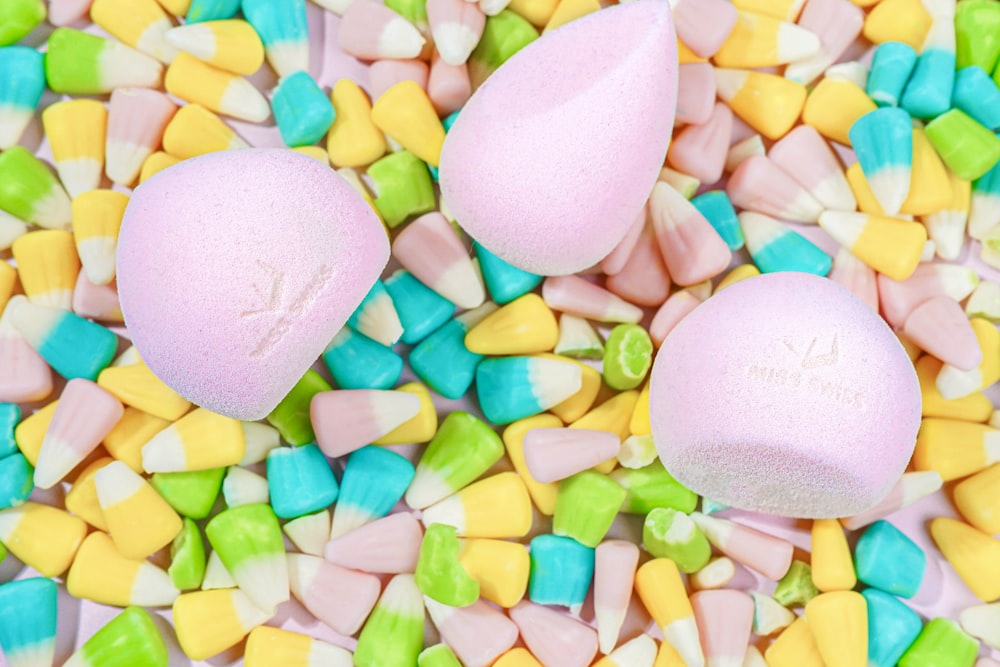 Photo by Ashley Piszek on Unsplash
The way you handle your sponge matters more than the product itself. A beauty blender works best when prepped properly and used with the right technique. Meanwhile, a cushion puff thrives on a lighter touch. Here’s how to get the most out of each—no fluff, just the moves that deliver real results.
Beauty Blender: Start by dampening—it’s not optional. A wet sponge absorbs less product, so your foundation goes further and blends smoothly. Use a gentle bouncing motion for liquid foundation; don’t drag. For creams or concealers, switch to stippling—press and lift in short, controlled taps. The sponge’s shape is designed to mimic your fingers, so treat it like an extension of your hand.
Cushion Puff: Powders are its domain. Use it dry for a barely-there finish by pressing the puff into your skin instead of swirling. If you’re applying liquid foundation, dab—never rub—until the base is set. The puff’s flat surface is built for control, not sweeping motions. Think of it as a precision tool, not a blender.
Cleaning: Both sponges demand attention after every use. Rinse under warm water and work a mild cleanser (like a drop of gentle shampoo) through the pores until the water runs clear. Squeeze gently—don’t twist—and lay flat to dry. Check the packaging for recommended cleaners; avoid anything harsh that could degrade the material.
Storage: Moisture is the enemy. Store sponges in a cool, dry spot away from direct sunlight to keep their shape and prevent bacteria growth. A breathable mesh bag or a clean, open container works best. Never shove them into a drawer while damp—that’s how mold starts.
The quick check before you buy: Run the press test—press the sponge firmly against your arm. A good one should glide without skipping or leaving streaks. Check the shape—deformation here means it won’t perform in a few months. Feel the material—too rough or too slippery, and it’ll drag or slide. These three tests reveal everything you need before you commit.
Frequently Asked Questions
Can I use a beauty blender for powder products?
Yes, but it’s not ideal. The dense, open-cell foam of a beauty blender is designed to press liquid and cream products into the skin, not deposit powder evenly. If you try to buff setting powder with one, you’ll likely end up with patchy, over-blended areas where the sponge drags pigment instead of letting it sit. For powders, reach for a cushion puff—its flatter, slightly textured surface is built to pick up and distribute loose or pressed powder without disturbing what’s underneath.
Why does my cushion puff leave streaks with liquid foundation?
Because it’s fighting its own design. Cushion puffs are optimized for dry application—powders, baked blushes, and setting sprays. When you load one with liquid foundation, the material (often a denser, less porous foam or synthetic fiber) can’t absorb or release product evenly. Instead, it slides the foundation across the skin in streaks, especially if you’re using a pressing motion. For liquids, switch to a sponge with a teardrop shape and medium density—those are engineered to bounce product into the skin rather than drag it.
How do I know if my sponge is too old to use?
Watch for three red flags, none of which require a calendar:
- It’s permanently stained—not just surface discoloration from product, but deep, set-in stains that won’t rinse out. That’s bacteria and old makeup clinging to the foam.
- It’s shedding—tiny bits of foam breaking off mid-blend. That means the material is breaking down, and those particles are ending up on your face.
- It’s not bouncing back—when you squeeze it dry, it stays compressed instead of springing back to shape. A sponge that’s lost its resilience can’t blend properly, no matter how much you dampen it.
If any of these apply, toss it. No sponge lasts forever, and a compromised one will ruin your finish before it ruins your skin.
Are silicone sponges better than foam for sensitive skin?
It depends on what you’re sensitive to. Silicone sponges don’t absorb product, so they’re hygienic—no trapped bacteria, no need for frequent replacement. But they’re also non-porous, which means they can’t diffuse product the way foam does. For sensitive skin that reacts to preservatives or fragrances in makeup, silicone is a safer bet. But if your skin is reactive to friction (rosacea, eczema, or general irritation from blending), the slick surface of a silicone sponge can actually drag more, leading to redness. Foam, when kept clean and replaced regularly, is gentler for friction-sensitive skin because it absorbs some of the pressure.
Can I use the same sponge for foundation and concealer?
Techn
Final Thoughts: The One Thing to Remember Before Buying
Here’s the truth no ad will tell you: the “best” sponge is the one you can test against your own face before you pay. Skin texture, product viscosity, and how much coverage you actually build in a session decide the winner—not a viral TikTok or a five-star rating.
If your routine runs on liquids (foundation, concealer, cream blush), the teardrop shape and open-cell foam of a beauty blender press product into the skin without streaks, letting you dial coverage up or down. If powders are your daily bread, a cushion puff’s flat profile and denser weave deposit pigment evenly without disturbing what’s underneath. Neither is universally “better”; they’re tools for opposite jobs.
Before you tap “add to cart,” run the two-minute check from the earlier section: press the sponge against your jawline to feel density, pinch the tip to test give, and hold it next to your foundation bottle to eyeball shape. Then flip the package over—material composition and cleaning instructions are the fine print that decides whether it’ll last a week or a year. Skip them, and you’re buying the same mistake twice.
Next step: Ready to cut your blending time in half while keeping your skin’s finish intact? upgrade to effortless, pro-level blending today
Keep reading
Keep exploring the topic with these related guides: