
Beauty Blender Use Wet or Dry: 3 Common Mistakes & Fixes
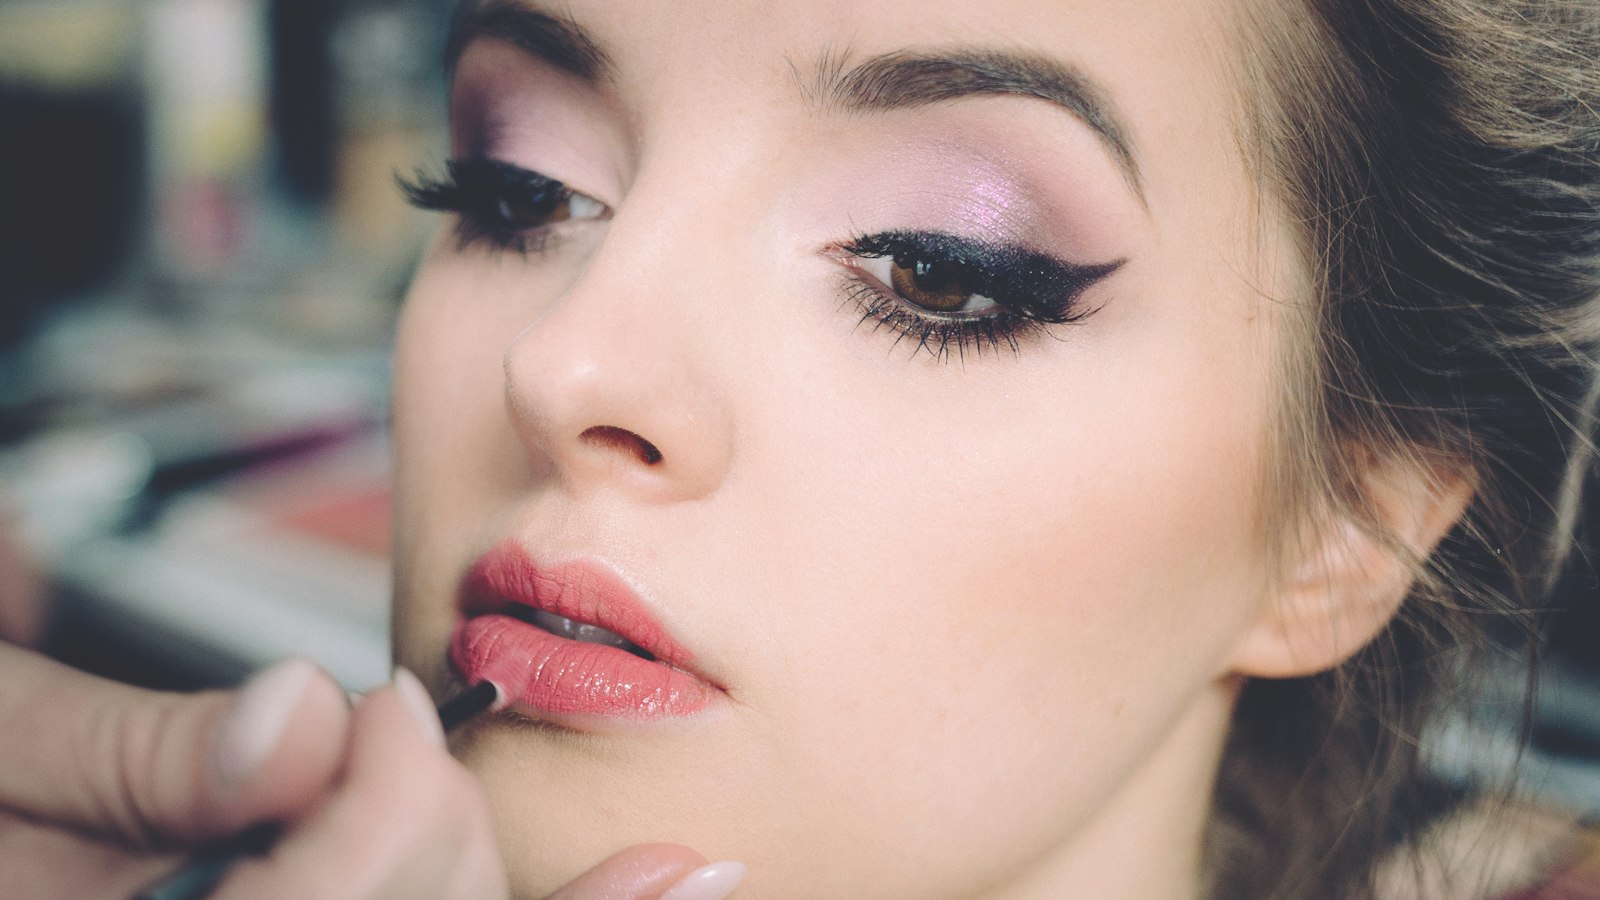
Photo by freestocks on Unsplash
Key Takeaways
The Beauty Blender’s texture and technique determine flawless application: use it dry for powder and lightly dampened for liquid, applying with the bounce technique (press, tap, lift) to avoid streaks or cakeiness. Skin type dictates sponge prep—oily skin needs drier, dry skin slightly damp—while over-saturating or wrong pressure worsens results.
- Powder: Apply with a dry Beauty Blender to prevent cakeiness.
- Liquid: Use lightly dampened (not soaking) sponge for smooth coverage.
- Technique: The bounce technique (press, tap, lift) avoids makeup separation.
- Skin prep: Oily skin needs a drier sponge; dry skin requires slightly damp prep.
- Mistakes: Dragging, over-saturating, or wrong pressure cause visible streaks.
Why Wet vs. Dry Matters: The Science Behind the Blend
Here’s the core truth: Your Beauty Blender’s texture isn’t just about preference—it’s a physics problem. The sponge’s cell structure behaves like a microscopic sponge (yes, the pun is intentional), and how it interacts with foundation, skin oils, and even your blending technique determines whether your makeup looks flawless or like a disaster waiting to happen.
The Absorption Game: Dry vs. Wet
When you use your Beauty Blender dry, its texture becomes rougher—think of it as a dry towel soaking up water. This is your secret weapon for:
- Powder foundations (which are already dry) or oily/combination skin (where excess product would slide or cling).
- Preventing cakeiness (a dry sponge won’t over-saturate the formula).
- Controlling shine (it wicks away natural oils before they can interfere).
Flip it to lightly dampened (tap water, not soaking—think damp washcloth, not mop), and those cells expand, increasing surface area. Now it adheres to dry skin like a glue, helping liquid foundations stick without pulling at hair or causing flaking. But here’s the catch: too much water = a gluey mess. The sponge’s cells can’t handle excess moisture—they’ll clump, and your blend will look like you applied foundation with a wet paintbrush.
Skin’s Role: The Oil Factor
Your skin’s natural oils don’t play nice with both textures. Dry skin needs that dampened sponge to help the foundation adhere—without it, the product sits on top like a mask. Oily skin, on the other hand, needs the dry sponge to absorb the shine before it even starts. And mature or sensitive skin? A damp sponge can sometimes feel too aggressive, so a light mist of setting spray (applied after foundation) often works better than water.
The Powder Puff Paradox
Here’s where things get interesting: a powder puff does the opposite. Its fibers repel liquid, making it useless for creams but perfect for matte powders (where you want to distribute, not absorb). That’s why pros keep both tools—one for liquid, one for powder—and switch based on the formula, not just the sponge’s texture.
The Bottom Line: Your Beauty Blender’s texture isn’t a guessing game—it’s a diagnostic tool. If your makeup slides, cakeifies, or pulls at hair, the fix isn’t just “try it wetter” or “try it drier.” It’s matching the sponge’s state to your skin’s needs and the product’s texture. And no, there’s no one-size-fits-all rule—because the real science isn’t in the sponge, it’s in how you use it. (More on that in The Bounce Technique.)
The 3 Biggest Mistakes (And How to Spot Them)
Your Beauty Blender isn’t just a tool—it’s a precision instrument, and the way you use it determines whether your makeup looks flawless or like a disaster. Here’s the hard truth: most mistakes aren’t about the product itself, but about how you’re holding, moving, or pressing it. The three most common errors all share the same symptom: makeup that looks applied, not blended. And the fixes? They’re simpler than you think.
Mistake 1: Dragging Instead of Bouncing
Symptom: Streaks, lines, or makeup that separates from your skin (like a second layer floating on top). Why it happens: You’re treating your Beauty Blender like a brush—pressing down and sliding it across your face. But that motion pulls at the skin, drags the product, and leaves telltale streaks. Think of it this way: if you’re sliding, you’re not blending—you’re painting.
The fix: Replace sliding with the “bounce technique”—press, tap, and lift. It’s like stamping a postage stamp: firm contact, a quick lift, then move. This prevents the sponge from grabbing and pulling at your skin, which is what creates those unsightly lines. Pro tip: Test it on your jawline first. If it looks dragged (not blended), you’re still sliding.
How to spot it: Look for makeup that looks like it’s sitting on your skin rather than melting into it. If you can see the edges of your foundation or blush strokes, you’re dragging.
Mistake 2: Over-Saturating the Sponge
Symptom: Glossy, dewy skin where you applied makeup—like your foundation is sweating off your face. Or, worse, your powder slides right off when you touch it. Why it happens: Soaking your Beauty Blender turns it into a water balloon. The excess moisture doesn’t just make your makeup slippery—it drowns the product, turning liquid foundation into a slick mess and powder into a pasty glob. A damp sponge is a tool; a soaking one is a disaster.
The fix: Lightly dampen, never soak. Tap the sponge under water, then pat it dry with a towel until it’s barely damp to the touch. For powders, use it completely dry. For liquids, a light mist is all you need—enough to let the product glide, not enough to turn your face into a mirror.
How to spot it: If your makeup looks wet (not blended) or slides off when you blink, you’ve overdone it. And if your powder puff leaves a shiny residue? That’s your Beauty Blender’s fault—you’re using it too wet.
Mistake 3: Wrong Pressure
Symptom: Cakey, chalky makeup (too hard) or patchy, uneven coverage (too light). Why it happens: Pressure isn’t just about how hard you press—it’s about how you press. Too much force compresses the sponge, squeezing out all the product and leaving you with a dry, matte disaster. Too little? You’re barely making contact, and your makeup looks like it was applied with a feather.
The fix:
- For liquid foundation: Light pressure. Think of it like dusting powder—just enough to distribute, not pack down.
- For powder: Firm pressure. You’re not trying to press the powder into your skin; you’re lifting it onto your face. Press hard enough to pick up product, but not so hard you’re leaving indentations.
How to spot it: Run your finger over your makeup. If it feels like you’re touching a second skin (too hard), or like you’ve missed spots entirely (too light), adjust your grip. Pro move: Test on your forearm first. If it looks uneven, you’re not pressing consistently.
Bonus: The ‘Drag Test’ (Your Quick Fix)
If your makeup looks dragged (not blended), you’re doing it wrong. Here’s the litmus test: After applying, hold your face still and look at your skin in natural light. If you can see the edges of your foundation, blush, or bronzer, you’re sliding. If it looks like a seamless part of your skin? You’re bouncing.
The jawline rule: Apply a tiny bit of foundation to your jawline and blend it in. If it looks streaky or patchy, you’re not using the right technique. Fix it by resetting your grip: press, tap, lift—no sliding.
The bottom line: Your Beauty Blender is a tool, not a weapon. Dragging creates streaks, over-saturating creates shine, and wrong pressure creates cakeiness. The fix isn’t buying a new sponge—it’s mastering the motion. Press. Tap. Lift. Repeat. Do that, and your makeup will look like it was painted by a pro.
When to Use Wet vs. Dry: A Skin-Type Guide
Your Beauty Blender isn’t just a tool—it’s a precision instrument, and the way you use it depends entirely on your skin type. Dry skin? Lightly dampen the sponge (tap water, pat dry) to help foundation adhere without flaking. Oily or combination? Use it dry or barely dampened to absorb excess oil and prevent shine. Sensitive? Start with a dry sponge, then add water sparingly—humidity can trigger reactions. Mature? Slightly dampen for hydration, but avoid over-saturating (it settles into fine lines). Powder foundation? Always dry—wet turns it into a cakey mess.
Here’s the breakdown by skin type, with fixes for common mistakes:
Your sponge should be lightly dampened—tap it in water, then pat dry until it’s barely moist. Too wet? Foundation flakes. Too dry? It won’t stick. Pro tip: Avoid soaking—excess water breaks down the sponge’s structure over time.
Oily/Combination Skin
Use it dry or barely dampened to absorb shine. A damp sponge can make oil slick to the surface, leading to a greasy finish. Fix the slide: If foundation moves, you’re over-dampening—pat dry before applying.
Sensitive Skin
Start dry, then add water gradually. Humidity can irritate, and a soaked sponge may cause redness. Test first: Apply a tiny amount to your jawline—if it stings, rinse the sponge and try again.
Mature Skin
A slightly dampened sponge helps foundation melt into fine lines, but don’t overdo it. Over-saturation causes settling in wrinkles. Fix the crepe: If makeup looks cakey, switch to a dry sponge for powder products.
Powder Foundation Only
Always dry. Wet = disaster. A dry Beauty Blender glides over powder without clumping or sliding. Fix the streak: If it looks patchy, use a hybrid technique: press the dry sponge into powder, then blend with a powder puff for seamless coverage.
The Bounce vs. Drag Rule: Think of it like stamping a postage stamp—press, tap, lift—instead of dragging a wet brush. Drag = sliding; bounce = control. Symptom check: If foundation streaks, you’re dragging. If it flakes, you’re over-dampening.
When in doubt, start dry. You can always add water, but you can’t undo a soaked sponge.
The Bounce Technique: Step-by-Step for Flawless Blending
Flawless Blending in 5 Minutes: The Pro Makeup Artist’s Brush System for Busy Creators — Mastering the bounce technique takes practice—but what if you could blend any makeup flawlessly in just 5 minutes? A structured brush-by-brush system cuts guesswork, so you focus on artistry, not streaks. Includes 1 free bonus resource. 5-minute pro makeup blending system for busy creators
 Photo by engin akyurt on Unsplash
Here’s the secret to a seamless base: you’re not blending—you’re stamping. The Beauty Blender’s bounce technique isn’t about dragging product across your skin; it’s about transferring it in precise, controlled bursts. Think of it like a tattoo artist’s stencil—press, release, and let the product settle. Do it wrong, and you’ll end up with streaks, sliding, or that dreaded “dry brush” effect where foundation looks like it’s been airbrushed with a paper towel. Do it right, and your makeup will melt into your skin like it was applied with a magic eraser.
The 4-Step Bounce (And Why It Works)
-
Press Like a Button
- Apply foundation to the center of your Beauty Blender (not the edges).
- Press it onto your skin with light, even pressure—imagine you’re pressing a doorbell, not a car horn. Too hard, and you’ll drag product; too soft, and it won’t transfer.
- Pro move: Use your wrist (not your arm) for micro-adjustments. Small motions = less mess, more control.
-
Tap to “Bounce” the Product
- Lift the sponge just slightly (a millimeter or two) and tap it down once. This isn’t a pat—it’s a sharp, deliberate tap that pushes product into your skin’s texture.
- Why? Tapping a dry Beauty Blender releases product in bursts rather than smearing it. Think of it like a stamping motion: press, lift, tap—repeat.
-
Lift Without Dragging
- Never slide the sponge off your face. Lift it straight up, like you’re peeling a bandage. Dragging pulls makeup apart, creating streaks or patchy coverage.
- Symptom check: If your foundation looks “striped” or “feathery,” you’re dragging. Reset and bounce instead.
-
Repeat in Small Sections
- Work in tiny zones (forehead, chin, jawline) to avoid over-blending. Start in the center of each area and bounce outward.
- Visual cue: Imagine your face is a grid. Each square gets 2–3 bounces max—no marathon blending sessions.
The Drag vs. Bounce Test (And Why It Matters)
Most people blend like they’re frosting a cake—sliding the sponge in wide, circular motions. That’s how you end up with:
- Sliding: Foundation looks like it’s melting off your skin (too wet sponge + drag).
- Cakeiness: Product sits on top instead of blending in (too dry sponge + drag).
- Streaks: Uneven transfer from dragging edges.
How to spot the difference:
- Wrong (Drag): Your hand moves in smooth, overlapping strokes. The sponge leaves a visible “track” of product.
- Right (Bounce): Your hand makes short, choppy motions—like you’re tapping a rhythm. The sponge leaves no trail.
Pro hack: Hold your Beauty Blender at a 45-degree angle when bouncing. This helps product transfer evenly and reduces the risk of pulling.
Skin-Type Adjustments (Because One Size Doesn’t Fit All)
Your bounce technique should adapt to your skin’s needs:
- Dry skin: Lightly dampen the sponge (tap water, pat dry) to help product adhere. Bounce more gently—dry skin needs less pressure.
- Oily skin: Use a dry sponge and bounce firmly to prevent sliding. If foundation sheens, dab a tiny bit of translucent powder on the sponge before bouncing.
- Sensitive skin: Skip the tap water entirely. A dry or lightly dampened sponge (just a mist, no soaking) reduces irritation.
- Mature skin: Bounce in smaller sections (forehead, cheeks, chin) to avoid tugging delicate skin. Use a dry sponge to prevent creasing.
The Hybrid Fix: Beauty Blender + Powder Puff
For a set-in-place finish, combine the bounce with a powder puff:
- Apply foundation using the bounce technique.
- While makeup is still wet, lightly dust a powder puff (not the sponge) over your T-zone and any areas prone to shine.
- Bounce again over the powdered zones to blend smoothly.
Why it works: The powder puff catches excess oil, while the Beauty Blender’s bounce locks everything in place without disturbing your base.
Troubleshooting Your Bounce
| Problem | Cause | Fix |
|---|---|---|
| Streaks | Dragging the sponge | Lift straight up; bounce instead. |
| Sliding | Sponge too wet or too much product | Use a dry sponge; load less product. |
| Cakey patches | Too much pressure or dry sponge | Lighten up; dampen sponge slightly. |
| Patchy coverage | Uneven bouncing | Work in smaller sections; reset pressure. |
Final Check: The “No-Touch” Test
Before you’re done, do this:
- Don’t touch your face for 30 seconds.
- If your makeup looks settled (no sliding, no streaks), you nailed it.
- If it’s still shiny or patchy, go back and bounce again—this time with less product and a drier sponge.
Remember: The bounce technique isn’t about speed—it’s about precision. Treat your Beauty Blender like a precision tool, not a brush. Master this, and you’ll never have to “fix” foundation again.
Texture Tricks: How to Fix Common Blending Failures
Your Beauty Blender isn’t just a tool—it’s a precision instrument, and the way you use it determines whether your makeup looks flawless or like a disaster. Most blending problems aren’t about the product itself; they’re about technique. Here’s how to fix the most common failures with zero wasted product and maximum control.
Cakey Makeup? You’re Overloading the Sponge
The fix is simple: use a dry sponge for powder foundation, or tap off excess product before applying. Wet sponges absorb more than they transfer, leaving a thick, matte layer that dries into cake. For liquid foundation, dampen the sponge lightly—just enough to pick up product without soaking it. The key is pressure control: press firmly once, then lift instead of dragging. If you’re still seeing cakeiness, you’re either pressing too hard or using too much product at once. Try applying in three thin layers instead of one thick one.
Sliding Foundation? Your Sponge Is Too Wet
Sliding happens when the sponge is dampened too much—the product doesn’t adhere to skin, just glides off. The fix? Pat your sponge dry after dampening (press it against a towel to remove excess water), or switch to a dry technique entirely for powder. Pro tip: if you’re using liquid foundation, dab a tiny bit of setting powder onto the sponge before applying. This creates a grip, preventing slide while keeping the finish natural.
Streaks? You’re Dragging Instead of Stamping
Streaks are the result of dragging the sponge across skin, which pushes product into uneven lines. The solution? Switch to the bounce method: press the sponge onto your skin, tap lightly to release product, then lift straight up. Think of it like stamping a postage stamp—short, controlled motions, not long sweeps. If streaks persist, your sponge might be too dry (re-dampen lightly) or too dirty (rinse and squeeze out excess water).
Foundation in Pores? You’re Over-Blending
When foundation settles into pores, it’s because you’re working the product too deeply into skin. The fix? Use a dry sponge and press lightly—just enough to distribute product without pressing into texture. For oily skin, set with a light dusting of powder (see: internal link to ‘Makeup Separating Fixes’ for more on setting). If your skin is dry, avoid over-blending entirely—let the product sit for 30 seconds before setting.
Makeup Separating? Your Skin Needs Time to Settle
Makeup separation isn’t a blending problem—it’s a timing issue. If your foundation slides or creases after a few hours, you’re setting it too soon. Wait 2 minutes after applying before dusting with powder. This lets the product bind to skin instead of just sitting on top. For extra hold, try the hybrid method: apply foundation with a damp sponge, then set with a powder puff (not the Beauty Blender) for a seamless finish.
The Bottom Line: Most blending failures come down to texture mismatches—wet vs. dry, pressure vs. lift, and how much product you’re actually transferring. Start with these fixes, and you’ll never see cakey makeup, sliding foundation, or streaks again. Need more? Internal link to ‘The Bounce Technique’ for the full step-by-step.
Beauty Blender vs. Powder Puff: When to Use Each
Here’s the hard truth: your tool choice isn’t just about preference—it’s about the formula you’re working with. A Beauty Blender (wet or dry) and a powder puff are built for different jobs, and mixing them up is how you end up with a cakey mess or a foundation that slides off by noon.
Use a Beauty Blender (wet or dry) for liquid, cream, or serum foundations. The sponge’s texture grips the product and transfers it evenly—no streaks, no patchiness. Wet it for liquid formulas (pat dry to control absorption), dry it for cream or serum. Never use a wet sponge on powder: it’ll turn cakey before you’ve even set it.
Use a powder puff for powder foundations and setting powders. The fluffy fibers repel liquid, preventing shine and helping the powder adhere. A dry Beauty Blender can work for powder, but it’ll settle faster—so set it with a puff for longevity.
Pro tip: Keep two sponges—one dry for powder, one damp for liquid. It’s the only way to avoid switching tools mid-application and ruining your blend.
The Hybrid Approach (When to Mix)
Here’s where most people go wrong: using a dry Beauty Blender for powder, then setting with a puff. It’s not cheating—it’s strategy. The sponge’s denser texture helps the powder cling longer, while the puff seals it in without dragging residue. Just never use a wet sponge on powder: the moisture turns it into a paste, and you’re left with a heavy, uneven layer.
How to Spot the Mistake
If your makeup looks like this:
- Streaks? You’re dragging instead of stamping (see The Bounce Technique section).
- Sliding? Your sponge was too wet for the formula.
- Cakey? You mixed a wet sponge with powder.
The fix? Match the tool to the texture. Liquid needs a damp sponge; powder needs a dry one (or a puff). And if you’re using both, keep them separate—your finish depends on it.
FAQ: Beauty Blender Wet vs. Dry
Can I reuse a damp Beauty Blender?
No—never reuse a damp sponge. The dampness creates a breeding ground for bacteria, and the residual product can dry out unevenly, leaving streaks. Rinse it thoroughly with warm water, squeeze out excess moisture, and let it air-dry completely before storing. Pro tip: Keep a small towel handy to pat it dry after each use—this speeds up drying and keeps your sponge in top shape.
How do I clean my Beauty Blender?
The easiest method? Rinse it under warm water after use, or place it in a bowl of water and microwave until the steam loosens dried product. For a deeper clean, wash it with mild soap and warm water, then rinse and dry. Avoid harsh detergents—they break down the sponge’s texture. Clean it after every use to prevent buildup, and replace it every 6–12 months (or sooner if it loses its bounce).
Why does my makeup look streaky?
You’re dragging the sponge instead of using the bounce technique. Streaks happen when you press too hard or glide the tool across your skin. Instead, press, lift, and stamp—like stamping a postmark—without sliding. For extra smoothness, lightly mist the sponge with setting spray or a hydrating mist (not water) to help product glide on.
Can I use a Beauty Blender on eyeshadow?
Yes, but only dry. A wet sponge will smudge shadow and blur your look. For eyeshadow, use the sponge dry to pack color into the crease, then tap off excess. For shimmer, press lightly—no bouncing needed. Save the wet technique for foundation and concealer, where it helps with blendability.
Does the color of the Beauty Blender matter?
Not for performance, but white hides product best. A white sponge lets you check for missed spots easily—critical for flawless blending. Colored sponges (like black or gray) work fine for dark foundations, but they make it harder to spot streaks. If you’re using a white sponge, rinse it occasionally to keep it clean and effective.
Need a quick fix? Most streaks and sliding happen because of technique—not the sponge itself. Revisit the bounce method and adjust your pressure. For stubborn texture issues, try a hybrid approach: use the Beauty Blender wet for foundation, then set with a dry powder puff to lock it in.
Master Your Blend: The Final Checklist
Your Beauty Blender isn’t a one-size-fits-all tool—it’s a precision instrument that demands respect. Here’s how to use it right every time:
-
Check your skin type first. Dry skin? Lightly dampen the sponge (tap water, pat dry) to help foundation adhere. Oily skin? Use it dry to avoid over-saturation. Sensitive? Test a dampened corner first—if it stings, go dry.
-
Match your product to your sponge. Liquid foundation, cream blush, or serum? Dampen. Powder, bronzer, or setting spray? Keep it dry. Pro tip: If you’re unsure, start dry and add moisture only if the product slides or cakes.
-
Bounce, don’t drag. Press the sponge into the product, tap it gently on your wrist to remove excess, then stamp it onto your skin—not drag. Think of it like stamping a postage mark: firm, controlled, and complete. Sliding = streaks. Bouncing = seamless.
-
Test on your jawline. The jawbone’s angle reveals texture flaws before they spread. If it looks streaky, you’re either pressing too hard or not dampening enough. Adjust and re-blend.
-
Clean it like a surgeon’s tool. Rinse under warm water after use, or place it in a bowl of water and microwave until the product loosens. A dirty sponge is a breeding ground for bacteria—and it won’t blend worth a thing.
The one rule no one tells you: Every Beauty Blender is different. Even two from the same batch can behave slightly differently. Adjust your technique per use. If it feels off, tweak the dampness, the pressure, or the angle until it works.
Final check: Did you spot any of these red flags?
- Streaks? You’re dragging or using too much product.
- Sliding? Your sponge is too wet for the formula.
- Cakeiness? You’re pressing too hard or using a dry sponge on liquid. Fix it by revisiting steps 1–4.
No shortcuts. No guesswork. Just a flawless blend, every time.
Keep reading
Keep exploring the topic with these related guides:
- Beauty Blender Bounce: How to Tell If Yours Is Working Right
- Beauty Blender and Brush Set: How to Choose the Perfect Combo
Next step: Ready to skip the streaks and perfect your technique? Grab the step-by-step guide that turns blending into a seamless routine—no more second-guessing. digital ebook for flawless makeup in minutes