
Makeup Brush Remover: 7 Pro Secrets for Clean Brushes
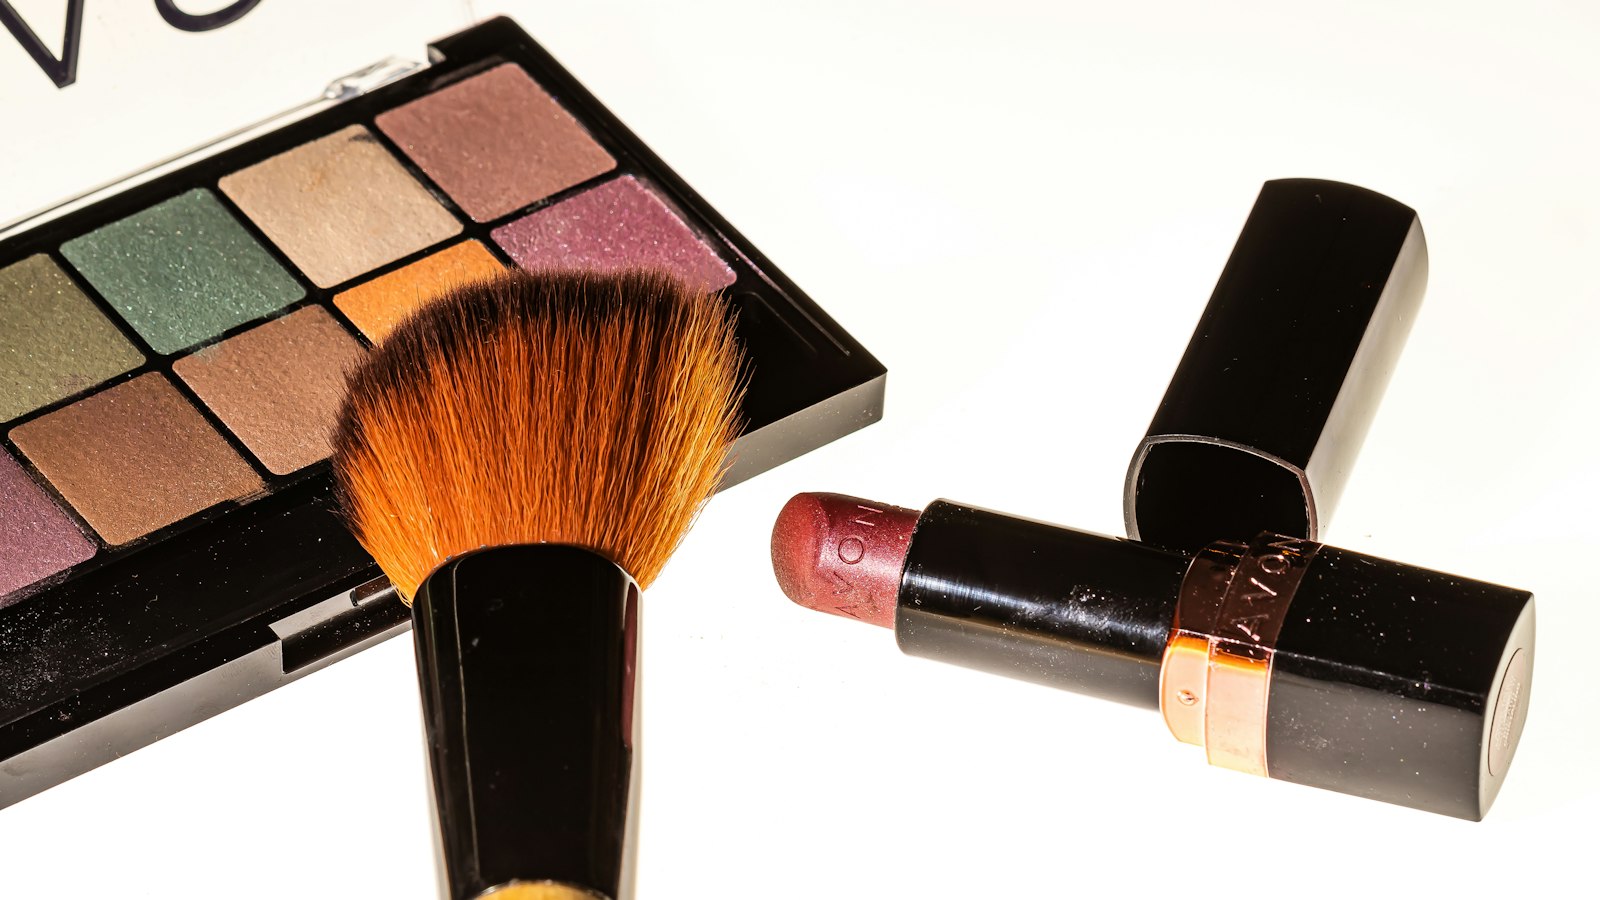
Photo by Lucas Santos on Unsplash
Key Takeaways
A makeup brush remover isn’t just a product—it’s a method that saves your brushes from bacteria, clumping, and premature wear. The right type (liquid, spray, or foam) depends entirely on your brush material and how often you clean them.
- Pick by brush type: Synthetic bristles need gentle, fast-drying removers; natural hair bristles benefit from deeper soaks.
- Clean weekly or risk it: Bacteria multiply in just 48 hours, and skipping cleaning turns your brush into a breeding ground for breakouts.
- Drying is non-negotiable: Leaving brushes damp accelerates bristle damage—always air-dry or use a brush stand.
- Diagnose before you clean: Clumped bristles? Too much remover or old product. Stiff handles? Moisture trapped in the ferrule. Fix the cause first.
The 3 Types of Makeup Brush Removers—and Which One You Need
You don’t need to memorize brands or formulas—just match your brush type to the remover’s job. The wrong choice leaves residue, clumps, or worse: bacteria hiding in the bristles. Here’s how to pick yours.
1. Liquid Removers (Micellar Water, Cleansing Milks)
Best for: Synthetic bristles (nylon, taklon) and mixed hair blends. How it works: Breaks down oil and pigment with a water-based formula, then rinses clean. Pros: Deep penetration for dense brushes (like powder puffs or blending sponges). Cons: Requires rinsing—skip this if you’re in a hurry.
Why it’s the default: Liquid removers dissolve makeup where it clings to the ferrule (the metal band holding the bristles). However, for natural hair brushes (squirrel, goat, badger), liquid can dry out the fibers over time.
2. Spray Removers (Quick-Use Cleansers)
Best for: Quick touch-ups on synthetic brushes (e.g., eyeshadow brushes). How it works: A fine mist loosens product, but relies on you to brush out the residue. Pros: Zero rinsing, portable. Cons: Not for heavy-duty cleaning. Sprays struggle to reach the deep grooves of synthetic bristles—leaving a film that traps bacteria.
The trade-off: Convenience vs. thoroughness. Sprays are fine for post-makeup wipe-downs, but not a replacement for deep cleaning.
3. Foam Removers (Gel or Solid Blocks)
Best for: Natural hair brushes (squirrel, mink, boar) and delicate tools (like eyelash curlers). How it works: Creates a lather that lifts makeup without stripping natural oils. Pros: Gentle, no rinsing needed (just wipe with a towel). Cons: Foams can’t penetrate synthetic bristles—use only for hair brushes.
The suggestion: Foam removers are often recommended for luxury brushes with natural bristles. For synthetic brushes, liquid removers are generally more effective.
How to Choose: The 3-Step Decision Rule
- Check your brush material:
- Synthetic (nylon/taklon)? → Liquid remover (deep clean) or spray (quick fix).
- Natural hair (squirrel/goat)? → Foam or liquid (avoid sprays—they dry out fibers).
- Ask: How dirty is it?
- Light residue (eyeliner smudges)? → Spray or foam.
- Heavy buildup (liquid foundation, glitter)? → Liquid remover + rinse.
- Time vs. thoroughness:
- 5 minutes or less? → Spray (but clean properly later).
- Pro-level hygiene? → Liquid remover + the full routine from The Step-by-Step Pro Cleaning Routine.
The mistake everyone makes: Assuming “natural” brushes tolerate harsh cleansers. They don’t. Synthetic bristles need deep-penetrating formulas, while natural hair brushes can handle gentler foams—but only if rinsed properly.
Pro tip: If your brushes still clump after cleaning, you’re overusing remover. The fix? Dilute liquid removers with water (1:1 ratio) and let them soak longer. (We’ll cover this in The 5 Most Common Makeup Brush Cleaning Mistakes.)
Image hint: Close-up of three hands holding a liquid remover bottle, a spray can, and a foam remover block side by side.
How to Choose a Remover That Won’t Ruin Your Brushes
The right makeup brush remover isn’t just about effectiveness—it’s about preserving your brushes without damaging the bristles, the ferrule, or the handle. Here’s how to pick one that keeps your tools in top shape for years, without guessing.
1. pH Level: Neutral or Slightly Acidic (5–7) is Safest
Most brushes are made from synthetic or natural hair, and both react poorly to harsh alkalines or acids. A remover with a pH between 5 and 7 (neutral to slightly acidic) won’t strip natural oils, weaken fibers, or leave residue that clumps bristles over time.
How to check? The manufacturer’s care instructions usually state the recommended pH range—look for it on the brush’s packaging or the brand’s website. If it’s not listed, assume neutral or slightly acidic is the safest bet.
2. Avoid Alcohol for Natural Hair Bristles (It Dries Them Out)
Alcohol-based removers are a red flag for brushes with goat, boar, or horsehair bristles. These fibers rely on natural oils to stay supple, and alcohol strips those oils, leaving bristles brittle and prone to shedding. For synthetic brushes (nylon, taklon, or sables), a tiny amount of alcohol is fine—but never as the primary ingredient.
Sign you’re overdoing it: Bristles that split, fray, or lose their point after cleaning.
3. Antibacterial Properties Without Harsh Chemicals
Bacteria thrive in leftover makeup, and a remover with mild antibacterial agents (like tea tree oil, salicylic acid, or benzalkonium chloride) kills germs without damaging bristles. Avoid bleach, triclosan, or strong synthetic fragrances—these can corrode metal ferrules or irritate sensitive skin when you use the brush next.
What to look for: Ingredients labeled as antibacterial or antimicrobial, but without harsh preservatives like parabens or phthalates.
4. Conditioning Agents for Shedding or Weak Bristles
If your brushes shed fibers or feel mushy, opt for a remover with conditioning agents (like glycerin, aloe vera, or panthenol). These strengthen fibers and prevent the bristles from falling out at the ferrule.
Test for weakness: Run your fingers along the bristles—if they pull out easily or feel stiff and dry, they need conditioning.
5. Material Compatibility: Always Check the Manufacturer’s Guidelines
Not all brushes are created equal. Synthetic bristles (nylon, taklon) handle most removers fine, but natural hair (goat, boar, horsehair) needs gentler formulas. Metal ferrules (common in high-end brushes) can corrode with citric acid or vinegar-based cleaners, while wood or acrylic handles may warp if exposed to water-based removers too often.
Where to confirm: The brush’s original packaging or the brand’s care instructions—these are the only sources that matter.
The One Rule That Saves Your Brushes: The Diagnostic Checklist
Before you buy, run this quick test on your brushes to avoid costly mistakes:
| Symptom | Likely Cause | Fix It With This Remover Type |
|---|---|---|
| Bristles clump together | Too much remover left behind | Foam or gel-based (dries cleaner) |
| Bristles feel stiff/dry | Alcohol or harsh detergents | Oil-free, pH-balanced liquid |
| Bristles shed at the ferrule | Weak fibers or improper cleaning | Conditioning remover with glycerin |
| Metal ferrule rusts | Acidic or vinegar-based cleaners | Neutral pH, alcohol-free |
| Brush handle warps | Water damage from over-soaking | Spray or wipe-down formula (less moisture) |
The Bottom Line: What to Verify Before You Buy
You don’t need to memorize brands—just match your brush type to these criteria:
- pH 5–7 (neutral or slightly acidic).
- No alcohol for natural hair bristles.
- Antibacterial but gentle (tea tree oil, salicylic acid).
- Conditioning agents if your brushes shed.
- Manufacturer-approved for your brush material.
Pro tip: If you’re unsure, stick to liquid or foam-based removers—they’re less likely to leave residue than sprays, and they give you more control over how much you use. And never soak brushes overnight—that’s how you ruin them.
Now you’re ready to pick a remover that cleans without compromising—because a good brush is worth protecting.
The Step-by-Step Pro Cleaning Routine (Beyond Just the Remover)
Flawless Blending in 5 Minutes: The Pro Makeup Artist’s Brush System for Busy Creators — Clean brushes are just the start—speed matters too. If you’re tired of spending 10+ minutes blending eyeshadow or foundation, a structured system cuts that time in half without sacrificing pro results. Includes 1 free bonus resource. 5-minute pro makeup blending system for busy creators
Cleaning your makeup brushes isn’t just about slapping on remover and calling it a day. The method matters more than the product. A sloppy routine leaves residue, weakens ferrules, and turns your brushes into bacterial breeding grounds—no matter how fancy the remover. Here’s how to clean like a professional, step by step, with the diagnostic checks that separate good from great.
Step 1: Shake, Don’t Dunk
Never plunge your brush into remover. That’s the fastest way to warp handles, loosen ferrules, and flood the bristles with excess liquid. Instead:
- Hold the brush over a sink or trash can and shake vigorously to remove loose product. (If you’re dealing with heavy makeup like cream blush, tap the bristles against the sink edge to dislodge clumps first.)
- Diagnostic check: If product flies off in chunks, your brush is overloaded—rinse it first with lukewarm water to avoid clogging the bristles.
Step 2: Target the Bristles, Not the Handle
Most people douse the entire brush, but moisture on the handle ruins the wood or metal over time. Focus only on the bristles:
- Apply remover directly to the bristles—use a dropper, spray, or a damp cloth. Avoid saturating the ferrule (the metal band where bristles meet the handle).
- Pro move: For stubborn product, gently massage the ferrule with your fingers. This loosens trapped particles without forcing water into the join.
- Diagnostic check: If the ferrule feels loose after cleaning, you’ve over-saturated it. Next time, use less remover or switch to a foam-based formula.
Step 3: Rinse Like a Pro
Lukewarm water is non-negotiable. Hot water warms handles, which can cause warping. Here’s how to do it right:
- Rinse under lukewarm running water, angling the bristles downward to let water drain naturally.
- Never squeeze the bristles—this distorts the shape. Instead, gently press the base of the bristles against the sink to remove excess water.
- Diagnostic check: If water beads up on the bristles after rinsing, you didn’t rinse long enough. Run them under water until they lay flat.
Step 4: Reshape and Dry Flat
This is where most people mess up. Drying brushes upright helps maintain bristle shape and strengthens the ferrule over time.
- Reshape the bristles into their natural point by gently combing them with your fingers or a brush comb.
- Lay the brush flat on a clean towel, bristles facing up. Prop the handle slightly if needed to prevent warping.
- Diagnostic check: If bristles bend permanently after drying, you didn’t reshape them properly or left them in a damp towel too long.
The Pro Secret: Detangle for a Salon Finish
Most guides stop at drying, but a brush comb is your secret weapon for that fresh-out-of-the-box feel:
- After the brush is fully dry, use a bristle-specific comb (or a clean toothbrush) to detangle any remaining knots.
- Why it matters: This removes micro-clumps that remover alone can’t reach, ensuring every stroke is smooth.
The Diagnostic Checklist: When Your Cleaning Goes Wrong
Not all brushes clean the same way. Here’s how to spot (and fix) common mistakes by their symptoms:
| Symptom | Likely Cause | Fix It |
|---|---|---|
| Bristles clump after drying | Too much remover or not rinsed well | Rinse longer next time; use less remover or switch to a foam formula. |
| Ferrule feels loose | Over-saturation or aggressive shaking | Avoid dunking; massage the ferrule gently instead of forcing water in. |
| Bristles won’t hold shape | Dried upright or not reshaped properly | Always dry flat; reshape bristles before laying down. |
| Handle warps or cracks | Hot water or remover on the handle | Only apply remover to bristles; rinse with lukewarm water. |
| Residue after cleaning | Cold water rinse or remover buildup | Rinse with warm water until bristles lay flat; deep-clean with a brush comb. |
Why This Matters
A sloppy routine doesn’t just make your brushes look bad—it shortens their lifespan. The ferrule weakens, bristles fray, and bacteria thrive in leftover product. Cleaning isn’t a one-time fix; it’s a habit. Follow these steps, and your brushes will last years, perform like new, and never let you down mid-blend.
(Need a deeper look at specific brush types or remover formulas? Check out The 3 Types of Makeup Brush Removers—and Which One You Need for tailored advice.)
The 5 Most Common Makeup Brush Cleaning Mistakes (And How to Fix Them)
Cleaning your makeup brushes isn’t just about slapping on remover and rinsing—it’s a process where small mistakes can turn your brushes into bacterial breeding grounds or ruin their shape. Here are the five most common cleaning mistakes, and how to fix them before they damage your tools.
1. Using Too Much Remover
Symptom: Bristles clump together, lose their shape, or feel stiff after drying. Why it happens: Excess remover leaves residue that hardens, fusing the fibers. Even water-based cleaners can behave this way if overused. Fix: Use a pea-sized amount of liquid remover, or a light mist of spray. For foam removers, apply a thin layer—just enough to cover the bristles without pooling. If your brushes are heavily makeup-laden, clean them in batches to avoid over-saturating.
2. Skipping the Drying Step
Symptom: Brushes develop a musty smell, grow mold, or attract bacteria. Why it happens: Damp bristles create the perfect environment for microbes to thrive. Even “quick-dry” removers need time to fully evaporate. Fix: Lay brushes flat on a clean towel or in an open brush holder to air-dry for 24 hours before use. If you’re in a hurry, use a brush dryer on low heat—but never high, as excessive heat weakens the glue holding the ferrule to the handle. Pro tip: Flip the brushes halfway through drying to ensure even moisture loss.
3. Storing Brushes in a Closed Container
Symptom: Bristles stay damp, develop mildew, or grow fuzzy over time. Why it happens: Closed containers trap moisture, preventing proper drying and accelerating bacterial growth. Fix: Store brushes upright in an open holder or lay them flat in a dry, well-ventilated area. If you must use a closed case (like a travel set), add a silica gel packet to absorb excess moisture. Never store brushes in a makeup bag or pouch—they’ll stay damp and degrade faster.
4. Cleaning Brushes Too Aggressively
Symptom: The ferrule (the metal band holding the bristles) loosens, or bristles bend and splay outward. Why it happens: Scrubbing too hard weakens the ferrule’s glue bond, and aggressive twisting can warp the bristles. Fix: Instead of scrubbing, gently massage the base of the bristles between your fingers while they’re in the remover. For stubborn makeup, use a soft-bristled toothbrush (like one for babies) to work it out without damaging the fibers. Avoid twisting the brush—this distorts the shape and can pull the ferrule loose.
5. Ignoring Brush Material
Symptom: Bristles fray, lose their spring, or dissolve over time. Why it happens: Not all removers are created equal. Harsh solvents (like acetone) can strip natural fibers, while water-based cleaners may struggle with oil-based makeup on synthetics. Fix: Match your remover to your brush type:
- Synthetic bristles (nylon, taklon): Use a gentle, water-based remover or a mild soap solution. Avoid alcohol-heavy cleaners—they can dry out the fibers.
- Natural bristles (goat, squirrel, badger): Opt for oil-based or balm removers to prevent fraying. Water alone won’t fully dissolve oil-based makeup.
- Mixed fibers: Check the brush’s label—if it’s a blend, use a dual-action remover (like a balm that dissolves both oil and water-based products).
Pro Tip: If your brushes still feel sticky after cleaning, they’re not dry enough. Let them air out for another 12 hours—rushing it leads to residue buildup. And if a brush’s bristles won’t spring back after cleaning, it’s time to replace it. Some damage is irreversible.
Natural vs. Chemical Makeup Brush Removers: What’s the Difference?
The choice between natural and chemical makeup brush removers isn’t about which is “better”—it’s about which matches your brushes, your routine, and your skin’s tolerance. Natural removers rely on plant-based solvents like witch hazel, aloe vera, or citrus extracts to dissolve makeup without harsh chemicals, while chemical removers use synthetic surfactants and solvents (often alcohol-based) for faster, deeper cleaning. The difference isn’t just in the ingredients; it’s in how they interact with your brushes and your skin. Here’s how to decide which one you need—and which one you should avoid.
The Core Trade-Off: Speed vs. Gentleness
Chemical removers cut through heavy makeup (waterproof mascara, long-wear foundation) in seconds, but they can strip natural oils from bristles, leaving them dry and brittle over time. Natural removers take longer to work—sometimes requiring multiple applications—but they preserve bristle integrity and are safer for sensitive skin. The trade-off isn’t just about cleaning power; it’s about the long-term health of your brushes and your face. If you’re using heavy, long-wear makeup daily, a chemical remover might be the only way to avoid clumping. If your brushes are synthetic (nylon, taklon) or your skin is reactive, a natural formula could save you from irritation and premature wear.
When to Pick Each (And When to Avoid Them)
| Criteria | Chemical Removers | Natural Removers |
|---|---|---|
| Best for | Waterproof, long-wear, or creamy makeup | Light to medium makeup, sensitive skin |
| Bristle types | Synthetic (nylon, taklon) or mixed fibers | Natural (sable, goat hair) or delicate synthetics |
| Skin sensitivity | Low (but can dry skin if overused) | High (gentler, but may not fully dissolve heavy makeup) |
| Cleaning time | Instant (30 sec–1 min) | 2–5 minutes (sometimes longer) |
| Residue risk | Higher (if not rinsed thoroughly) | Lower (but some plant oils can leave a film) |
| Bacterial control | Strong (alcohol-based formulas kill germs) | Moderate (depends on preservatives) |
| Environmental impact | Higher (often plastic packaging, synthetic solvents) | Lower (biodegradable, but check for microplastics in scrubbing agents) |
The symptom that says you’re using the wrong type:
- Clumped bristles after rinsing? You’re using a natural remover on waterproof makeup—or a chemical remover that didn’t dissolve everything before it dried.
- Bristles that feel gummy or coated? A natural remover with leftover plant oils, or a chemical remover that didn’t rinse clean.
- Skin irritation after cleaning? The remover’s ingredients are reacting with your skin (common with alcohol-heavy formulas on dry or eczema-prone skin).
The Pro Fix: How to Use Each Type Without Ruining Your Brushes
For chemical removers:
- Pre-soak heavy makeup in warm water for 30 seconds to loosen it before applying remover.
- Rinse in cool water—this helps close the bristles after cleaning.
- Pat dry with a clean towel, then reshape bristles while damp to prevent bending.
For natural removers:
- Massage the ferrule (the metal band where bristles meet the handle) for 10–15 seconds to work the remover deep into the base.
- Use a toothbrush to scrub the bristle tips if makeup is stubborn—natural removers need mechanical help to break down heavy products.
- Rinse until water runs clear—natural formulas leave a film if not rinsed thoroughly.
The One Exception: Hybrid Removers
Some removers blend natural and chemical ingredients (e.g., alcohol-free but with synthetic surfactants). These are the safest middle ground—they clean effectively without the harshness of pure chemical formulas. Look for products labeled “alcohol-free” or “plant-based” with added emulsifiers like glycerin or coconut-derived surfactants. The symptom that says it’s working: your brushes feel clean and dry without residue, and your skin doesn’t react.
The Bottom Line: Pick Based on Your Brushes, Not the Label
- If your brushes are natural (sable, goat hair) or you have sensitive skin: Start with a natural remover. If it doesn’t dissolve your makeup, switch to a chemical one only for those brushes.
- If you wear waterproof or long-wear makeup daily: Use a chemical remover, but follow the pro rinse-and-reshape routine to protect bristles.
- If you’re unsure: Test a small batch of both on a cheap brush first. The one that leaves your bristles soft and your makeup fully dissolved is the one for you.
The decision rule: Your brushes should feel dry and springy after cleaning, not stiff or coated. If they don’t, you’re using the wrong type—or your routine needs adjustment. (For troubleshooting, see The 5 Most Common Makeup Brush Cleaning Mistakes.)
Frequently Asked Questions
Can I use baby shampoo as a makeup brush remover?
Short answer: Yes—but with caveats. Baby shampoo is gentle enough for most brushes, but it lacks the deep-cleansing power of dedicated removers. The real risk isn’t damage (it won’t strip bristles or warp handles), but leaving residue that traps bacteria. If you use it, rinse thoroughly with warm water and shake out excess moisture to prevent clumping. For brushes with synthetic bristles or stubborn makeup (like waterproof mascara), baby shampoo won’t cut it—stick to a formula designed for those materials.
Pro tip: If you’re committed to shampoo, opt for a fragrance-free, sulfate-free version. The absence of harsh detergents reduces the chance of irritation if the remover drips onto your skin during cleaning.
How often should I deep-clean my makeup brushes?
Short answer: Every 7–10 days, but adjust based on how often you use them. Brushes used daily for foundation, powder, or waterproof products need cleaning more frequently—every 5–7 days—while blush or bronzer brushes can stretch to 10–14 days. The key is visual inspection: if bristles look dull, clumpy, or coated with product, it’s time.
Diagnostic checklist for overdue brushes:
- Clumped bristles = residue buildup (clean immediately).
- Dull or stiff bristles = dried makeup (rinse with remover ASAP).
- Visible product flakes = bacteria risk (deep-clean now).
- Handle feels greasy = old remover residue (wash handle separately).
Exception: Brushes used for liquid liner or eyelash glue should be cleaned after every use—these products don’t rinse off easily and create a breeding ground for bacteria.
What’s the best way to dry makeup brushes?
Short answer: Never lay them flat or in a closed container. The correct method:
- Reshape bristles into their original form (pointing upward for domes, angled for blending).
- Stand them upright in a brush holder or open container (like a clean, empty spice jar) with bristles facing up. This prevents water from pooling in the ferrule or handle.
- Air-dry completely (24–48 hours). Do not use a hairdryer—heat warps handles and weakens adhesives. If you’re in a hurry, gently blot excess water with a clean microfiber towel (never paper towels—they leave lint).
Red flags for improper drying:
- Bristles sticking together = residual moisture (let them dry longer).
- Handle feels damp = water trapped in the ferrule (disassemble if possible).
- Brush won’t hold shape = adhesive failure from heat or pressure (replace if damaged).
Pro move: Store brushes in a cool, dry place (not the bathroom). Humidity accelerates mold growth, and direct sunlight degrades synthetic bristles over time.
Can I reuse old makeup remover?
Short answer: No—never reuse remover, even if it looks fine. Here’s why:
- Bacteria and fungi thrive in remover left in brushes or bottles. Even if it doesn’t smell, microscopic contaminants linger.
- Chemical breakdown: Over time, the active ingredients (surfactants, solvents) lose effectiveness, leaving residue that clumps bristles and weakens adhesives.
- Contamination risk: If you’ve used the remover in a brush that later touched your face, you’ve just transferred bacteria back to your skin.
What to do with “old” remover:
- Discard it after one use (or after cleaning a single brush, if you’re using a travel-sized bottle).
- For bulk removers, portion into small, labeled containers (e.g., a clean shot glass per brush) to avoid cross-contamination.
- Natural removers (like castile soap) degrade faster than chemical ones—replace them every 3–5 uses to avoid buildup.
Exception: If you’re using a powder remover (like a brush-cleansing spray), follow the brand’s instructions—but even then, never reuse the liquid after it’s been in contact with brushes. The bottle itself can harbor bacteria.
Bonus: The One Mistake Everyone Makes with Brush Drying
Most people think “dry” means “not dripping,” but residual moisture is the most common cause of brush damage. Test for dryness: After drying, press the bristles gently—if they spring back immediately, they’re ready. If they feel damp or resist reshaping, let them dry another 12 hours. Skipping this step leads to:
- Mold growth (visible as black/dark spots on bristles).
- Ferrule corrosion (metal rusts if left damp).
- Handle warping (plastic handles bend over time with trapped moisture).
Pro hack: Place a silica gel packet (the kind in shoe boxes) in your brush storage to absorb lingering humidity. Replace it every 3 months.
When to Replace Your Makeup Brushes (Even with Perfect Cleaning)
Your brushes are tools, not forever. Even with flawless cleaning, they wear out—and when they do, no remover can save them. Here’s how to spot the moment to replace them:
- Bristles that clump or won’t hold shape mean the fibers are frayed beyond repair. If they splay out after cleaning or stay stuck together, it’s time to retire them.
- A loose or missing ferrule (the metal band holding the bristles to the handle) is a death sentence. If it wobbles or falls off, the brush is irreparable—buy a new one.
- Excessive shedding after cleaning signals frayed bristles. If you’re finding hairs everywhere after you’ve cleaned, the brush has reached its limit.
- A musty smell after cleaning means mold has taken root. No remover will fix this—discard it immediately.
Pro tip: Keep a backup brush or two on hand. Even the best remover can’t revive a worn-out brush, and having a spare means you’re never stuck with a compromised tool.
Why It Matters
Brushes degrade over time—not just from dirt, but from the physical stress of use. A well-maintained brush can last months, but if you’re seeing any of these signs, replace it. A fresh brush ensures smoother application, better blending, and a hygienic tool. Don’t wait until your brush fails mid-makeup—act when you notice the first sign of wear.
Keep reading
Keep exploring the topic with these related guides:
- How to Care for Beauty Blender: 7 Pro Tips
- Makeup Brush Sanitizer: 7 Deep-Clean Tips Without Washing
Next step: Ready to master blending faster? Grab the step-by-step guide to save time and perfect your technique—no extra tools needed. digital guide for flawless makeup in minutes