
Beauty Blender Loose Powder: 7 Pro Tips for Flawless
Photo by Shirly Welloving on Unsplash
Beauty Blender Loose Powder: 7 Pro Tips for Flawless Application in 2026
Key Takeaways
The Beauty Blender works best for loose powder when used dry—wet sponges create streaks and drag. For a flawless finish, tap (not press) powder onto skin, then blend with light, circular motions.
- Dry only: Wet sponges drag powder, causing streaks—stick to dry blending.
- Tap, don’t press: One light tap per section prevents clumping and cakeiness.
- Light circles: Blend upward from the jawline to avoid settling into fine lines.
- Switch tools: Use a powder brush for hard-to-reach areas like the hairline.
- Set long-lasting: Mist lightly with a cool setting spray or press translucent powder on the T-zone.
Part of our complete guide: for the full picture, see 25+ Free Procreate Makeup Brushes for Flawless Digital.
What Decides a Streak-Free Powder Application
| Criterion | Why it decides the outcome | How to check it yourself | Red flag |
|---|---|---|---|
| Sponge dryness | Moisture creates friction, causing loose powder to clump and drag instead of dispersing evenly. | Hold the sponge up to a light source: if it looks translucent or water droplets form when squeezed, it’s too damp. A dry sponge will feel slightly rough and absorb no liquid when pressed against your skin. | Water droplets or a shiny, wet appearance when squeezed. |
| Powder application method | Pressing compacts powder into clumps; tapping releases an even, airborne dust for smooth blending. | Tap the back of your hand against the powder compact’s edge: if powder falls in a fine, even cloud (like flour), you’re doing it right. Pressing should leave visible marks or cause powder to pile up. | Visible powder piles or a “caked” texture when pressed against your skin. |
| Blending direction | Circular motions drag powder downward, settling into fine lines; upward/outward motions help powder adhere evenly. | Place a dry sponge on your forehead and mimic blending strokes: if your hand moves in small, upward sweeps (away from the face center), it’s correct. Circular motions will leave visible streaks when tested on your arm. | Streaks or a “windshield wiper” pattern when tested on your arm with dry powder. |
| Tool surface texture | Dense cells (like Beauty Blender) trap powder; velour or silicon surfaces release it smoothly. | Run your fingertip over the sponge’s surface: dense cells feel like a textured grid, while velour or silicon feels smoother and flatter. | A grid-like texture (like a honeycomb) that visibly catches powder when tapped. |
| Skin prep smoothness | Oil or texture causes powder to settle unevenly, making blending impossible. | Press your finger against your skin: if it feels rough, sticky, or has visible pores, you need a primer. A smooth, matte surface (like a lightly powdered area) will feel even under your fingertip. | Sticky residue, visible pores, or a “grainy” feel when touched. |
| Setting technique | Cool mist or translucent powder locks powder in place; heat or heavy pressing causes melting. | Mist your hand with setting spray: if it feels cool and evaporates quickly, it’s safe. Pressing translucent powder should leave a sheer, even layer—not a thick cake. | A warm, sticky feeling after misting or a thick, visible layer when pressing powder. |
| Tool pressure | Light contact disperses powder; pressing drags and clumps it. | Gently press your sponge against your skin: if you can see your fingerprints in the powder, you’re pressing too hard. A light touch should leave no visible marks. | Visible fingerprints or a “sucked-in” look where the sponge touched. |
Why the Beauty Blender Struggles with Loose Powder (And How to Fix It)
The Beauty Blender’s signature dense cells—what make it so effective for liquid foundation—are its downfall with loose powder. Unlike pressed powder, which clumps into a malleable mass, loose powder is finer and more airborne, meaning it disperses as a cloud when dragged. A wet sponge traps that cloud in its cells instead of dispersing it smoothly, creating streaks and a cakey finish.
The Physics of the Problem
Moisture creates friction, and friction with loose powder equals clumping. The Beauty Blender’s dense cells, designed to absorb liquid foundation, become a sieve for loose powder, causing uneven distribution. The solution? Use a completely dry Beauty Blender for initial application.
The Fix: Tap, Don’t Press
- Tap powder onto skin – Mimic the way a powder puff works but with the Beauty Blender’s precision.
- Blend with light, circular motions – Avoid dragging powder downward, which settles into fine lines.
- Switch tools for hard-to-reach areas – Use a powder brush for under the nose or along the jawline.
Common Mistake: Dampening Before Application
A lightly dampened Beauty Blender (not soaked) works for blending after the initial application, but even then, the key is minimal moisture. Think of it like a powder puff with a handle: the sponge’s density helps control the product, but only if it’s not fighting against the powder’s natural dispersion.
For long-lasting powder, the pro hack is to mist your skin lightly with setting spray after applying powder, then press a translucent powder (like a finely milled loose powder) onto the T-zone with a dry sponge. This locks everything in place without adding bulk.
The 3 Best Sponges for Loose Powder (Beyond the Beauty Blender)
The Beauty Blender isn’t the only tool for loose powder—and in some cases, it’s not even the best. If you’re tired of streaks or uneven coverage, the right sponge can make all the difference. Here’s what to compare when choosing, and which types work best for your needs.
1. Velour Powder Puffs (The Brush Substitute)
Velour puffs—like the ones from Pimoys or GXXMEI—are the closest thing to a powder brush without the brush. Their softer, flatter surface distributes loose powder evenly, mimicking the way a brush would. This makes them ideal for mineral powders and loose setting sprays, where a Beauty Blender’s dense cells would clump and drag.
Why they win:
- No pressing needed—just tap powder onto skin, then blend with light, sweeping motions.
- The flat base prevents powder from sinking into the sponge, so you get more use per puff.
2. Triangle Sponges (The Contouring Pro)
For contouring and blending, nothing beats a triangle sponge—especially in a 6-pack set. The angled edges reach the jawline and sides of the face without smudging, while the tapered shape helps you control placement. These are the go-to for sharp contour definition and precise blending under eyes or along the nose.
Pro tip:
- Use them dry for loose powder.
- Wet them only for liquid foundation or cream products.
3. Silicon Powder Puffs (The Easy Pickup)
Silicon puffs—like Morphe’s—are the closest to a powder brush in terms of texture. They pick up powder easily and release it smoothly, but they don’t blend as well as velour or triangle sponges. Best for quick applications (like setting spray) or minimalist looks where you want to avoid over-blending.
Avoid them for:
- Heavy contour or matte powder—they can drag and leave texture.
What to Avoid: Traditional Makeup Sponges
The original Beauty Blender (or any dense-cell sponge) is a streak magnet with loose powder unless used completely dry. The cells trap powder, making it hard to distribute evenly. If you’re set on a Beauty Blender, stick to dry blending only—but for loose powder, velour, triangles, or silicon are far more reliable.
Final decision rule:
- If you need even coverage, go velour.
- If you’re contouring, triangles are non-negotiable.
- For quick, smooth applications, silicon works—but don’t expect the same precision.
How to Blend Loose Powder Without Streaks (Step-by-Step)
Flawless Blending in 5 Minutes: The Pro Makeup Artist’s Brush System for Busy Creators — If blending powder feels like a daily battle, a structured system can save you time—especially when you’re juggling busy mornings. Includes 1 free bonus resource. 5-minute pro powder blending guide for busy creators
The Beauty Blender’s dense cells are a disaster with loose powder—unless you follow the right steps. Streaks happen when powder clumps or drags, and the fix isn’t about the tool, it’s about the physics: loose powder needs to be tapped onto skin, not pressed, and blended with a dry sponge in the right direction.
Step 1: Prep Your Skin (The Primer Rule)
Loose powder clings to oil and texture, so start with a lightweight, non-greasy primer. Look for one labeled “for powder” or “mattifying”—these create a smooth base without adding shine. If you skip this, powder will settle into pores and crevices, making it impossible to blend evenly.
Pro tip: A tiny dab of translucent powder on your forehead before primer helps—it creates a textured base for better adhesion.
Step 2: Tap, Don’t Press (The Powder Physics)
This is where most people go wrong. Pressing compacts loose powder, turning it into a clumpy mess. Instead:
- Use your ring finger (it’s the lightest touch).
- Hold the powder compact at a 45-degree angle, about an inch above your skin.
- Tap the back of your hand against the compact’s edge—this releases a fine, even dust. Think of it like sprinkling flour: a light hand prevents clumps.
- Focus on the T-zone first (forehead, nose, chin). Overloading here causes drag when you blend.
Why this works: Loose powder is made of tiny, irregular particles. Pressing forces them together; tapping lets them fall individually, so they blend like a cloud.
Step 3: Blend with a Dry Sponge (The Direction Matters)
Grab a completely dry Beauty Blender or velour puff. Wet sponges soak up powder, creating hollows and streaks. Instead:
- Place the sponge on your forehead and lightly press down (just enough to make contact).
- Buff outward in straight lines—away from the center of your face, not in circles. Circular motions drag powder and create a “windshield wiper” effect.
- Work in three zones:
- Forehead to hairline (upward)
- Cheeks to temples (sideways)
- Chin to jawline (diagonal)
Physics note: Loose powder is static-cling happy. Buffing outward helps the particles “flow” with your hand instead of resisting it.
Step 4: Fix Streaks (The Dampen-Upward Trick)
If you see streaks after blending:
- Lightly dampen the sponge—just a hint of water, not soaked. Too much turns it into a blotter.
- Blend upward from the jawline, using small, patting motions. This helps the powder settle evenly.
- For stubborn streaks, switch to a powder brush (like a fluffy kabuki). Brush in the same upward direction—this catches loose particles without dragging.
Why upward? Powder naturally settles downward. Blending upward encourages a smoother finish.
Step 5: Set It (The Two-Minute Lock)
Loose powder needs help staying put. Do one of these:
- Mist with a cool setting spray (like a hydrating one with alcohol-free ingredients). Setting spray helps the powder stay in place.
- Press a tiny amount of translucent powder onto your T-zone with a dry sponge. This acts as an anchor for the rest.
Pro hack: If you’re oily, set with pressed powder instead of spray—it’s less likely to melt into shine.
The One Mistake That Ruins Everything
Using a wet sponge. Water makes loose powder behave like glue—it clumps and drags. If you must dampen, do it after blending, not before.
When to Walk Away
If your powder still looks patchy after these steps, you’re either:
- Overloading (start with less powder).
- Using the wrong sponge (try a velour puff or powder brush).
- Skipping the primer (go back to Step 1).
Final rule: Loose powder is a dusting job, not a pressing one. Treat it like snow—tap it down lightly, then sweep it into place. Do that, and your finish will be flawless.
When to Use Wet vs. Dry Beauty Blender for Powder
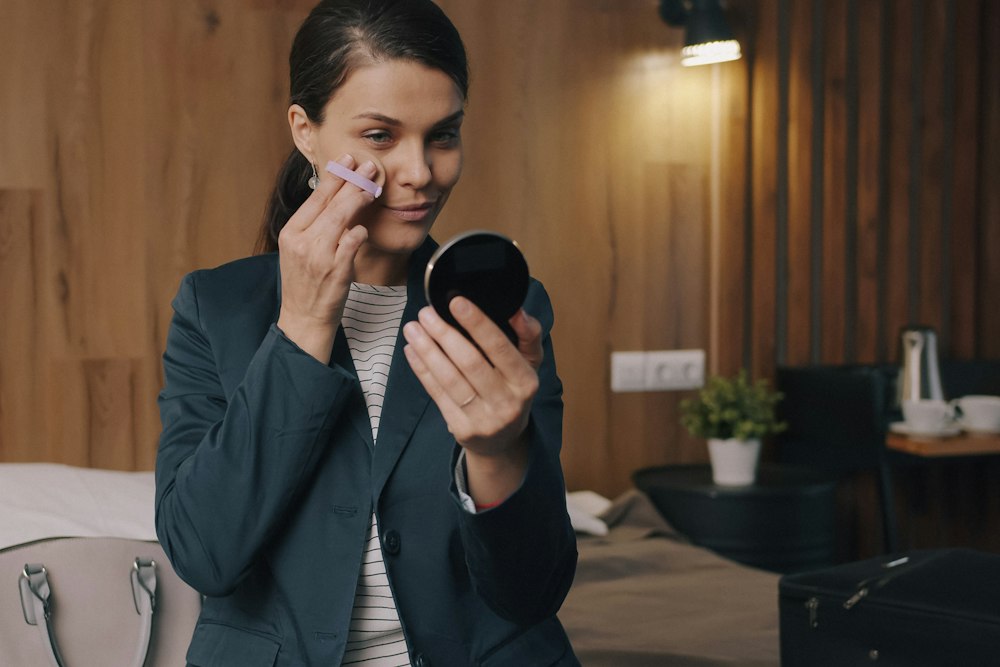 Photo by Vitaly Gariev on Unsplash
Here’s the rule: use a dry Beauty Blender for loose powder. Wet or damp sponges turn loose powder into a clumpy mess—streaks, drag, and a finish that looks like you rolled in talc. The physics behind it? Loose powder is lightweight and fluffy; water weighs it down, creating a thicker, more cohesive texture. The Beauty Blender’s dense cells (its superpower for liquid foundation) become a sieve, letting powder slip through unevenly.
When to Go Dry
Use a completely dry Beauty Blender for:
- Matte finishes (no shine, minimal blending needed)
- Oily/combination skin (prevents clogging pores)
- Loose mineral powders (avoids streaks)
When to Dampen (Lightly)
A lightly dampened Beauty Blender works for:
- Buildable coverage (e.g., setting spray or loose powder foundation)
- Dry/mature skin (helps powder adhere)
- Contouring (creates a softer blend than a brush)
Never Use Wet for Loose Powder
Wet sponges are a disaster with loose powder—they clump, streak, and drag, leaving a cakey, uneven finish. If you’re using a setting spray, dampen the sponge after applying powder, not before.
Pro Tip: Tap powder onto skin (don’t press) and blend with light, circular motions—the key to avoiding streaks. If your powder looks patchy, you’re either pressing too hard or using too much moisture. The goal is to distribute, not press in.
Why This Matters: The Beauty Blender’s texture is optimized for liquid foundation, not powder. The fix isn’t the tool—it’s the technique. Dry for control, dampen only when you need adhesion, and always blend with an open hand to avoid compacting the powder.
The 5 Most Common Loose Powder Mistakes (And How to Fix Them)
Loose powder is a big deal for a natural, airbrushed finish—but only if you avoid these five mistakes. The Beauty Blender’s dense cells are great for liquid foundation, but they turn loose powder into a clumpy mess. Here’s how to spot the symptoms, diagnose the cause, and fix it for good.
Mistake 1: Overloading the Sponge
Symptom: Clumps, uneven coverage, or powder piling up in creases. Why it happens: Pressing powder onto the sponge (or worse, the skin) forces it into the cells, where it clumps instead of dispersing. Loose powder needs to be tapped, not packed.
Fix: Use the “one-tap rule”—tap powder lightly onto your skin in four sections (forehead, cheeks, nose, chin) with a single tap per area. Then blend with light, circular motions. If you’re using a brush, tap off excess into your hand before applying.
Mistake 2: Using a Wet Sponge
Symptom: Streaks, drag, or a finish that looks like you rolled in talc. Why it happens: Wet sponges turn loose powder into a paste, which drags instead of blending. The physics here are brutal—moisture makes powder particles stick together, creating clumps that streak when you swipe.
Fix: Keep your sponge dry or lightly dampened (like a damp washcloth). If you need a little moisture for blending, dab the sponge on a dampened cotton pad first—just enough to soften the sponge, not soak it.
Mistake 3: Blending Downward
Symptom: Cakey under-eyes, powder settling into fine lines, or a heavy look. Why it happens: Gravity wins. Blending downward pushes powder into creases and under the eyes, where it collects like snow in a valley.
Fix: Start blending upward from the jawline, working your way to the forehead. This lifts powder into the hollows of your face, where it belongs. For under-eyes, use a smaller brush (like a fluffy concealer brush) to tap powder lightly, then blend with your fingers in an upward motion.
Mistake 4: Skipping Primer
Symptom: Powder sliding off oily skin, settling into pores, or wearing off in patches. Why it happens: Loose powder needs grip. Without primer, it clings to dry areas (like the forehead) and slides off oily zones (like the T-zone), creating an uneven finish.
Fix: Apply a lightweight, non-greasy primer before powder. Look for formulas labeled “for loose powder” or “blurring primer”—they create a smooth, slightly textured surface that lets powder adhere evenly. Pro tip: If you’re in a pinch, a tiny dab of translucent setting powder on oily areas can buy you time.
Mistake 5: Not Setting Powder
Symptom: Powder disappears in 2 hours, or your makeup looks patchy by midday. Why it happens: Loose powder is lightweight by design, which is great for a natural finish—but it also means it’s not built to last. Without setting, it dissipates with heat, touch, or humidity.
Fix: Lock it in with a cool setting spray (like MAC Fix+ or Urban Decay All Nighter). For extra staying power, press a tiny amount of translucent powder onto your T-zone with a dry sponge—this creates a barrier that keeps the rest of your powder in place.
The secret to flawless loose powder? It’s not about the product—it’s about the physics. Loose powder needs to be tapped, not pressed; blended upward, not downward; and set lightly, not heavily. Skip these steps, and you’ll end up with streaks, drag, or a finish that fades faster than your coffee. Master them, and you’ll get that airbrushed, long-lasting look—without the cakey mess.
Which Sponge Is Right for Your Skin Type?
The right sponge for loose powder isn’t one-size-fits-all—it depends on your skin type and how you apply it. Oily or combination skin? Use a dry Beauty Blender or velour puff to avoid clogging pores. Tap powder lightly and blend upward to prevent drag. Dry or mature skin? A lightly dampened Beauty Blender or silicon puff helps powder adhere without settling into fine lines. Press powder gently and blend with the damp sponge to avoid streaks. Sensitive skin? Skip the Beauty Blender entirely—opt for a hypoallergenic velour puff (like Pimoys Hypoallergenic Velour Puffs) and stick to mineral powder, which is less irritating. Acne-prone skin? Avoid Beauty Blenders (they trap bacteria) and use disposable powder brushes instead. The key is matching the sponge’s texture to your skin’s needs—and the technique matters just as much as the tool.
The Physics Behind the Pick
Loose powder behaves differently on different skin types, and the sponge’s job is to control it. Oily skin needs a dry tool to prevent powder from clumping into the sponge’s cells—tap, don’t press, to distribute it evenly. Dry skin benefits from a damp sponge because moisture helps powder stick without flaking. Sensitive skin demands a non-porous, hypoallergenic surface to avoid irritation, while acne-prone skin requires disposable tools to minimize bacterial buildup. The wrong combo (like a wet sponge on oily skin) turns powder into a cakey mess—so choose based on how your skin reacts, not just the sponge’s name.
No matter your skin type, the secret to powder staying put is mist your face lightly with setting spray first, then press a translucent powder (like a loose mineral or baking-soda blend) onto your T-zone before blending. This locks everything in place—no matter what sponge you use.
Frequently Asked Questions
Can I use a Beauty Blender for both foundation and powder?
No, and here’s why. The Beauty Blender’s dense foam cells excel at absorbing liquid foundation, but they clump loose powder, turning your finish into a textured mess. The fix isn’t about the tool—it’s about the physics: liquid foundation clings to the sponge’s surface, while loose powder gets trapped in the cells and dragged across your skin. Use the Beauty Blender dry for powder (tap, don’t press), but save it for foundation only when it’s damp. For powder, a velour puff or a softer, flatter sponge (like a powder brush) will give you that airbrushed, streak-free finish without the struggle.
Why does my loose powder streak even when I use a dry sponge?
Streaks happen when powder clumps or drags—and both are avoidable. Clumping is the real culprit: loose powder sticks to the sponge’s texture, then transfers in uneven patches. The fix? Tap, don’t press. Lightly pat the sponge onto your skin (like dusting flour) instead of pressing down. If you’re still seeing streaks, your sponge might be too dense—switch to a velour puff or a powder brush with a flatter, smoother surface. Pro tip: if your powder has a fine, talc-like consistency (like translucent setting powder), it’s more forgiving than chunky formulas.
What’s the difference between a velour puff and a powder brush?
Texture and technique. A velour puff (like the ones used for loose powder) has a soft, plush surface that picks up powder gently without dragging. It’s ideal for setting powder—lightly dabbing to lock in your foundation without disturbing it. A powder brush, on the other hand, has stiff, angled bristles designed to distribute powder evenly (think: contour or highlighter application). The brush is better for blending powder into foundation or adding dimension, while the puff is for finishing. Need both? Use the brush to apply, then the puff to set.
How do I store my Beauty Blender to prevent bacteria?
Air-dry and stash it properly. After use, rinse the Beauty Blender with warm water and mild soap (no harsh chemicals—they break down the sponge), then squeeze out excess water (don’t wring it). Let it air-dry completely (overnight) before storing it in a clean, breathable container—like a mesh bag or an open drawer. Never leave it in a sealed case or a damp makeup bag, as moisture breeds bacteria. For extra hygiene, wash it weekly (or daily if you share your tools). And if it starts to smell? Toss it—foam doesn’t recover.
Can I use a Beauty Blender for setting spray?
No, and here’s the physics behind it. Setting spray is a liquid that is atomized into a mist, so the Beauty Blender’s dense cells may absorb it unevenly if applied too heavily. The result? A patchy, uneven sheen where the spray pooled. For setting spray, use your hands (hold them 6–8 inches away and mist in a crosshatch motion) or a large, fluffy brush (like a kabuki) to lightly buff the spray into your skin. The Beauty Blender’s job is foundation and powder—leave the mist to the tools built for it.
Pro tip for long-lasting powder: After setting your loose powder with a puff, lightly mist your T-zone with setting spray, then press a tiny amount of translucent powder (like Laura Mercier Translucent Loose Setting Powder) over it. The extra layer locks in your makeup without adding bulk—it’s the secret to a flawless finish that lasts all day.
The Secret to Long-Lasting Loose Powder (Pro Hack)
Loose powder is a big deal for a natural, airbrushed finish—but only if it lasts. The trick isn’t in the powder itself or the sponge you use; it’s in how you set it. Most people drown their T-zone in setting spray, which creates a sticky, shiny layer that attracts powder instead of locking it in. The result? A finish that melts by midday.
The Fix: Mist Lightly, Then Press
After patting on your loose powder with a dry Beauty Blender, give your T-zone a fine spray of setting mist—just enough so the spray bottle doesn’t drip. Then, instead of brushing more powder over the whole face, press a tiny amount of translucent powder directly onto the T-zone with a clean puff or your fingers. This creates a grip that keeps everything in place without the cakey buildup.
For All-Day Wear
Layer a lightweight powder foundation first (a cream-to-powder formula works best), then set with loose powder and mist. This hybrid approach extends wear time without the heavy, matte finish that cracks under makeup. If your powder still wears off by lunch, switch to a formula designed for longevity—look for one with silica or rice starch in the ingredients, which clings better to skin. Or, upgrade your setting spray to one with a lightly textured finish (think “grip” or “hold” in the marketing) instead of a sheer mist.
The Physics of Setting
Loose powder needs a dry surface to adhere to, not a wet one. A damp sponge or over-sprayed mist turns powder into a clumpy mess, while a fine mist + pressed powder gives you the control you need. Skip the heavy-handed application, and your finish will last as long as your confidence.
More to Explore
Real Techniques Miracle Powder Sponge
The Real Techniques Miracle Powder Sponge is designed specifically for loose powder applications. Its velour-like texture mimics the feel of a powder brush, allowing for smooth, streak-free application. Unlike traditional sponges, it doesn’t trap powder in its cells, making it ideal for those who struggle with clumping. The sponge’s flat, wide surface also helps with even distribution, especially for larger areas like the forehead and cheeks.
Pro Tip: Use it dry for the best results, tapping powder onto your skin before blending with light, upward motions.
Pimoys Powder Puffs, 6 Pack Triangle Makeup Puff
The Pimoys Powder Puffs come in a 6-pack set and feature a triangle shape, perfect for contouring and blending. The soft velour material ensures a smooth application without dragging, making it a favorite for loose powder and setting sprays. The angled edges allow for precise application in hard-to-reach areas, such as the jawline and sides of the nose.
Best For:
- Contouring and blending
- Loose powder and mineral powders
- Quick, even application
GXXMEI 30PCS Powder Puff Face Soft Makeup Sponge
The GXXMEI Powder Puffs offer a 30-piece set of triangle-shaped sponges made from soft velour. These puffs are designed to mimic the feel of a powder brush, providing a smooth, even application without the streaks. The angled edges help with contouring and blending, while the gentle texture prevents powder from clumping.
Ideal For:
- Mineral powders and loose setting sprays
- Contouring and blending
- Long-lasting, streak-free application
More Results
The Best Setting Sprays for Loose Powder
Setting sprays are essential for locking in your loose powder and extending its wear time. Here are some top picks for different skin types and needs:
- MAC Fix+ – A cult favorite, this spray provides a light hold without adding shine. It’s great for oily skin and helps keep powder in place for hours.
- Urban Decay All Nighter – Offers a strong hold and is ideal for long-lasting wear, especially in humid conditions.
- Tarte Shape Tape Setting Spray – Designed to lock in powder while adding a subtle glow, perfect for dry or combination skin.
- Laura Mercier Translucent Loose Setting Powder + Setting Spray Duo – A cooling mist that helps set powder without adding bulk, great for sensitive skin.
Pro Tip: Always mist from a distance (6–8 inches away) and avoid over-saturating your skin to prevent a sticky, shiny finish.
Final Thoughts
Mastering loose powder with a Beauty Blender—or any sponge—is all about understanding the physics of application. Loose powder is lightweight and airborne, so it needs to be tapped, not pressed, and blended with light, upward motions. The right sponge (velour, triangle, or silicon) can make all the difference, but technique is key.
By following these 7 pro tips, you’ll achieve a flawless, streak-free finish that lasts all day—without the cakey mess. And remember: the secret isn’t in the product; it’s in how you use it.
Next step: Ready to streamline your powder routine? Grab the step-by-step system now—no brushes needed, just smarter blending. Digital ebook for flawless powder application
Keep reading
Want to go deeper? Read our guide on Real Techniques Beauty Blender: 7 Pro Tips for Flawless Blending.