
Concealer Creasing Fix: 7 Pro Tricks to Keep It Flawless All Day
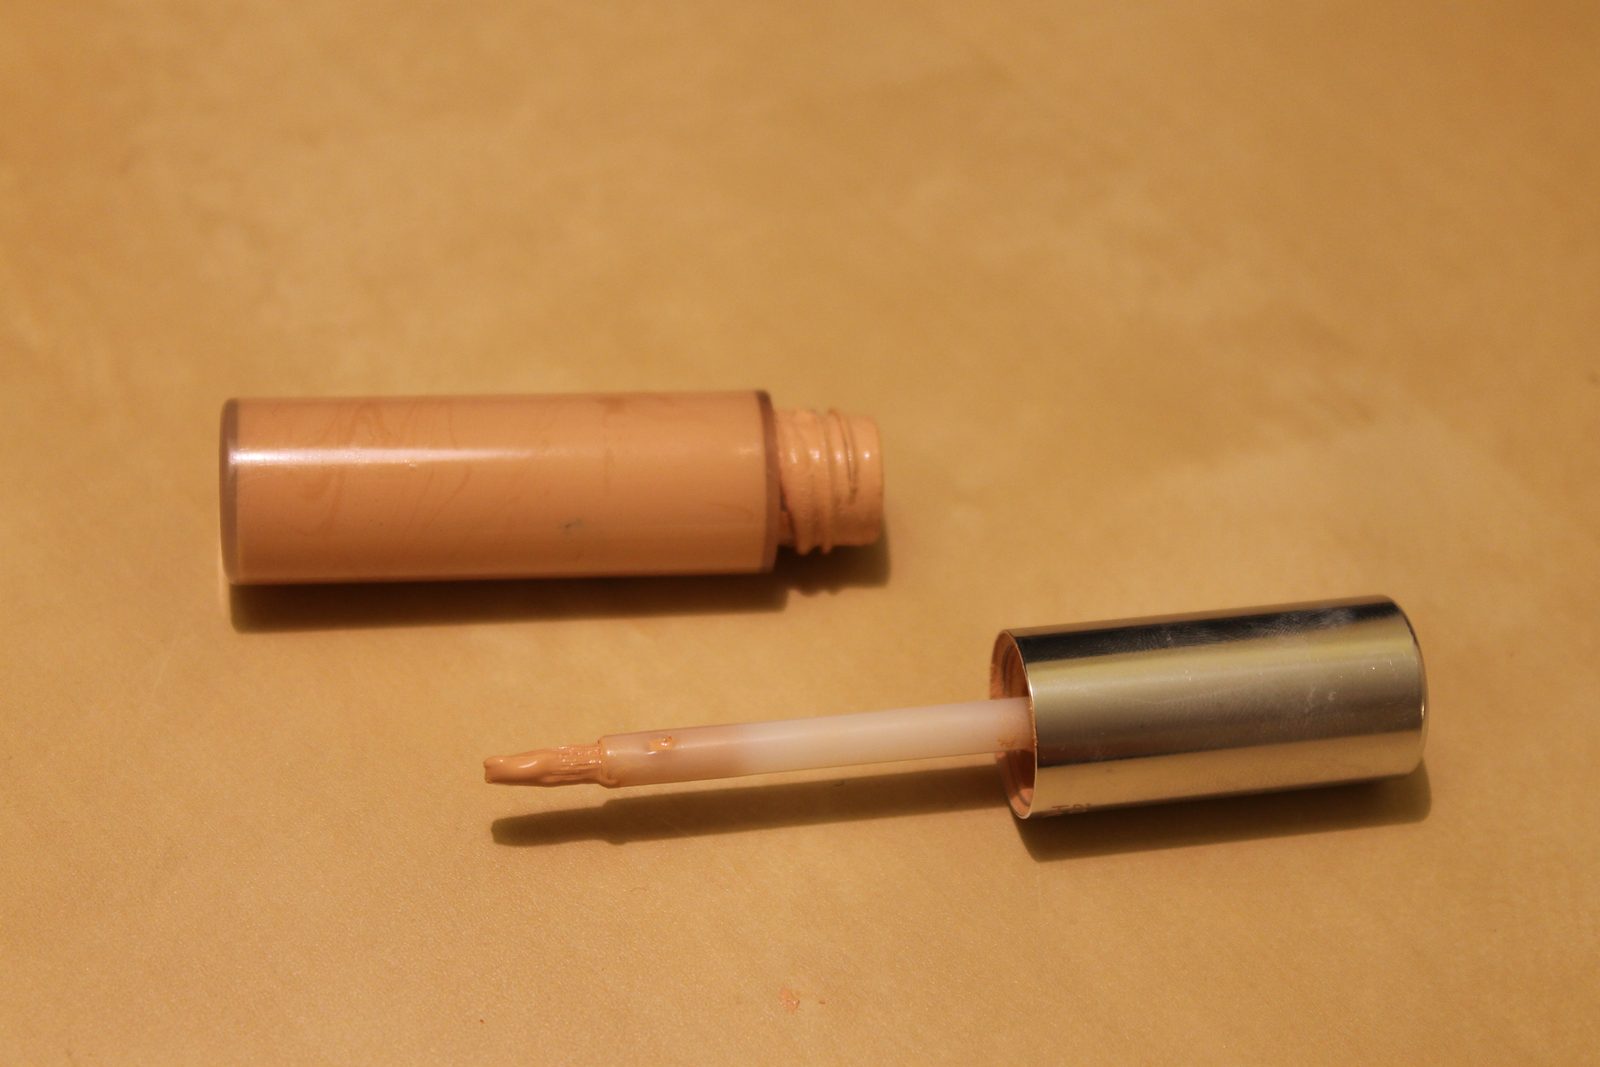
Key Takeaways
Concealer creasing isn’t about bad technique—it’s about skin texture, formula mismatch, or too much pressure. The fix? Damp sponges melt concealer into skin without pressing it down, while avoiding triggers like oily skin + powder formulas or dry skin + heavy cream concealers. Pro tip: Pat, don’t rub—tap with a damp sponge for seamless wear. For stubborn creasing, layer a thin primer first, then set with a blurring powder (skip heavy cake).
- Damp sponge > fingers or stiff brushes—melt concealer into skin without pressing.
- Avoid these combos: oily skin + powder formulas, dry skin + heavy cream, or over-blending with a brush.
- Pat, don’t rub: Tap concealer into skin with a damp sponge for seamless wear.
- Layer primer + blurring powder for stubborn creasing—skip heavy cake.
- #1 rule: Never press concealer down; melt it in with a damp sponge.
Why Your Concealer Keeps Creasing (And How to Stop It)
Concealer creasing isn’t about bad technique—it’s about skin texture, formula mismatch, or too much pressure. The fix depends on your skin type, because the wrong formula or application method turns concealer into a heavy, visible mess instead of a seamless base. Here’s how to diagnose the real problem and stop it for good.
The Science Behind Creasing
Concealer creases when it sinks into fine lines (like under the eyes) or doesn’t adhere to skin texture. Oily skin? Heavy cream concealers clog pores and slide. Dry skin? Thick formulas crack and flake. Sensitive skin? Over-blending pushes concealer into creases. And the #1 mistake? Applying it too thickly—it creases when it can’t stick.
Diagnose Your Skin Type (And Fix It)
1. Oily Skin
Problem: Heavy cream or powder-heavy formulas clog pores and slide off as the day goes on. Fix:
- Switch to a gel or water-based formula—these melt into skin without sitting on top.
- Set with a blurring powder (not cake). Cake powder thickens and emphasizes creasing; a finely milled, translucent powder blends without settling into lines.
2. Dry Skin
Problem: Thick cream concealers crack and flake because they don’t bond with dehydrated skin. Fix:
- Use a hydrating primer (look for hyaluronic acid or glycerin) to smooth texture.
- Apply with a damp beauty sponge—the moisture helps the concealer melt into skin without pressing it down.
3. Sensitive/Combination Skin
Problem: Over-blending with a brush pushes concealer into creases, especially around the nose and jawline. Fix:
- Use a stippling brush (like a small kabuki) or a beauty sponge for gentle patting, not rubbing.
- Less is more: layer lightly—thick applications crease because they can’t adhere.
The #1 Mistake (And How to Avoid It)
Applying concealer too thickly is the fastest way to guarantee creasing. The fix? Use less product and layer lightly. A thin, even layer blends better and lasts longer—no pressing, no sinking.
Pro Tip: If your concealer still creases after adjusting formula and technique, your primer or setting step might be the issue. (We’ll cover emergency fixes in a later section.)
Image:
Part of our complete guide: for the full picture, see 25+ Free Procreate Makeup Brushes for Flawless Digital.
The 7 Pro Tricks to Stop Concealer Creasing (No Expensive Tools Needed)
Concealer creasing isn’t about technique—it’s about physics. The wrong formula, too much pressure, or skin texture that resists blending turns your coverage into a map of your under-eye valleys. The fix? Work with your skin, not against it. Here are seven pro tricks that melt concealer into place without a single expensive tool.
1. Dampen Your Sponge or Brush—The Science of Melting
Water isn’t just a trick; it’s a chemical reset. Most concealers are oil-in-water emulsions, and water softens the oil droplets so they sink into skin instead of sitting on top. Here’s how to do it right:
- Dampen, don’t soak. Wipe your sponge or brush under lukewarm water until it’s damp, not dripping. Excess water dilutes the concealer and thins coverage.
- Tap, don’t swipe. Press the damp sponge against your skin in a stamping motion—like patting a cake—rather than dragging it. This pushes the formula into texture without pulling it into creases.
- Pro move: If your concealer is waterproof, use micellar water instead of plain water. It dissolves sebum and cleanses pores, so the concealer adheres better.
Why it works: Skin’s natural oils repel water-based products. A damp tool disrupts that barrier, letting the concealer absorb rather than cling.
2. Pat, Don’t Rub—The Stamping Technique
Most people rub concealer into creases, which compresses the product and forces it downward. Instead:
- Use a damp beauty sponge (or a clean finger) and press the concealer into skin in small, circular motions.
- Think “stamping,” not “blending.” Your goal is to distribute, not drag. If you’re seeing creases after application, you’re applying too much pressure.
- For stubborn areas: Dab a tiny amount of concealer onto the sponge first, then press it onto the skin. This prevents overloading.
Visual cue: Imagine you’re pressing a stamp onto paper—not smearing ink.
3. Prime Like a Pro—The Hydrating Base
A thin layer of primer smooths texture and prevents concealer from sinking into dry patches. But not all primers work:
- For dry skin: A hydrating primer (like one with glycerin or aloe) plumps fine lines and creates a uniform surface.
- For oily skin: A silicone-based primer (look for “blurring” or “smoothing” on the label) blurs pores and keeps concealer from sliding.
- For mature skin: A peptide primer (often labeled “anti-aging”) adds temporary firmness to prevent creasing.
Avoid: Heavy creams or powders—they can pull concealer into creases.
4. Dot, Don’t Swipe—The Stippling Brush Hack
Swiping concealer with a brush packs it into creases. Instead, use a small, densely packed brush (like a blending brush) to:
- Dot concealer in the center of your under-eye, then tap upward toward the brow bone.
- Work in triangles: Start at the inner corner, then the outer corner, and tap upward to follow the natural lift of the eye.
- For deep creases: Apply concealer outside the crease first, then lightly tap over it. This prevents the formula from settling into the valley.
Tool alternative: A clean makeup sponge cut into a tiny triangle works just as well.
5. Set with Powder—But Not Just Any Powder
Powder is your secret weapon, but the wrong type emphasizes creases. Here’s how to pick and apply it:
- Use a finely milled translucent powder (like a loose setting spray or a blurring powder). Cake powders are too dense and settle into creases.
- Apply with a fluffy brush in light, patting motions—never press.
- For oily skin: Set with a mattifying powder, but avoid heavy formulas that can cause flaking.
Pro tip: If your powder makes creases worse, switch to a setting spray with a blurring finish.
6. The Triangle Application—Follow the Natural Lift
Most people apply concealer in a straight line, which drags it into creases. Instead:
- Start at the inner corner—this is where the skin is thinnest and most prone to creasing.
- Move to the outer corner—tap upward to follow the natural lift of the eye.
- Finish at the brow bone—this prevents the concealer from settling into the tear trough.
Why it works: You’re working with gravity, not against it.
7. Reapply Strategically—The Tiny-Touch Method
By midday, creasing often returns. Instead of reapplying a full layer, use this spot-conceal trick:
- Dab a tiny amount of concealer on a damp sponge and press it over the creased area.
- Set immediately with a light dusting of powder or a blurring spray.
- Avoid rubbing—this just pushes the concealer deeper into the crease.
Emergency fix: If creasing happens before you finish your makeup, press a warm (not hot) flat iron over the area for 10 seconds. The heat melts the concealer into the skin temporarily.
The One Rule That Fixes 90% of Creasing
Stop pressing. Every time you rub, swipe, or press concealer into skin, you’re forcing it into creases. The goal is to distribute, not pack. Use the tricks above, and your concealer will stay put—without a single expensive tool.
Still creasing? Check your skin texture and concealer formula—those are the real culprits. (We’ll cover those in the next section.)
The 3 Biggest Mistakes That Cause Creasing (And How to Fix Them)
 Photo by Ashley Piszek on Unsplash
Concealer creasing isn’t a mystery—it’s a physics problem. The wrong formula, too much pressure, or skipping prep turns your coverage into a map of your under-eye valleys. But the real fix starts with diagnosing the mistake. Here are the three most common culprits, and how to stop them for good.
1. Over-Blending with a Stiff Brush
The Mistake: Swiping a dense brush across your under-eyes doesn’t blend—it pushes concealer deeper into creases. The stiffer the brush, the worse the creasing. You’re not melting the product into skin; you’re carving it into your texture.
How to Fix It:
- Swap the brush for a damp sponge. A damp beauty sponge (or even a clean makeup sponge with a few drops of water) melts concealer into skin without pressing it down. The dampness helps the formula sink in evenly, while the sponge’s texture prevents dragging.
- Use a stippling brush instead. If you prefer a brush, opt for a soft, fluffy stippling brush (the kind used for powder) and tap—not swipe—it into creases. The goal is to dissolve the product, not spread it.
- Less is more. Load a tiny amount of concealer onto your tool and build coverage in thin layers. Thick application = more pressure = more creasing.
The Science: Brushes are designed to distribute, not adhere. When you swipe, you’re essentially pushing product into the valleys of your skin—where it has nowhere to go but down.
2. Matching the Wrong Formula to Your Skin Type
The Mistake: Heavy cream concealer on oily skin? Gel on dry, sensitive skin? That’s a recipe for disaster. The formula has to match your skin’s needs—or it’ll either sink into texture or slide off entirely.
How to Fix It:
- Oily skin? Use a gel or water-based concealer. These formulas are lightweight and blend easily without settling into pores.
- Dry or mature skin? Opt for a hydrating cream or serum-based concealer. These contain emollients to prevent cracking and creasing over time.
- Combination or sensitive skin? Look for a balm or stick formula. These offer buildable coverage without the heaviness of traditional creams.
The Trap: “Full coverage” isn’t always the answer. If your concealer looks flawless at first but creases by noon, it’s either too heavy for your skin or not hydrating enough to stay in place.
3. Skipping Primer (Or Using the Wrong Kind)
The Mistake: Applying concealer directly to bare skin is like painting on unprimed drywall—it’ll crack under pressure. Without a base, concealer sinks into fine lines, clings to texture, and creases the second you blink.
How to Fix It:
- Use a primer designed for your skin type. Silicone-based primers smooth texture and create a barrier, while hydrating mists plump and prep dry skin.
- Apply a thin layer. A heavy hand with primer = more product to crease. Think “sheer,” not “opaque.”
- Let it set for 30 seconds. Primer needs time to bond with skin before concealer goes on. Skipping this step is like slapping makeup on damp skin—it won’t adhere.
The Bonus Fix: If you’re short on time, even a hydrating facial mist (with no alcohol) can help. Spritz, pat dry, and apply concealer—it’ll give you a slightly smoother canvas.
Bonus: Powdering Too Soon (The Silent Crease Trigger)
The Mistake: Setting powder immediately after concealer locks it into place—right in your creases. By the time you realize it, you’re stuck with a cakey, uneven finish.
How to Fix It:
- Wait 2–3 minutes. Let your concealer settle into skin before dusting with powder. This gives it time to meld naturally.
- Use a blurring powder. Translucent or finely milled powders (like loose setting sprays) diffuse light and soften creases without emphasizing them.
- Apply powder around creases, not on top. Brush powder in a circular motion outside the under-eye area to create a “halo” effect that optically softens the transition.
The Pro Hack: If you’re in a rush, use a lightweight setting spray instead of powder. It’ll hold your makeup without the texture.
How to Diagnose Your Mistake
Creasing isn’t one-size-fits-all. Ask yourself:
- Does it happen immediately? → Likely a formula or primer issue.
- Does it appear after a few hours? → Probably over-blending or powdering too soon.
- Does it only happen in certain areas? → Check your skin texture (e.g., dry patches vs. oily zones).
The Fix Depends on the Cause:
| Problem | Quick Fix | Long-Term Solution |
|---|---|---|
| Over-blending | Use a damp sponge or stippling brush | Relearn: tap, don’t swipe |
| Wrong formula | Switch to a skin-type match | Test formulas in small patches first |
| No primer | Apply a hydrating mist or primer | Never skip prep—it’s not optional |
| Powdered too soon | Wait 2–3 minutes before setting | Use a setting spray instead |
The Bottom Line
Creasing isn’t about “bad technique”—it’s about physics, prep, and product. The fix starts with identifying why it’s happening in your case. Over-blending? Swap your brush. Wrong formula? Match it to your skin. No primer? That’s the first step, not the last.
Your Action Plan:
- Check your skin type and switch formulas if needed.
- Always prime—even if it’s just a mist.
- Blend with a damp sponge or stippling brush—never a stiff brush.
- Wait before powdering—patience prevents creasing.
Do this, and your concealer will stay put—no creases, no touch-ups, just flawless coverage from morning to night.
How to Fix Creasing If You’ve Already Applied It
Concealer creasing isn’t a lost cause—it’s a fixable mess. If you’ve already applied concealer and the creases are staring back at you, don’t reach for more product (that just makes it worse). Instead, dampen a beauty sponge, dab a tiny bit of concealer over the creased area, and let it melt in without rubbing. The key here is damp, not wet—too much moisture turns concealer into a slippery disaster. A damp sponge mimics the skin’s natural hydration, helping the formula blend smoothly into the under-eye hollows without pressing it down.
Once it’s set, blur the edges with a translucent powder—not a cake compact, which can settle into creases like a bad foundation. Press a fluffy brush lightly over the area to diffuse the lines, then finish with a setting spray that contains blurring particles (think hydrating mists with fine, reflective ingredients). The spray doesn’t just set—it melts the edges of the concealer into the skin, so the creases disappear into the background.
For stubborn creases that refuse to play nice, start over with a thin layer of primer (a silicone-based one works best). Let it dry completely, then reapply concealer lightly—this time, use a damp sponge again to avoid pressing. Set with powder and spray, and you’ll have a flawless finish without the creasing. Pro tip: Never touch up with fingers—your skin’s natural oils turn concealer into a sticky mess that creases faster.
Why This Works (And What to Avoid)
The damp sponge trick isn’t just a hack—it’s physics. Dry application presses concealer into the crevices of your under-eyes, where it has nowhere to go but down. A damp sponge, however, mimics the skin’s surface tension, letting the product melt into the texture without settling into the valleys. Powder and spray seal the deal by locking the formula in place without adding weight or texture.
What to avoid:
- Rubbing (it pushes concealer deeper into creases).
- Cake powder (it settles and highlights creases).
- Finger touching up (oils make creasing worse).
- Over-applying (more product = more creasing).
Emergency Fix Recap
- Damp sponge + tiny dab of concealer (don’t rub).
- Translucent powder (not cake) to blur edges.
- Setting spray with blurring particles to melt the lines.
- For stubborn creases: Primer → light reapplication → set again.
This isn’t a band-aid—it’s a reset. Follow these steps, and your concealer will stay put until your next skincare routine. No expensive tools, no guesswork, just a science-backed fix for a common makeup fail.
Frequently Asked Questions
 Photo by Axel Ruffini on Unsplash
Why does my concealer crease after a few hours?
Concealer creasing after a few hours isn’t a failure of the product—it’s physics. The issue comes down to three core factors: your skin’s texture, the formula’s weight, and how much pressure you’re applying. If your under-eyes have fine lines or pores, creasing is inevitable with a heavy, matte formula unless you melt it into the skin with a damp sponge instead of pressing it down. The fix starts with prep: hydrate with a serum or essence, then use a pat-and-blend technique with a damp beauty sponge to lock the formula in place. Skip the heavy hand, and the creases won’t have anywhere to go.
Can I use a brush instead of a sponge to prevent creasing?
A brush can work—but only if you’re using the right technique and the right formula. Dry brushes (like fluffy blending brushes) push concealer into creases, while wet brushes (like those used for cream formulas) can work if you’re gentle. The problem? Most people press too hard, which is exactly what causes creasing. Instead, dab the brush into the concealer, tap off excess, then pat (don’t stroke) the formula onto skin. For best results, pair it with a lightweight, water-based concealer—these formulas blend more easily without settling into texture. If you’re using a matte stick, a brush won’t save you; switch to a cream or stick with a damp sponge.
What’s the best concealer formula for creasing-prone skin?
There’s no single “best” formula—only the right one for your skin’s texture and your application method. Here’s how to pick:
- Oily/combination skin? Go for a gel or water-based formula—these melt into skin without settling. Brands often label these as “lightweight” or “dewy.”
- Dry/mature skin? A hydrating cream concealer (look for glycerin or hyaluronic acid) blends more smoothly and lasts longer.
- Sensitive/redness-prone? Avoid heavy, matte formulas—opt for tinted moisturizers or serum concealers with anti-inflammatory ingredients like niacinamide.
The key isn’t the formula itself—it’s how you apply it. A heavy matte stick will crease on any skin if you pat it on dry. Dampen your sponge, press lightly, and let the formula sink in. That’s the real fix.
How do I fix creasing without making my makeup look cakey?
The cakey-crease trade-off happens when you overcompensate—adding more product to cover creases just makes them worse. Instead, try this:
- Dampen a beauty sponge (not soaking wet) and press it over the creased area to lift and redistribute the existing concealer.
- Dot a tiny bit of fresh concealer (no more than a grain of rice) over the crease, then press the sponge on top to blend.
- Set with a fine mist of hydrating setting spray—this locks the formula in place without adding bulk.
If the crease is stubborn, skip the concealer entirely and use a color-correcting primer (peach for dark circles, green for redness) under a lightweight foundation. The primer fills texture without settling, and the foundation blends over it smoothly.
Does setting spray help with creasing?
Setting spray can help—but only if you’re using the right kind and applying it correctly. Avoid alcohol-heavy sprays—they dry out skin and make creasing worse by pulling the formula down into lines. Instead, look for:
- Hydrating sprays (with glycerin or aloe) to lock concealer in place without cracking it.
- Fine-mist formulas—a heavy mist is less likely to disturb already-blended concealer.
Pro tip: Wait 30 seconds after applying concealer before spraying. This gives the formula time to sink in, so the spray doesn’t push it into creases. For extra insurance, press a damp sponge over the area first to melt the concealer into skin before setting.
Key takeaway: Creasing isn’t about the product—it’s about how you prep, apply, and set. The damp sponge technique is your secret weapon, but the real fix starts with understanding your skin’s texture and choosing a formula that moves with it, not against it.
Your Crease-Free Concealer Routine (Step-by-Step)
Forget the guesswork—this is the exact process that keeps concealer flat all day, no matter your skin type. The secret isn’t in the product; it’s in the physics: hydration first, pressure second, and setting as the final lock. Here’s how to do it right, every time.
1. Prep Like You’re Priming for War
Skip the dry-sponge slap. Your skin needs a hydrating barrier—even if you’re oily. Use a blurring primer (a fine mist works in a pinch) to smooth texture and create a sticky base. Why? Dry skin = crease magnet. Pro move: Pat the primer in with your fingers—it spreads evenly and won’t drag product.
2. Apply with the ‘Damp Sponge Hack’
Dampen your sponge (or stippling brush) with water or hydrating toner, then press the concealer into skin in a triangle motion (start at the inner corner, drag outward). Never rub—that’s how you push product into creases. Let the formula sink for 20 seconds before blending. (Yes, waiting is part of the trick.)
3. Set with Powder—But Not Cake
After 2–3 minutes, dust (don’t press) with a blurring powder—not a compact. The goal is to melt the concealer into skin, not cake it. Think “sheer veil,” not “heavy foundation.” Pro tip: If your skin is dry, skip powder entirely and go straight to spray.
4. Lock It Down for 12+ Hours
Finish with a setting spray that contains blurring particles (like dimethicone or silica). This isn’t just to “set”—it’s to re-hydrate the skin and dissolve any micro-creases that might form later. For long wear: Reapply tiny dots (not full coverage) over creased areas and set again. The key? Less product, more strategic placement.
Why This Works:
- Hydration first prevents the “dry patch” that creases form on.
- Pressure control (pressing, not rubbing) keeps product where it belongs.
- Layering in order (primer → concealer → powder → spray) builds a seamless base.
Your Next Move: Start with the damp sponge method—it’s the one trick that fixes 80% of creasing instantly. And if you’ve already messed up? See How to Fix Creasing If You’ve Already Applied It for the emergency fix. No redo needed.
Keep reading
Keep exploring the topic with these related guides: