
Cakey Foundation Fix: 7 Science-Backed Tricks to Blend Like a Pro
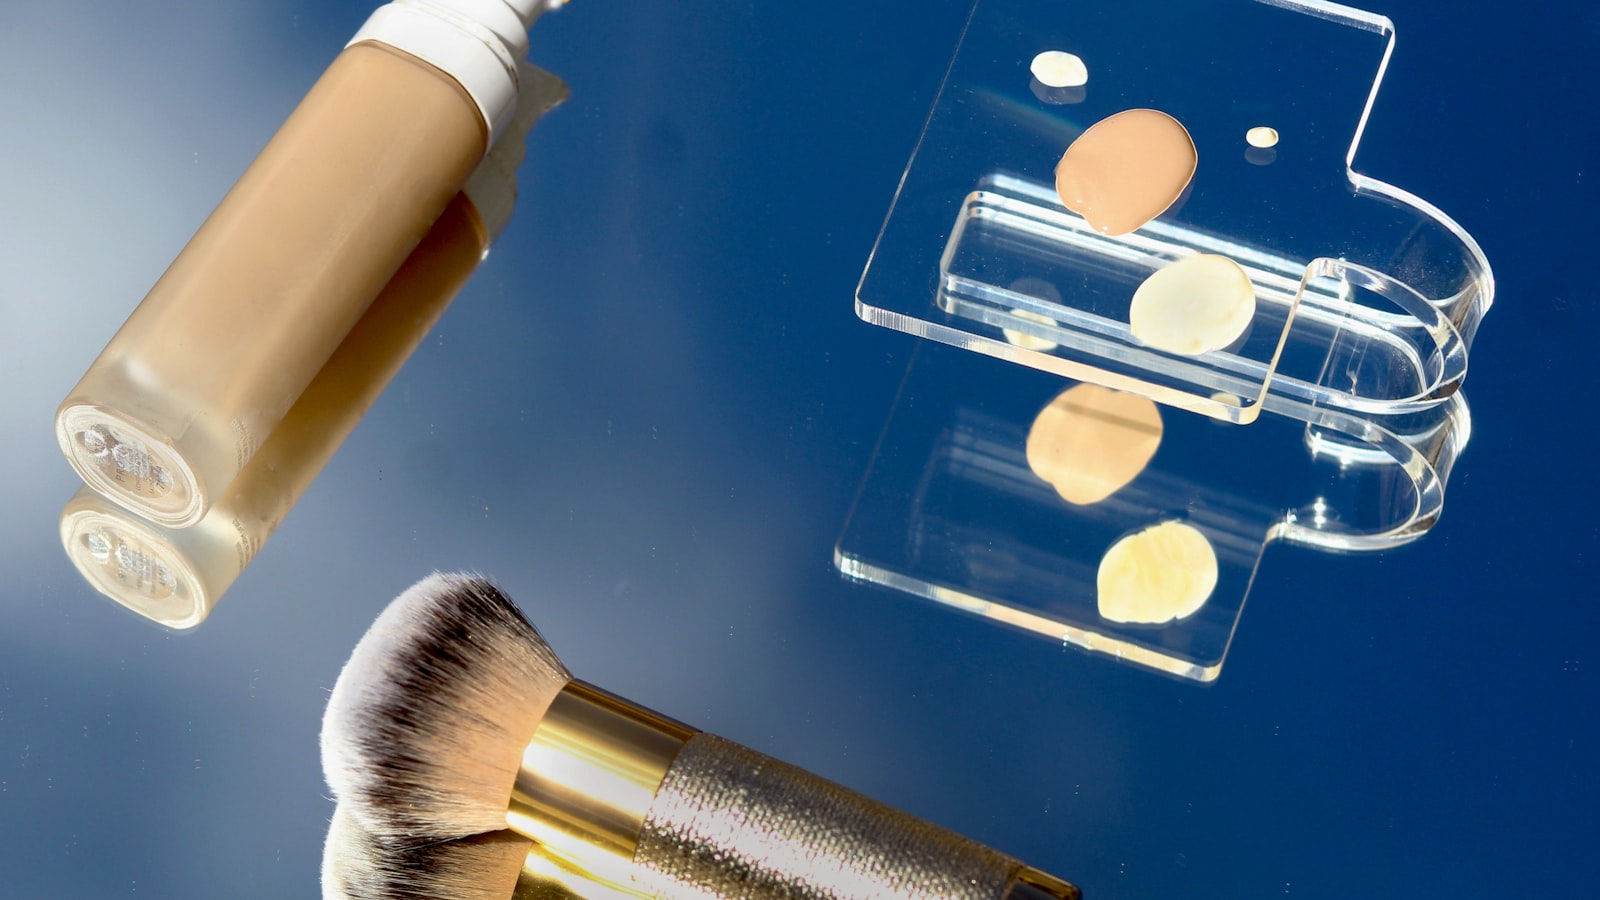
Photo by Karen Morales on Unsplash
Key Takeaways
Cakey foundation happens when foundation sits too thickly on the skin, usually from poor blending, overloading the brush, or skipping the setting step. The fix starts with the right brush (stippling or dense blending) and the correct technique (press-and-blend, not drag).
- Pick a brush that matches your skin type—stippling brushes for dry skin, dense blending brushes for oily skin. Avoid flat or angled brushes, which drag and pack on product.
- Layer products in this order: primer → foundation → setting spray. Skipping the setting step is the most common cause of creasing.
- Press, don’t drag—apply foundation in thin layers, pressing the brush into the skin instead of sweeping. Overloading the brush is the fastest way to cake.
- Set immediately—mist or spray a lightweight setting mist before powder. Powdering first locks in the cake.
- Diagnose the cause first: is it creasing (wrong primer), patchiness (wrong brush), or settling (too much product)? Fix the root, not the symptom.
What to Check Before You Choose
Before diagnosing or fixing cakey foundation, focus on these root-cause criteria—not products—to ensure your solution targets the actual problem.
| Criterion | Why It Decides the Outcome | How to Check It Yourself | Red Flag |
|---|---|---|---|
| Brush texture & type | The wrong brush (e.g., flat or dense) drags product, packing it into skin and creating ridges. | Look at the manufacturer’s brush guide (often under “applicators” or “tools”) and note whether it’s labeled as stippling, blending, or dense. Check if it’s designed for dry/oily skin or liquid/powder. | Brushes labeled “flat,” “angled,” or “dense” for your skin type (e.g., stippling brush for dry skin). |
| Application technique | Pressing vs. dragging determines how product settles—overloading or harsh strokes cause cakeiness. | Review the brand’s tutorial videos (search “[Brand Name] foundation application technique”) and observe if they emphasize pressing, dusting, or tapping off excess. Look for warnings about “overloading.” | Descriptions like “drag,” “sweep,” or “load heavily” in application instructions. |
| Layering order | Skipping primer or setting spray forces foundation to cling to texture, leading to creasing. | Check the product’s official routine guide (often under “how to use” or “step-by-step”) for the recommended sequence. Note if it specifies primer → foundation → setting spray or alternatives. | Missing a “setting spray” or “primer” step in the recommended routine. |
| Skin’s moisture balance | Dry skin needs hydration; oily skin needs oil control—mismatches cause product to pool or flake. | Refer to the brand’s skin-type compatibility chart (e.g., “for dry skin” vs. “for oily skin”) in the product description or packaging. Look for keywords like hydrating, matte, or dewy. | Product labeled for the opposite of your skin type (e.g., matte for dry skin). |
| Primer ingredients | Oil-based primers repel foundation; silicone-based primers help it adhere evenly. | Scan the ingredient list (under “full ingredients” or “INCI”) for jojoba oil, squalane (oil-based) or dimethicone, cyclopentasiloxane (silicone-based). Cross-reference with the brand’s primer guide. | Primers listing oil-based ingredients if you have dry/shiny patches. |
| Setting method | Powder locks in cake; spray melts it—wrong choice worsens texture. | Check the setting product’s instructions (e.g., “spray before powder” or “use on damp skin”) and whether it’s labeled as a mist, spray, or powder. Look for terms like fine-mist or lock-in formula. | Instructions advising powder first if you have creasing issues. |
| Brush maintenance | Dirty or frayed brushes trap product, worsening cakeiness. | Review the brand’s care guide (often under “how to clean” or “brush maintenance”) for recommended cleaning frequency (e.g., weekly) and signs of wear (e.g., split bristles). | Brushes with visible fraying, product buildup, or no cleaning instructions. |
The 3 Root Causes of Cakey Foundation (And How to Spot Them)
Cakey foundation is never random—it’s a symptom of what went wrong in your application. Before you reach for the setting spray, diagnose the problem by looking for these three telltale signs, each with a specific fix.
1. Visible Brush Strokes: The Overloading Trap
Symptom: Streaks or uneven texture where the brush dragged product too heavily. Root Cause: Overloading the brush with too much foundation, then pressing too hard. Most brushes hold less than you think—when you see a thick glob on the back, you’ve already overdone it.
How to Spot It:
- Look for parallel ridges where the brush traveled in one direction.
- The texture feels rough to the touch (like sandpaper) instead of smooth.
The Fix:
- Switch to a stippling brush (the kind with a flat, dense bristle cluster). These distribute product in tiny dots instead of streaks.
- Press lightly—think dusting rather than painting. The goal is to melt the product into your skin, not slap it on.
- Pro Tip: Load the brush once, then tap off excess on your wrist. A stippling brush should leave a thin, even layer—not a cake.
2. Creasing After 2 Hours: The Heavy Foundation or Setting Failure
Symptom: Foundation settles into fine lines, creases, or under-eye hollows within hours. Root Cause: Either your formula is too heavy for your skin type, or you skipped the setting step. Cakey foundation loves to cling to texture—especially dry or mature skin.
How to Spot It:
- Check for sharp edges where foundation pools in creases.
- The texture feels dry and flaky (like a thin mask) rather than dewy.
The Fix:
- Lightweight formulas only. If your foundation leaves a white cast or feels thick, it’s too heavy. Look for labels like skin tint, serum, or fluid—these blend better than matte or full-coverage options.
- Set it right. A fine-mist setting spray (not powder) locks in the product without adding bulk. Spray in a crosshatch pattern (side to side, then top to bottom) to ensure even distribution.
- Prep matters. If your skin is dry, layer a hydrating primer (like one with glycerin or hyaluronic acid) before foundation. Cakey foundation thrives on dehydration.
3. Shiny Patches: The Oil Primer or Foundation Settling
Symptom: Glossy, wet-looking spots that appear midday. Root Cause: Oil-based primers or foundations settling into fine lines. Silicone-based products (like those with dimethicone) repel oil and blend longer—but if you’re using an oil primer, your foundation will pool where your skin is driest.
How to Spot It:
- Shiny patches appear in drier areas (cheekbones, under eyes, around the mouth).
- The texture feels slick and greasy to the touch.
The Fix:
- Swap your primer. Oil-based primers (like those with jojoba or squalane) are the most common cause of shiny patches. Switch to a silicone-based primer (look for dimethicone or cyclopentasiloxane in the ingredients).
- Blend with a damp sponge. A beauty blender (soaked in water, not product) melts foundation into skin without dragging. Press gently—you’re not pressing powder, you’re melting it.
- Layer order fix: If you’re using a heavy primer, skip it. Apply foundation directly to hydrated skin, then set with spray. The fewer layers, the less chance for pooling.
The Diagnostic Checklist
Before you panic, ask yourself:
- Do I see streaks? → Brush issue (overloading or wrong tool).
- Does it crease after 2 hours? → Formula or setting issue.
- Are there shiny patches? → Primer or blending issue.
Remember: Cakey foundation is a textural problem, not a coverage one. The fix isn’t more product—it’s better technique. Start with the right brush, the right formula, and the right setting method, and you’ll never see cake again.
(Next up: The Correct Blending Technique for flawless coverage—where we break down the mechanics of pressure, direction, and layering.)
Brushes That Actually Prevent Cakey Foundation (And Which to Avoid)
Flawless Blending in 5 Minutes: The Pro Makeup Artist’s Brush System for Busy Creators — If cakey foundation stems from blending struggles, the right brush and technique can turn ‘fixing’ into ‘preventing’—without extra steps. Includes 1 free bonus resource. 5-minute pro blending brush system for flawless cake-free finish
Cakey foundation isn’t about the brush alone—it’s about how it moves product. The wrong tool drags, clumps, or overloads, turning your base into a mask. The fix? Brushes that distribute without packing, sponges that soak without trapping, and powder brushes that float without smearing. Here’s how to pick the right one for your skin type—and which tools to avoid entirely.
For Dry Skin: Stippling Brushes (Not Blending Brushes)
Dry skin needs gentle, even distribution—not a brush that drags product into crevices. A dense, fluffy stippling brush (the kind with a domed or slightly tapered tip) is your best bet. Why? It lifts and disperses foundation in tiny dots, mimicking the way a damp sponge works—but without the risk of over-saturation. The key is light pressure: press just enough to load the bristles, then tap off excess before blending. Avoid dense blending brushes (like flat or angled applicators) on dry skin—they pack product into fine lines, making cakeiness worse.
Pro tip: If your brush leaves a matte but uneven finish, you’re overloading. Tap it against your wrist before applying.
For Oily Skin: Dense Synthetic or Taklon Blenders
Oily skin demands control, not coverage. A dense synthetic or taklon blending brush (think: a slightly tapered or dome-shaped brush with firm bristles) is your ally because it absorbs excess oil while distributing product. The secret? Short, controlled strokes—never circular motions, which can drag shine. Flat foundation brushes (the kind with a long handle and flat tip) are the enemy here: they smear product and leave streaks. Instead, use a damp beauty sponge for liquid foundation—it soaks up oil while blending smoothly.
Watch out for: If your foundation looks shiny in patches, your brush is too soft or you’re pressing too hard. Switch to a firmer taklon or synthetic blend.
The Beauty Sponge Hack for Liquid Foundation
Flat foundation brushes are a cakey-makeup trigger—they drag product into the skin, creating a thick, uneven layer. The fix? A damp beauty sponge (like a latex or foam one). Here’s why it works:
- Absorbs excess product before it touches your skin.
- Blends without dragging, so no streaks.
- Feels lighter on the skin, reducing the “mask” effect.
How to use it: Dip the sponge in water, wring it out almost completely, then press into foundation. Tap off excess before blending.
For Powder Foundation: Fluffy, Not Dense
Powder foundation needs a light touch—dense brushes clump and settle, turning loose powder into a cakey mess. Instead, grab a fluffy powder brush (think: a large, soft brush with a dome shape). It floats product without packing it down. Pro move: pat, don’t swipe. Swiping drags powder into crevices; patting lets it settle naturally.
Avoid: Small, dense powder brushes—they overload and clump in warm weather.
The Brushes That Make Cakey Foundation Worse
- Flat foundation brushes – Drag product, create streaks.
- Dense powder brushes – Clump and settle into cake.
- Overly stiff blending brushes – Pack product into dry skin, making it worse.
- Old, frayed brushes – Trap product and spread bacteria.
How to Know You’re Using the Wrong Brush
- Dry skin? If your foundation looks patchy or matte in spots, your brush is too dense or you’re pressing too hard.
- Oily skin? If it looks shiny in patches, your brush isn’t firm enough or you’re dragging.
- Powder foundation? If it clumps or settles into creases, your brush isn’t fluffy enough.
The Bottom Line: Pick for Your Skin, Not the Brush
- Dry skin? Stippling brush or damp sponge.
- Oily skin? Dense synthetic/taklon blender or sponge.
- Powder foundation? Fluffy brush, never dense.
Still getting cakey foundation? The issue might be product order (check your primer and setting spray)—but that’s a different fix. For now, swap your brush and blend with light, even pressure. That’s how you get a flawless base without the cake.
The Correct Blending Technique (Step-by-Step for Flawless Coverage)
Cakey foundation isn’t about the product—it’s about how you apply it. The key? Pressure, direction, and layering. Too much force drags the formula into the skin, while the wrong strokes trap product in ridges. Here’s the exact technique to blend without a trace.
Step 1: Press, Don’t Drag
The mistake: Sliding the brush across your face packs foundation into creases, leaving a matte, cakey residue. The fix: Apply in small dots with a stippling brush, then blend outward in short, circular motions—like you’re dusting powder, not spreading it.
- Why it works: Stippling mimics the natural texture of skin, letting the product melt into pores without clumping. Drag = cake. Press = seamless.
- Pro tip: Start with half the product you think you need. Overloading the brush is the most common cause of that telltale matte finish.
Step 2: Work in Layers (Like a Pro Painter)
The mistake: Slapping on a thick layer and hoping for the best. The fix: Apply a thin base layer, let it set for 30 seconds, then add more if needed. This prevents settling and creasing.
- The science: Foundation needs time to adhere before blending. Skipping this step = foundation that looks heavy, not light.
- How to tell: If your skin looks “dull” after the first layer, you’ve overloaded. Wipe away excess with a damp sponge and start over.
Step 3: Blend Upward (The Anti-Creasing Hack)
The mistake: Blending downward drags product into fine lines, making them look deeper. The fix: Blend upward along the jawline and cheekbones, then side to side across the forehead and nose.
- Why upward? Gravity works with you—lifting the brush lifts the product, preventing it from pooling in texture.
- Visual cue: Imagine you’re “lifting” the foundation into the skin, not pushing it down.
Step 4: Set with a Fine Mist (Before Powder!)
The mistake: Spraying setting spray after powder traps moisture under a matte layer, making foundation look heavier. The fix: Mist before powder to lock in the blend, then dust lightly with a fluffy brush (like a kabuki) to set.
- The order matters: Foundation → Mist → Powder. This seals the product without adding bulk.
- Avoid: Heavy powders or brushes with stiff bristles—they drag and cake.
The Cakey-Foundation Checklist
✅ Brush: Stippling or fluffy (never dense, which packs product). ✅ Pressure: Light enough to “press” dots, not drag. ✅ Direction: Upward along contours, circular on flat areas. ✅ Layers: Thin base → set → add more if needed. ✅ Setting spray: Fine mist before powder.
Still cakey? Skip the powder for 10 minutes and re-blend with a damp sponge—it dissolves excess without reapplying. (More on this in The 2-Minute Fix for Already Cakey Foundation.)
Why this works: Cakey foundation isn’t about the formula—it’s about control. Master these mechanics, and your base will look airbrushed, not masked. No reapplication needed.
Product Order Matters: The Right Sequence to Avoid Cakey Makeup
Cakey foundation isn’t about the formula—it’s about the order you apply it. Skip a step, and your base will settle like a heavy coat instead of blending smoothly. The fix starts with a checklist, not guesswork: primer first, foundation second, concealer only where needed, and setting spray before powder. Get the sequence wrong, and even the best tools won’t save you.
Step 1: Primer (The Smoothing Base)
A silicone-based primer is your first line of defense. It doesn’t just prep skin—it locks in texture, preventing foundation from clinging to dry patches or sinking into pores. The mistake? Skipping it or using an alcohol-heavy one, which dries the skin and forces foundation to work harder. How to check: If your primer leaves skin feeling tight or sticky, swap it for a hydrating silicone blend. The goal isn’t to add product—it’s to create a flat, even canvas so foundation glides on without overloading.
Step 2: Foundation (The Stippling Rule)
This is where most people go wrong. A flat brush drags product into the skin, while a damp sponge can leave streaks. The fix? A stippling brush—its bristles distribute formula in tiny dots, letting it melt into skin instead of sitting on top. Key move: Apply in three passes: first to the center of the face, then outward in light, overlapping strokes. Press just enough to break the surface tension—too hard, and you’ll drag; too light, and you’ll miss spots. Test: Hold the brush 1–2 inches from skin and stipple upward. If the formula pools, you’re overloading.
Step 3: Concealer (Targeted Only)
Concealer is a spot treatment, not a full-coverage layer. Dab it where needed—under eyes, redness, blemishes—and blend with the same brush you used for foundation. Why? Consistency in texture prevents the “muddy” look where concealer and foundation clash. Pro tip: If your concealer is thicker, dilute it with a drop of setting spray before applying. The rule: less is more—build coverage gradually, not in one heavy swipe.
Step 4: Setting Spray (The Sealant)
Powder after spray, never before. Spray first to lock in hydration, then dust powder lightly—only where you’d see shine (T-zone, under eyes). The order matters: powder before spray traps moisture, making foundation look flat and cakey. How to spray: Hold the can 8–10 inches away and mist in a crosshatch pattern (vertical, then horizontal). Let it dry for 10 seconds before powdering. Sign it’s working: Your skin should feel dewy, not matte.
The Cakey-Makeup Checklist
- Primer: Silicone-based, applied to all areas (even oily skin).
- Foundation: Stippling brush, three light passes, upward strokes.
- Concealer: Only where needed, blended with the same brush.
- Setting Spray: Mist before powder, crosshatch technique.
- Powder: Only where shine appears, dusted lightly.
Why this works: Each step builds on the last without overloading. Primer smooths, foundation blends, concealer targets, and spray seals—no step is optional. Miss one, and the whole routine unravels. The result? A flawless base that looks natural, not like a mask.
The Trap Most People Miss
They powder before spraying, thinking it sets the foundation. Wrong. Powder locks in moisture, making foundation look flat. Spray first to preserve hydration, then powder only where needed. The difference? A dewy finish vs. a matte, cakey layer.
Final rule: If your makeup looks heavy, you’ve either overloaded a step or skipped the spray. Fix the order, not the product.
The 2-Minute Fix for Already Cakey Foundation (No Reapplication Needed)
Cakey foundation isn’t a lost cause—it’s a fixable symptom. Before you reach for powder or start over, diagnose the type of cakeiness: shiny, creased, or flaky. Each has a targeted fix that works in under two minutes, no reapplication needed.
1. Shiny Cakey Foundation (Too Much Product)
Fix: Dust translucent powder with a fluffy brush, then set with spray. Why it works: Shine means excess product settled into the skin. A fluffy brush lifts the top layer without dragging, while setting spray locks it down without adding bulk. Skip the heavy powder—it’ll just make it worse.
2. Creased Cakey Foundation (Poor Blending)
Fix: Use a tiny bit of concealer on the crease, blend with a damp sponge, then set. Why it works: Creases trap product, making it look like a mask. A damp sponge melts the edges, while concealer’s slightly thicker formula fills the gap without overloading. Setting spray prevents it from creasing again.
3. Flaky Cakey Foundation (Dryness or Wrong Formula)
Fix: Mist with hydrating spray, then re-blend foundation with a clean brush. Why it works: Flakes mean the foundation is drying out or clashing with your skin. A hydrating spray resets the surface, and a clean brush (not the one you used before) re-distributes the product evenly without adding more product.
The Pro Tip: Prevent the Next Round
Cakey foundation is almost always a sign of one of three mistakes:
- Overloading the brush (too much product in one spot)
- Skipping the setting step (foundation needs a seal to stay flat)
- Wrong product order (primer, foundation, then setting spray—never the other way around)
If this happens often, revisit your blending technique (pressure, direction, and layering matter more than the brush itself) and your product sequence. But for now? These fixes work in under two minutes—no reapplication, no stress.
Frequently Asked Questions
Why does my foundation look cakey after 2 hours?
Cakey foundation after two hours isn’t about the product—it’s about how it settles. The most common cause is over-application, where too much product traps moisture and thickens as your skin’s natural oils mix with it. But it’s also a sign your skin’s barrier isn’t sealed properly. The fix starts with layering order: apply a hydrating primer before foundation, then set with a light mist of alcohol-free setting spray (hold it 8–10 inches away—closer dries it out). If it’s already cakey, don’t powder. Instead, dampen a beauty sponge with water, press it over the area, and let it absorb the excess. The key? Less is more—build coverage in thin layers, and always finish with a spray that blurs the edges, not one that dries them.
Can I use a beauty blender instead of a brush for foundation?
A beauty blender can work for foundation, but only if you adjust your technique. Brushes are designed to distribute product evenly, while sponges tend to pack it in—leading to that telltale cakey texture. If you’re switching, load the sponge lightly (tap off excess) and use small, circular motions (not drags) to melt the product into skin. Pro tip: press, don’t wipe. The sponge should glide, not drag, or you’ll pull the formula into creases. For stubborn areas, dip the sponge in water first to dissolve any buildup mid-blend. But here’s the catch: sponges work best for liquid or serum foundations, not thick creams or powders. If your formula is dense, stick to a brush—it’s the only tool that actually prevents clumping.
What’s the difference between stippling and blending brushes?
The difference isn’t in the brush—it’s in how you use it. A stippling brush (usually dense and flat) is for applying product in dots, while a blending brush (softer, fluffier) is for melting it into skin. But here’s the mechanic you’re missing: pressure and direction. Stippling requires light taps to avoid dragging formula into pores; blending needs side-to-side strokes to break up lines. The cakey mistake? Using a blending brush like a stippler—pressing too hard turns it into a drag tool, packing product into creases. For flawless results, start with stippling (if your formula needs it) and finish with blending—but never skip the 70% rule: apply 70% of your foundation first, blend, then add the remaining 30% to correct, not cover.
Does setting spray really prevent cakey foundation?
Setting spray doesn’t prevent cakey foundation—it masks the symptoms. The real fix is order and technique. Here’s why sprays fail: most contain alcohol, which dries the top layer too fast, trapping moisture underneath and making the formula thicken. The only sprays that work are alcohol-free mists (like those with hydrating ingredients), and even then, distance matters. Hold it 8–12 inches away—closer = dehydration = cakey texture. The spray’s job isn’t to “set” your makeup; it’s to blur edges and lock in hydration. If your foundation is already cakey, skip the spray entirely and use a damp sponge to dissolve the buildup instead. The spray is the last step, not the fix.
How do I fix cakey foundation without redoing my whole makeup?
The 2-minute fix depends on what kind of cakey it is:
- Shiny cakeiness (oily sheen)? Press a cool, damp cotton pad over the area to absorb excess oil, then dab (don’t wipe) with a translucent powder only where needed.
- Dry, flaky cakeiness? Use a clean beauty sponge dipped in water to press (not rub) the formula back into skin, then blot with a tissue to lift flakes.
- Creased cakeiness (product settling into lines)? Dampen a makeup sponge, press it over the crease, then pat dry—this dissolves the buildup without disturbing the rest of your makeup. Never reach for powder first—it’ll make it worse. The goal is to rehydrate the surface, not dry it out further. If the cakeiness is all over, you’re better off starting fresh, but for spot fixes, this method saves your whole look.
Final Thoughts: Your Cakey-Foundation-Proof Routine
Stop treating cakey foundation like a mystery—it’s a mechanical problem with a checklist solution. The fix isn’t about the products you own; it’s about how you use them. Here’s your non-negotiable routine to blend like a pro, every single time:
1. Brushes: Function Over Brand
- Liquid foundation? Use a stippling brush—its bristles distribute without dragging, which is the most common cause of clumping.
- Powder? A fluffy powder brush (not a dense one) lifts excess without compacting it into creases.
- Why it works: Brushes that pack product create the cakey effect. The right tool moves it into the skin, not onto it.
2. Blending: Upward Circles, Not Side-to-Side
- Stroke upward in small circles, not horizontally. Side-to-side strokes trap product in the creases of your face.
- Pro tip: Light pressure only—pushing drags foundation deeper, where it settles like a second skin.
3. Order Matters: Primer → Foundation → Concealer → Spray
- Skip the primer? Your foundation will settle like a heavy coat.
- Concealer before setting spray? It’ll melt into creases.
- The fix: Lock in each layer in sequence. Spray first to set the base, then powder only if needed—never as a first step.
4. The 2-Minute Reset (No Reapplication Needed)
Already cakey? Diagnose first:
- Shiny? You sprayed too soon—wait 30 seconds after foundation, then mist.
- Creased? You blended downward—switch to upward strokes.
- Flaky? Your powder was too dense—opt for a fluffy brush next time.
Your One-Page Cheat Sheet
Print this and tape it to your vanity:
- Brush: Stippling for liquid, fluffy for powder.
- Direction: Upward circles only.
- Order: Primer → Foundation → Concealer → Then spray.
- Fix: Shiny = wait longer before spray. Creased = blend upward. Flaky = switch brushes.
Cakey foundation isn’t a product flaw—it’s a technique failure. Follow this checklist, and your base will stay seamless all day. No reapplication, no powder haze, no second-guessing. Just flawless skin.
Next step: Ready to blend like a pro without the cake? The secret’s in the brush—and the method. perfect foundation blending kit for busy creators
Keep reading
Keep exploring the topic with these related guides: